The DIY Cooling Mods on my Personal C5 Corvette Track Car
This is just the start of the article where I'll be documenting all of the DIY cooling modifications I'm doing to the C5 Corvette. There's a lot of little details that all come together as part of the larger picture that is maximizing the cooling potential of the C5 Corvette.
Sections:
- Oil Cooler
- Radiator Fan Shroud Modifications
- Bumper / Radiator Duct Inlet Opening
- Hood Vents
- CAI Airflow
- Radiator Ducting Gap Filling
- 160 Degree Thermostat
- Fan Tuning
Oil Cooler
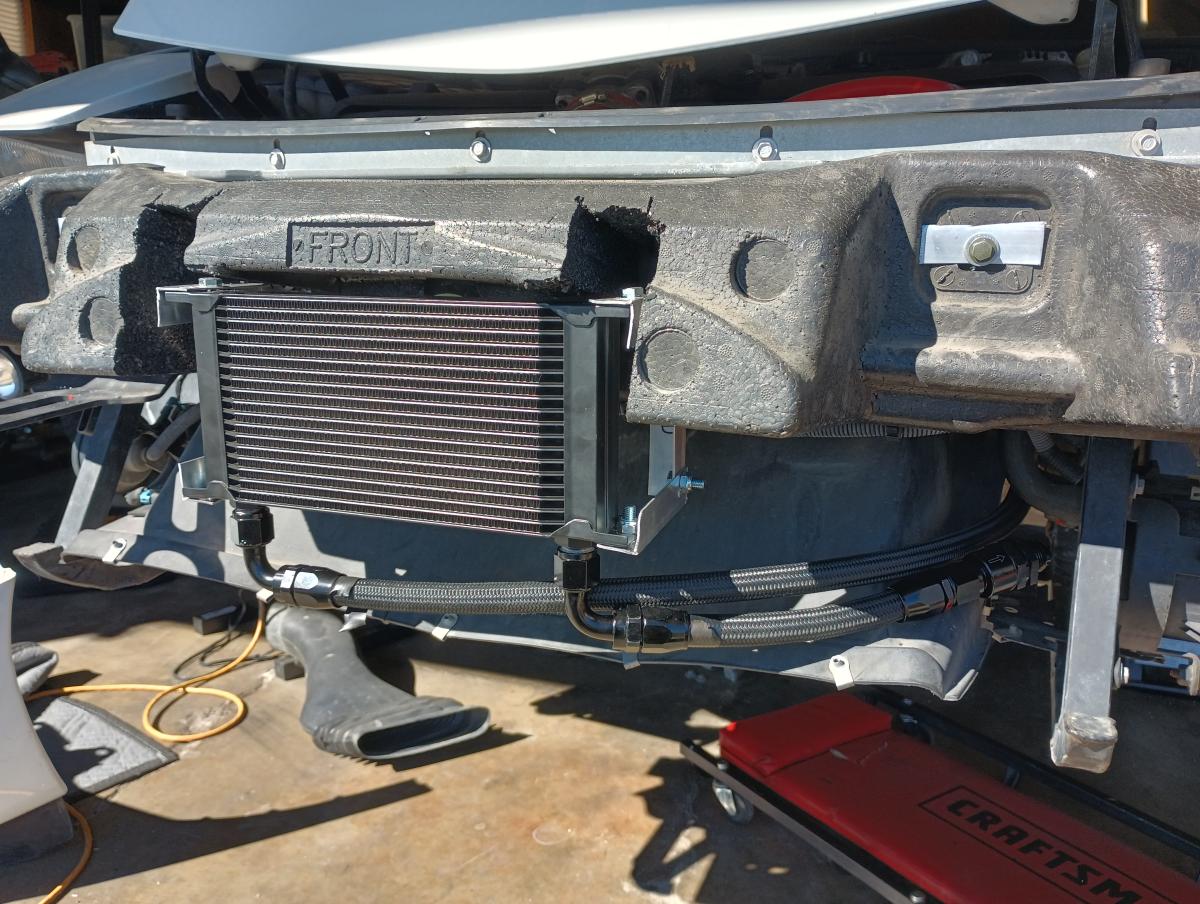
I wrote all about the oil cooler I installed at great length in this article here. I can undoubtedly say this was one of the most effective cooling modifications i've ever done and highly recommend it!
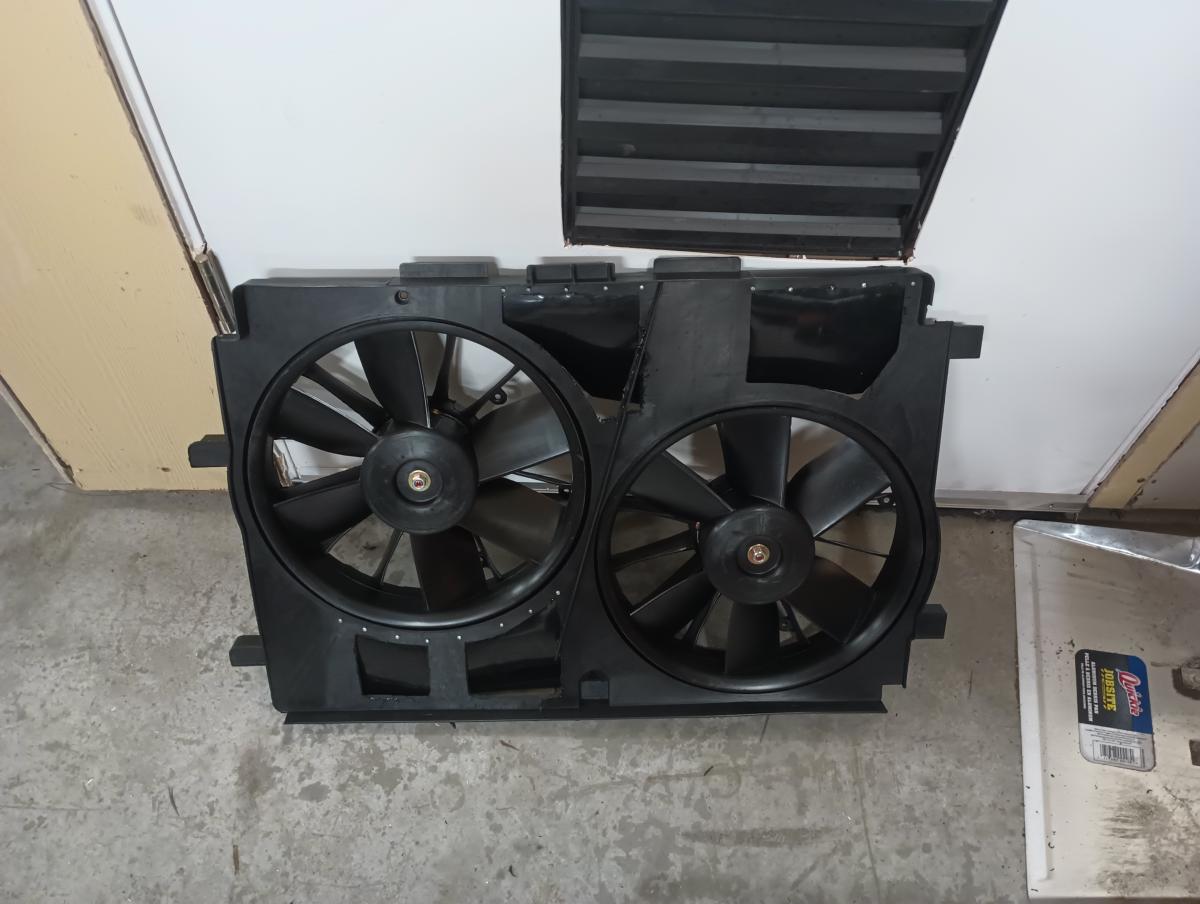
Radiator Fan Shroud Modifications
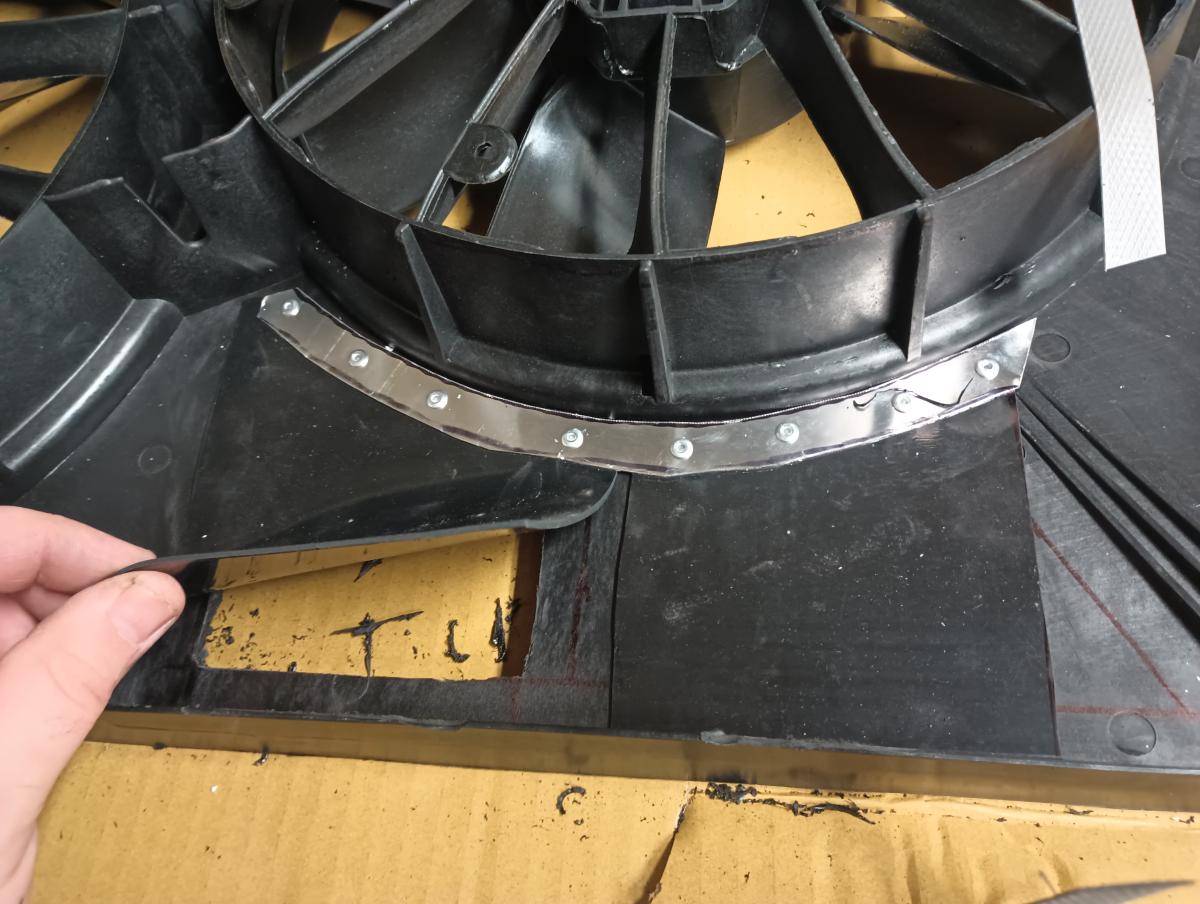
Radiator fan shroud flaps are not exactly a novel concept. DeWitts has them on their C5 radiator fan shroud, as does Gspeed on their fan shroud. Given that the two biggest players in the C5 cooling game use flaps, I decided to try my hand at making some myself. The jist is that air flowing through the radiator will push the flaps open and exit that way when the air speed excesds that of the pull of the fan. However, when air speeds are reduced and the fans are able to pull more air through the radiator the flaps will be pulled close, ensuring the only air the fan is pulling is coming through the radiator.
The DIY process is pretty simple. Cut out the plastic in the 4 areas pictured. I used a 3/4" piece of wood to mark the perimetter around the edge of the 4 spaces I felt I could add flaps. I then cut a piece of rubber (amazon link) to size to cover the section, overlapping the 3/4" perimetter. Next up, I cut a 3/4" tall piece of aluminum to cover the rubber flap and the upper section of the flap and pop riveted the aluminum over the flap and onto the OEM shroud. A very simple and cheap modification that in theory should work. More and smaller flaps would quite possibly work better as it will be less weight for the fan to pull closed, but I'll let you determine what DIY approach works best for you!
Long term my plan is to test how the car does temperature wise at the track with an OEM shroud, a DIY flap shroud, a skeletonized fan shroud, and no shroud at all. For now though, I'll just toss this on and assume it's the best.
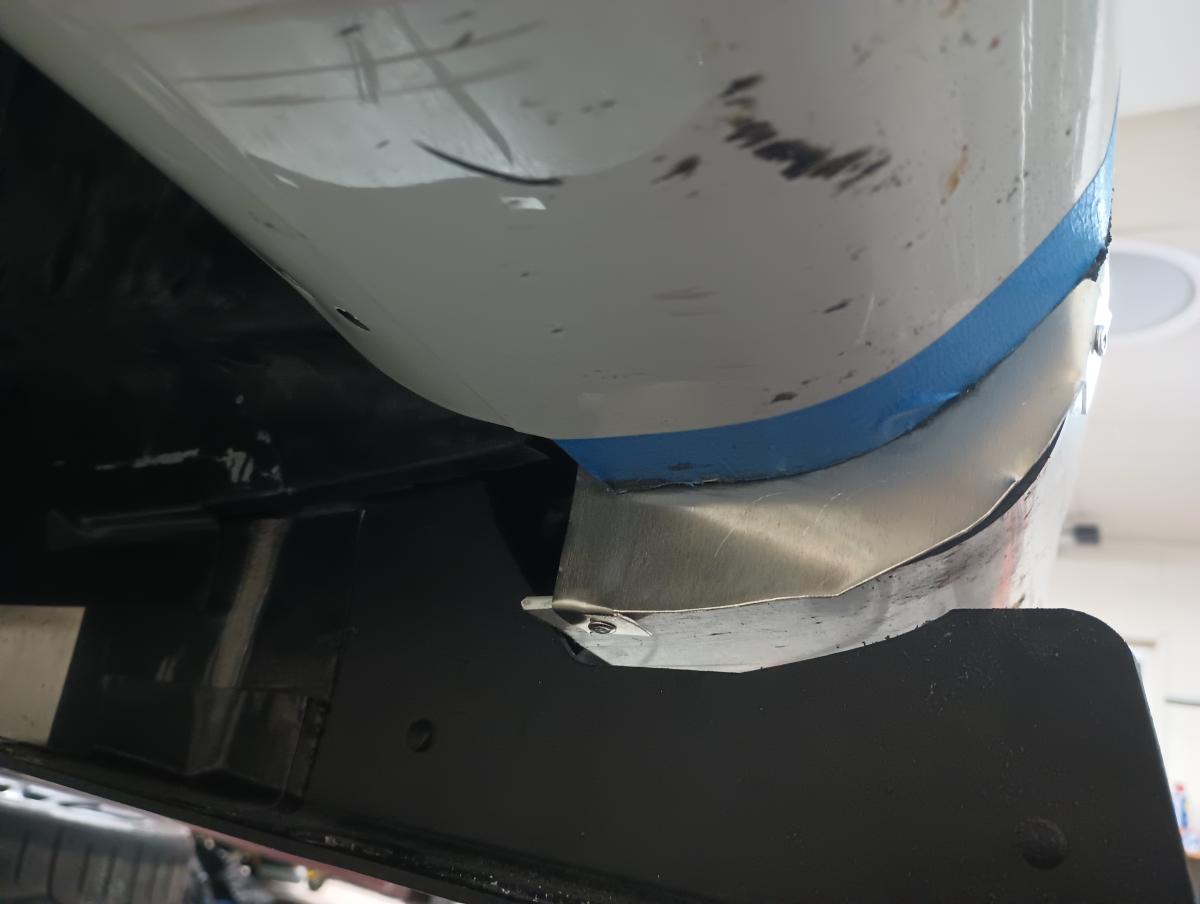
Bumper / Radiator Air Inlet Opening
This one seems simple enough. The C5 Corvette is a bottom breather along the front of the car. Air going under the car is pulled up and through the radiator, largely caused by a pressure differential caused by the OEM air dam leaving a low pressur zone behind the radiator, which in itself also helps direct more air up and into the radiator. Want to get more air flowing through the radiator? Let more air from the front of the car through and into the radiator. Now this does come with some downsides. The C5 Corvette comes with an air lift issue under the hood from the factory, so more air into the engine bay will increase lift unless the air has a way to evacuate. In my case, I have hood vents. I recommend you add the same.
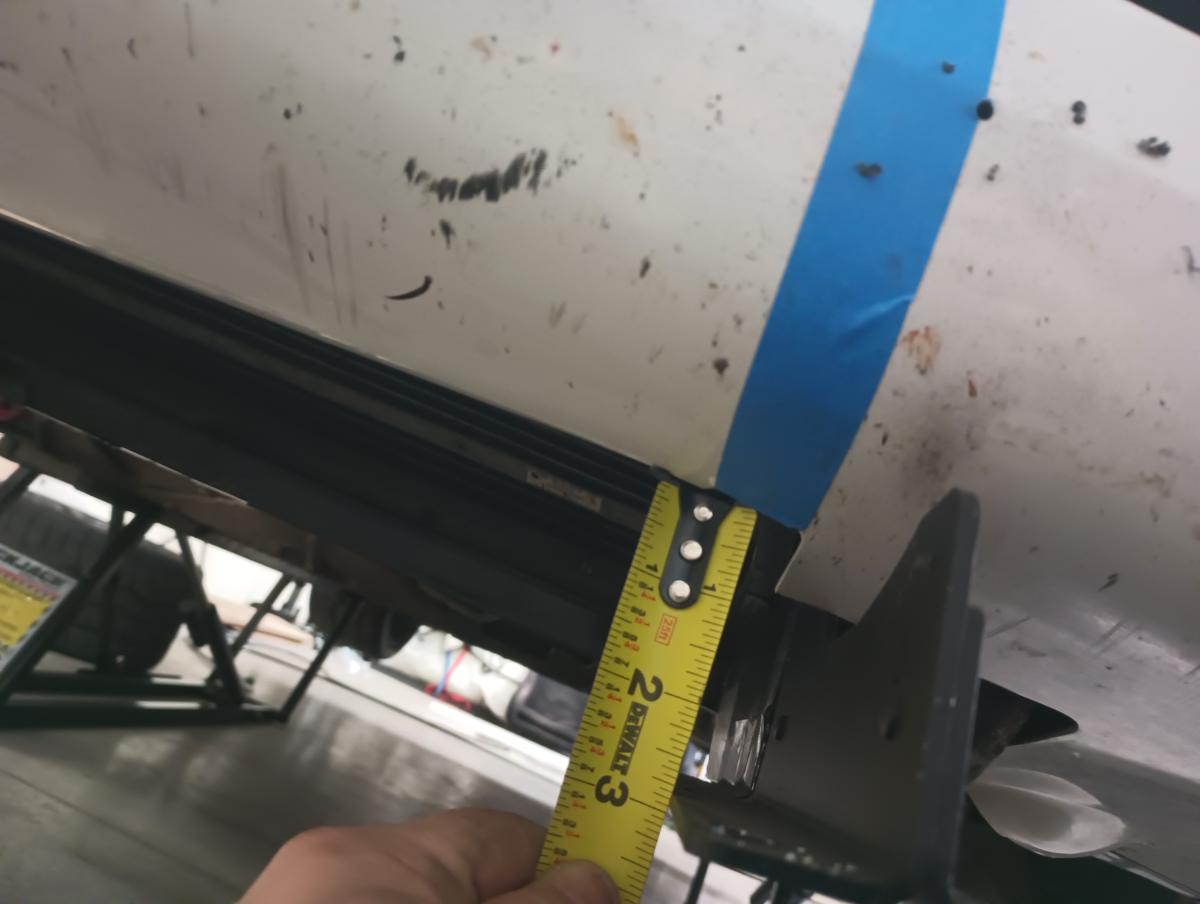
Above you can see the initial opening measured at approximately 2-7/8"
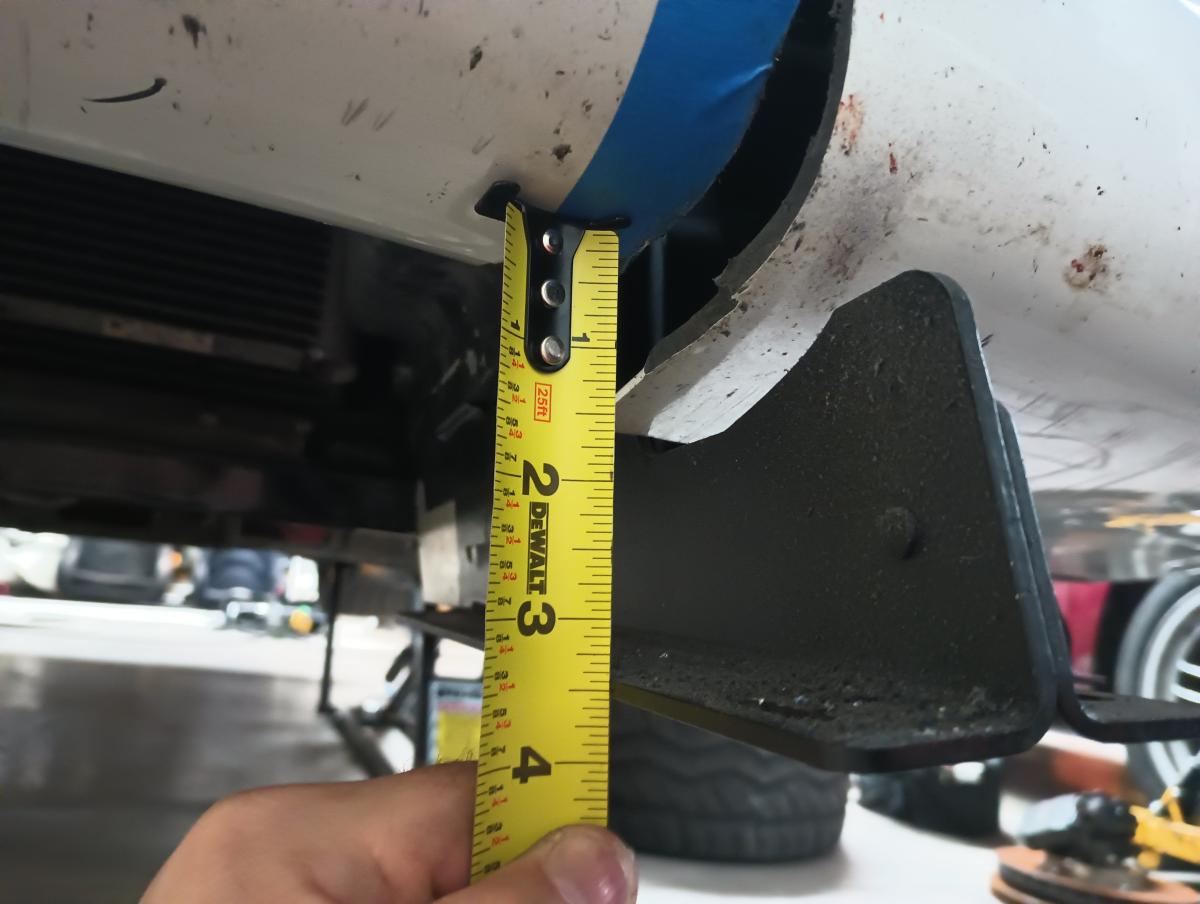
Above here you can see the radiator opening at approximately 3-7/16" or so. Overall, opening this area up added 30.4% additional height for the air to flow through.
The modification itself is simple. Trace the line from the bumper opening in this area up to the first crease line on the bumper. I put down tape to get a straight line. Drill a small hole at the intersection of your line or tape and the first crease. Use a dremel with a cutting wheel to cut the line between the opening and the hole you drilled. Repeat on the other side. The bumper "flap" should now be able to move freely. Pull the bumper as far over the OEM ducting as you can now go, and mark that distance. Notate the distance from the top of the OEM holes to the new location. Measure and drill the holes that much further away from the OEM holes on the new and improved bumper flap. Reassemble and you're in business!
Hood Vents
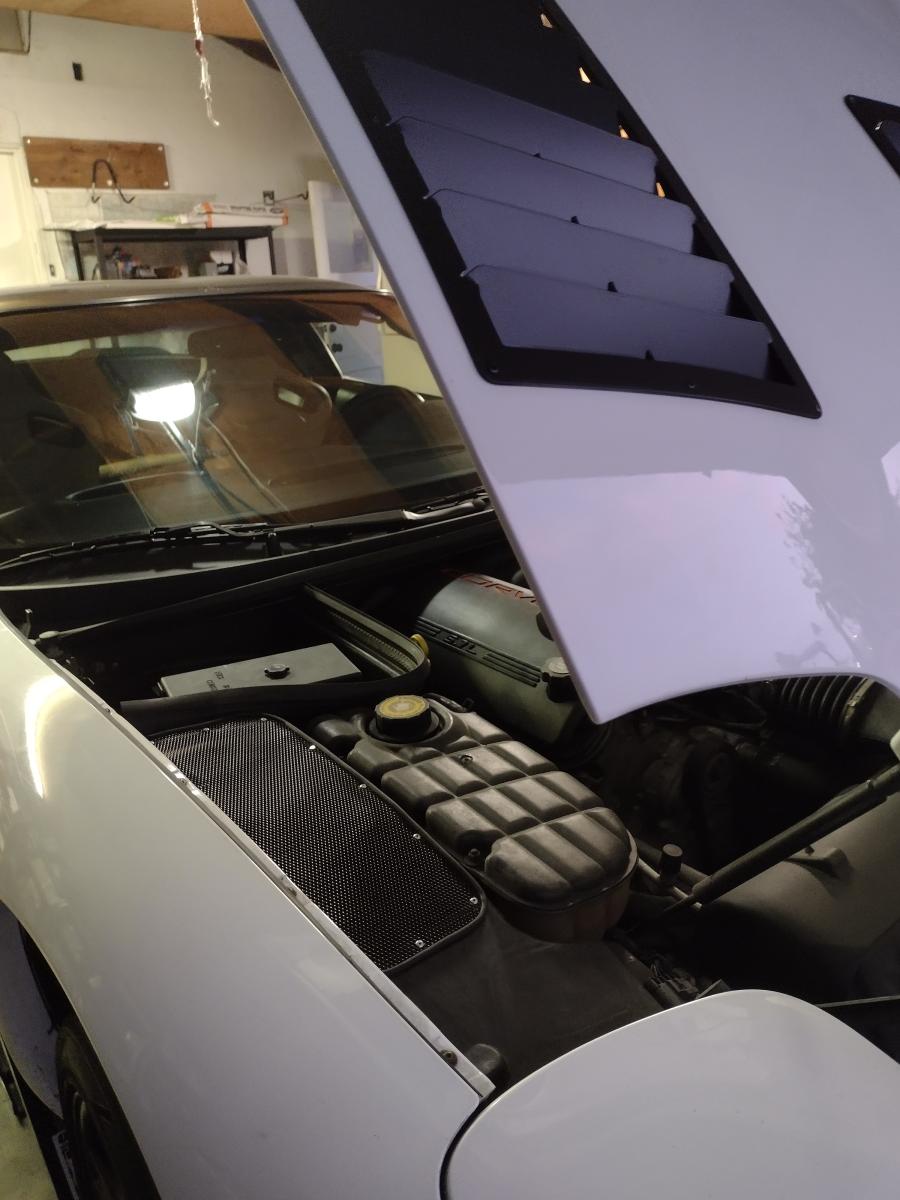
So hood vents are a good idea in general. I wrote about it in great length over in my post about venting the wheel wells through the louvers, but the short version goes that heat can escape out of them and any pressure building up under the hood can also escape in turn reducing lift. Tried, tested an true. Not exactly DIY as I bought a product and installed it, but the wheel well vents bit was DIY so eh I'm claiming it!
CAI Airflow Improvements
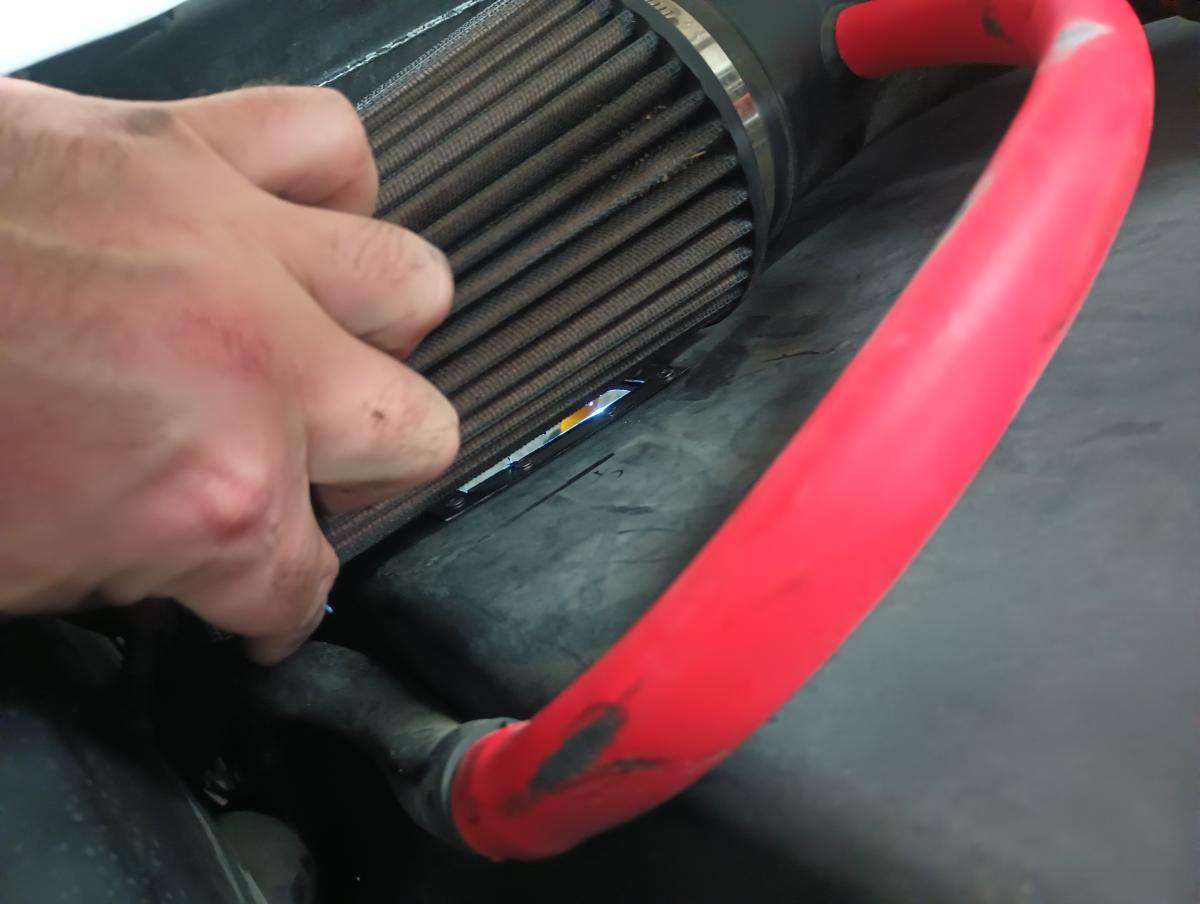
So here's a pretty basics one, but in my case I put in a ghetto Cold Air Intake from ebay with two giant K&N pod filters. It cost a fraction of the fancier kits and is pretty much identical. It works well, sounds good... but I was always wondering could I get more airflow?
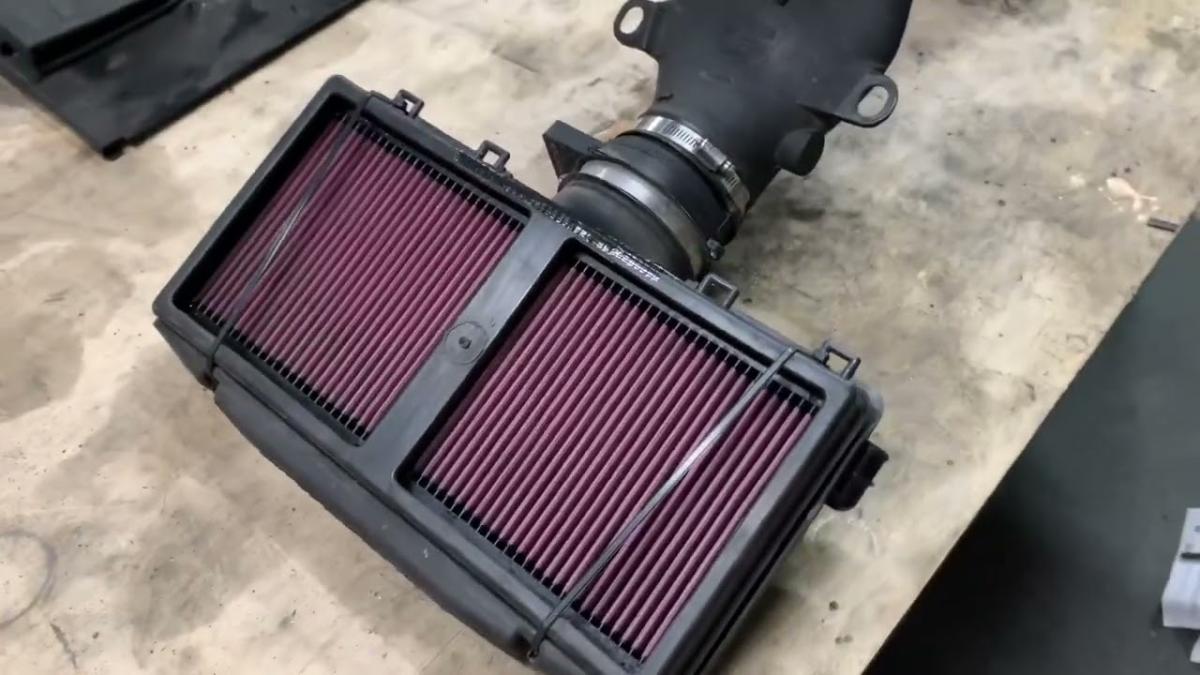
The most popular DIY mod for cold air intakes is the "zip tie mod" where you flip over your OEM airbox, cut a hole in the radiator ducting the sam size as the OEM box and zip tie it on. This lets air get pulled in through the radiator shroud and you get maximum fresh cold air.

I chose not to go with that perfectly sensible mod for whatever reason... and in hindsight probably should have. I just at the time didn't want to cut up the OEM parts, and that ship has now longsince sailed. As I'm already on the boat I'm on... I decided to instead just cut some small openings in the radiator ducting to help divert just a bit of fresh cool air into the area where the CAI resides.
Radiator Ducting Gap Filling
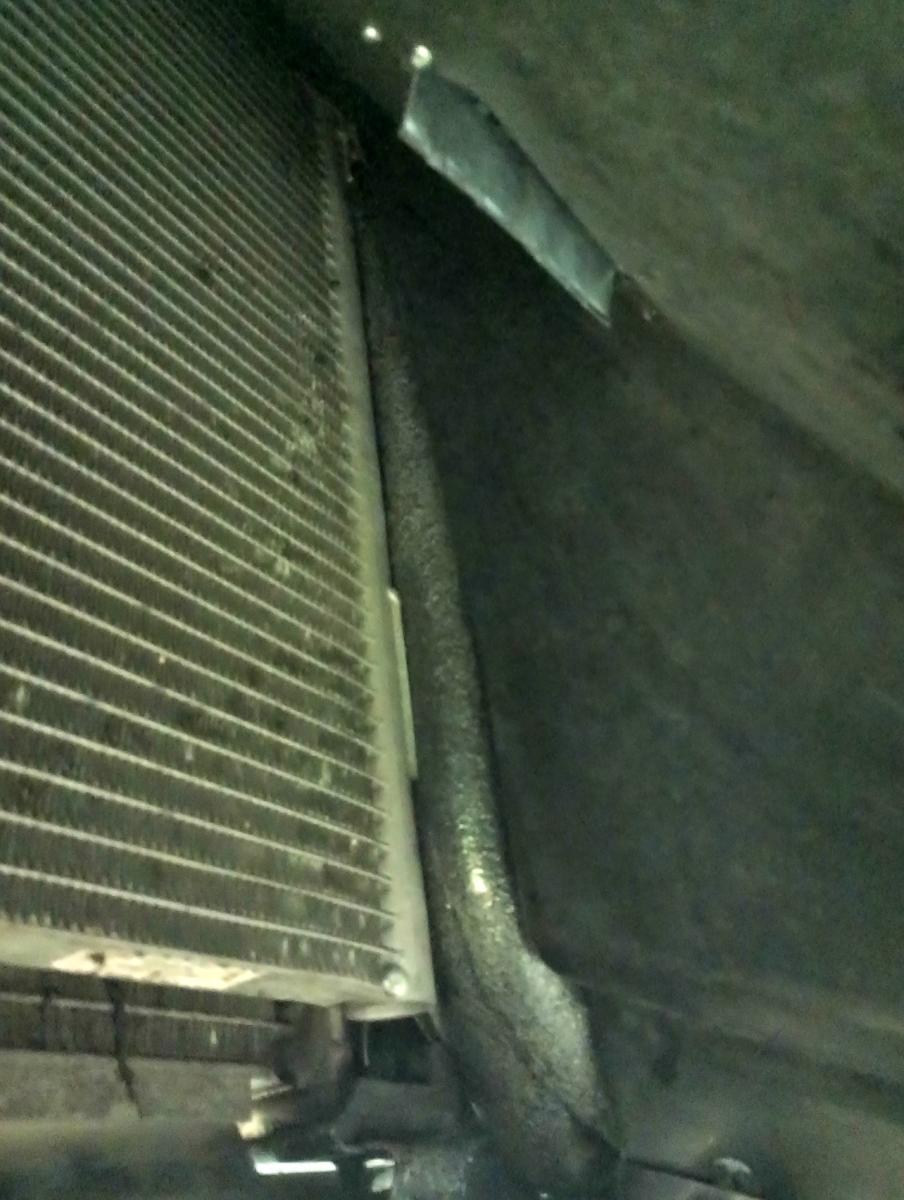
So if you've spent much time crawling around under the radiator area of the C5, you'll notice there's a bunch of gaps besides the radiator, accumulator and the air ducting up front on the C5 Corvette. I was pondering just how to fill the gaps, and then somebody suggested putting pool noodles up there! That seemed geniusly simple to me... but of course pool noodles are out of season in the PNW by quite a few months, so I figured I'd make it work with foam insulation. Sure enough, in a few short minutes with some foam insulationg and cissors I was able to fill all the gaps air could take instead of going through the radiator. Nice!
Now, some have stated this isn't a wise idea as the pool noodles will melt. They are indeed supposed to fail around 220F, which incidentally is way below my oil temperatures and my coolant temperatures. Supposedly the thing to use is hvac armorflex, but I didn't learn that until after the fact so... this may create a giant dumb mess. We'll find out long term, but so far this has held up for the better part of a year and over a dozen events without melting.
160 Degree Thermostat
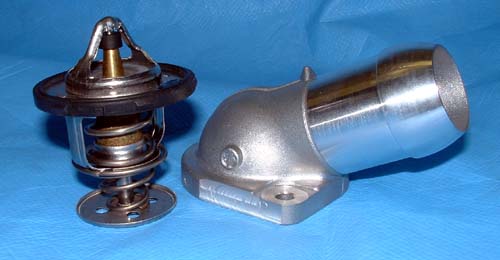
So while I was removing the AC on my Corvette I decided to take the time to swap out the thermostat for a 160 degree thermostat and... it did nothing for me on track. Even on the street my car will idle at 185-190 degrees. While I do start 5-10 degrees cooler when I hit the track, I'm nearly always back up to where the thermostat normally would be by turn 2 of a track. I'd say get a 180 degree thermostat over 160 and you'll be fine. Or better yet, get a bypass if you can find one for the C5!
Fan Tuning
I don't have a good generic picture for this, but as part of getting my car tuned we adjusted the temperature at which the fans kick on and the speed at which they kick on. Specifically the fans turn on/off at 40mph, and at 195 degrees. I could probably drop this temperature even more now that I've got my 160 degree thermostat in there... but honestly none of it matters once I hit the track. Coolant temps settle at 220 degrees, oil temperature settles at 250-265 depending on how hard I'm pushing, and that just is what it is. I do think having the fans come on at a slightly higher speed than OEM (35mph) helps in low speed turns, but so very few tracks I run have turns slow enough that this matters.