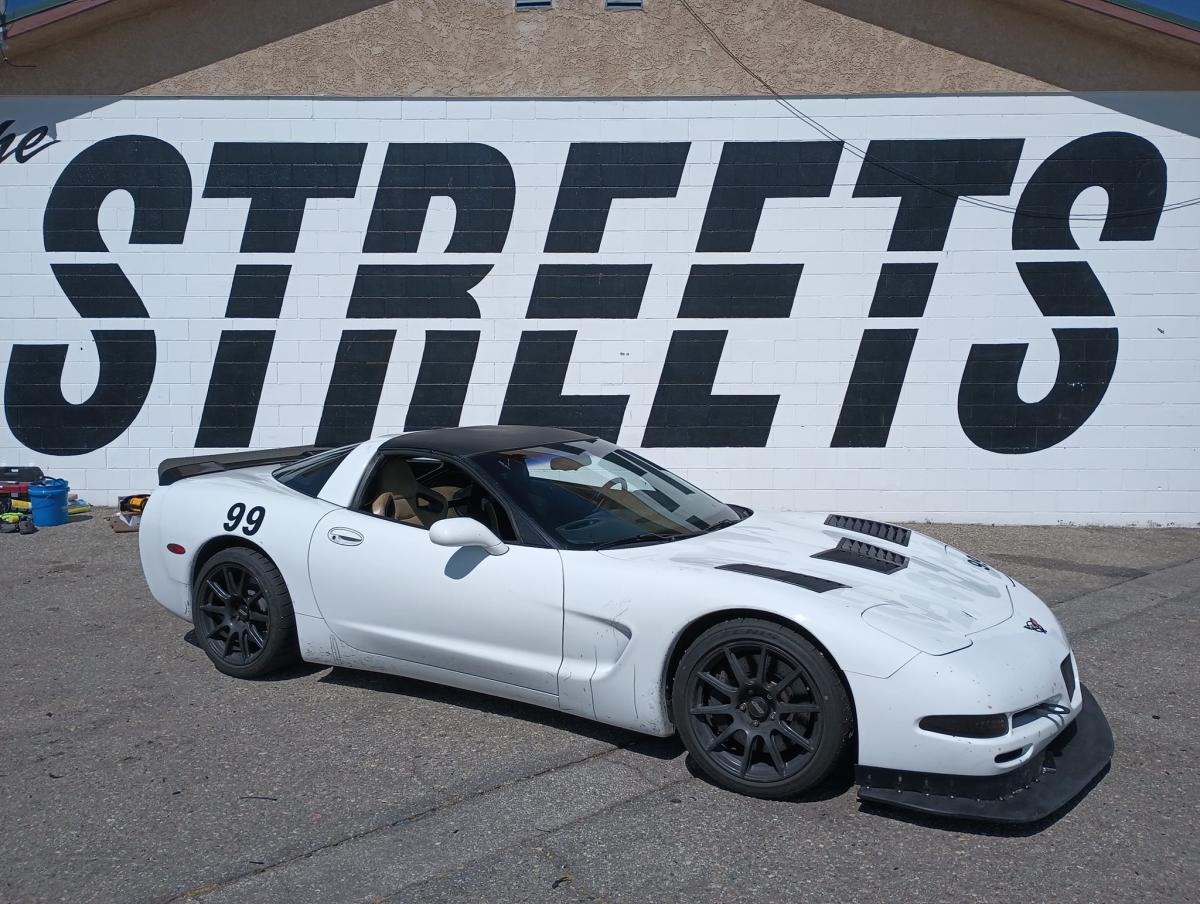
Nine Lives Racing C5 Corvette Front Splitter + Mount - Install & Review - DIY Splitter Ramps
So when it comes to Aero in the track and race car game... there's not many companies getting more mention than Nine Lives Racing. Between their solid reputation for producing product that works at pretty fair prices and their RADiculous "big wang" wing marketing, they stand out. What I notice even more though is that they are active on social media. Now they aren't just posting photos of how cool they are... they are engaging with folks and talking about their product and how it can work with them, how to work with their product, etc etc. There's only a few folks I see doing this, and coincindentally, they all make good product.
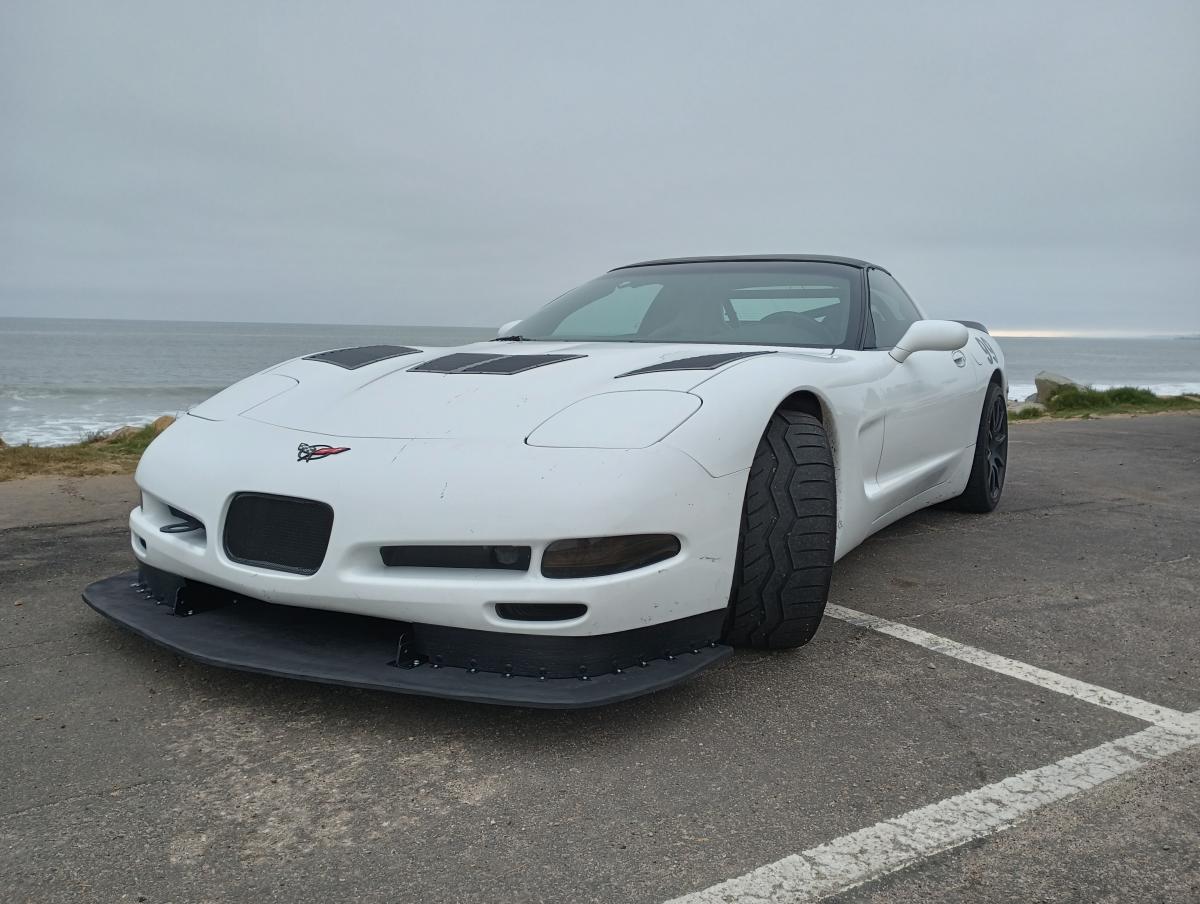
So knowing all this I decided to proceed with the Nine Lives Racing front splitter mounts and splitter template to make my own front splitter. I figured why not, the front end of these Corvettes is so poorly built anyways I may as well try and get some extra downforce up front. While I do occassionally get understeer out of my car, it in general was really balanced... so I likely unbalanced the car by just adding front aero... but more on that to come after I track it.
If you are considering this and read nothing else, read this:
- Solid product! The install templates are killer and easy to work with, but do double check the splitter template against the bracket mount spacing.
- The installation instructions for the splitter gloss over some time consuming customizations nescessary when reinstalling the bumper / OEM equipment. You'll have to notch the brake ducts and cut up your dumper to clear the side mounts. It will require some test fitting rounds to make work, but isn't difficult, just time consuming.
- OEM air dam bits don't reinstall, so count on needing to figure out an air dam. Feel free to copy what I did below or come up with something better.
- I have no idea how you could possibly run this on a lowered car! I can barely get out of my driveway and I'm at the sky high frame height of 5.5"! That said, you probably want the OEM geomtry anyways and with this splitter you don't need to lower the car to reduce air going under it.
Parts Used in this install:
- 9LR Mounts + Splitter Template
- 4x8 sheet of 1/2" Plywood
- Landscape Edging
- 3/4" #8 wood screws
- Large flange black rivets
- 8' length of Angle Aluminum (likely only need 3-4' if you can find a section that short)
Just starting out, and building the splitter.
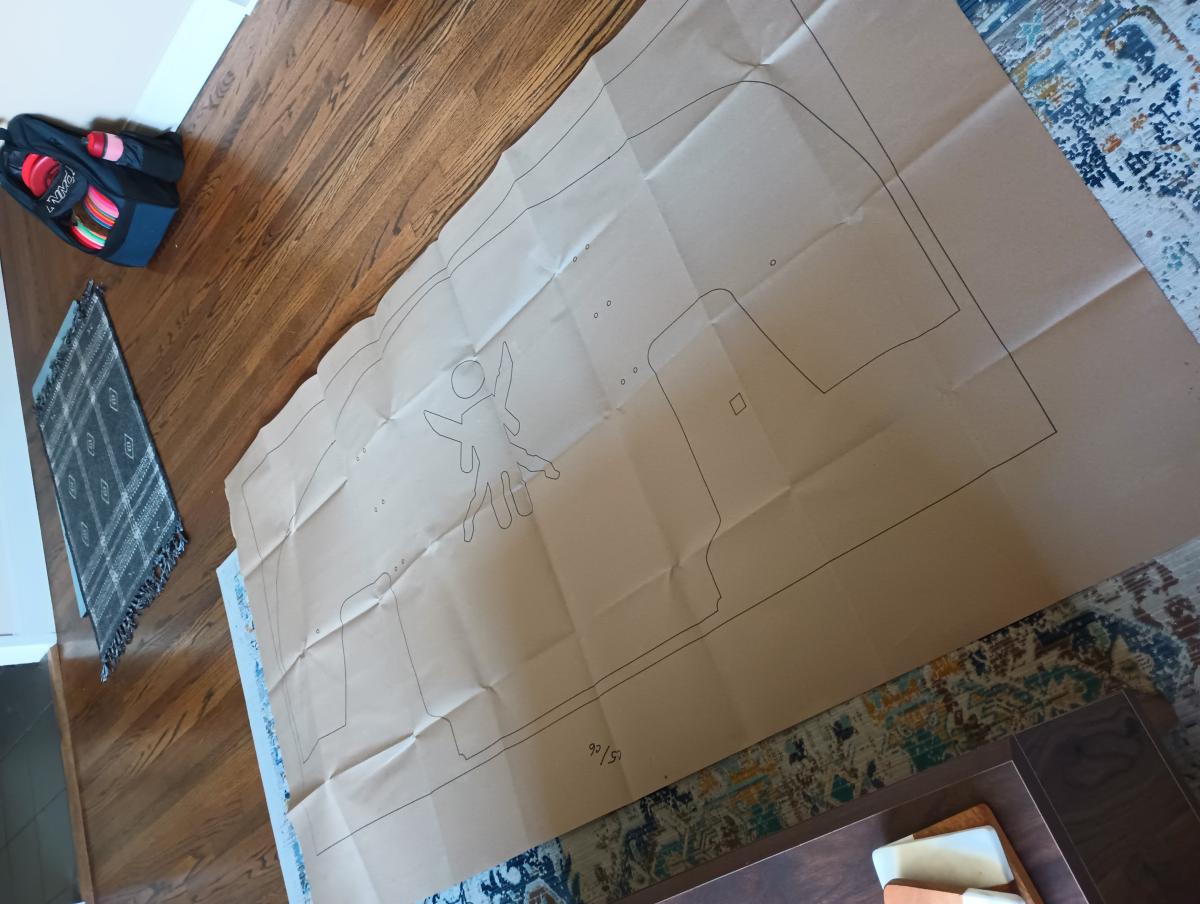
So to start things off, I got the template from 9LR to trace out on some plywood. I did some research and wasted a whole day trying to track down ABS or Delrin sheets, and... Plywood just won. The piece of plywood I traced out for the splitter was actually not all that heavy despite being 1/2", and in the end is pretty damn tough. To quote advice I got on the topic: "Wood is Natures Carbon Fiber" - AMT Motorsports
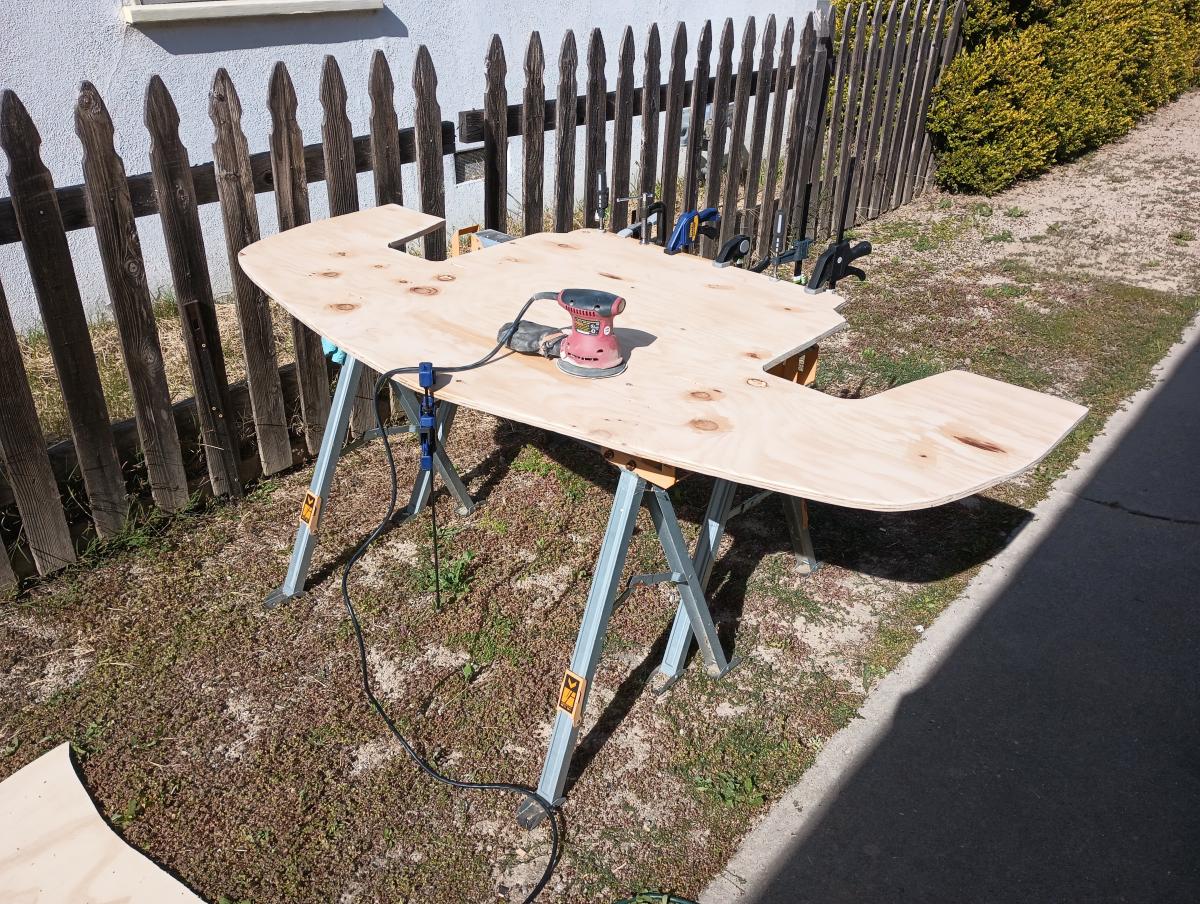
The template admittedly made the job of cutting out the splitter a breeze. With a jig saw I was able to make short work of it all. I did the standard drill big holes wherever you wanto to make a sharp turn with the jig saw, and cutting it was easy.
Unfortunately, the template it turns out they sent me was ever so slightly off for the holes for the mounts. I took pictures with it all lined up, showed 9LR via email, and they apologized and said they'd look into it. So good on 9LR for taking ownership of the issue and being willing to look into it, but a bit of a bummer my splitter was now off center by about 3/8" and I had to make the splitter a bit less structurally sound by drilling additional holes for the mounting brackets a very slight distance off from the original noles.

The Splitter Mount Templates & Mounts Were Easy and Great
I had no problems installing them and everything lined up right away. Getting in there with the rivnuts was also reasonable as well. If I had to complain about anything, it would just be that they didn't toss any extra rivnuts in with the kit. It's a gripe I have with EVERY manufacturer though, as it's gotta add $1-2 to at most to toss in a few little bits of extra hardware with every order. Those extra pieces mean the world in the case of a DIY mechanic accidentally over doing it one of their rivnuts like I did. Fortunately, I personally have more rivnuts, but I've made mistakes on other kits before like dropping a bolt and it was a nightmare. So 9LR or anyone else out there reading this, spend the $1-2 to toss in extra hardware!
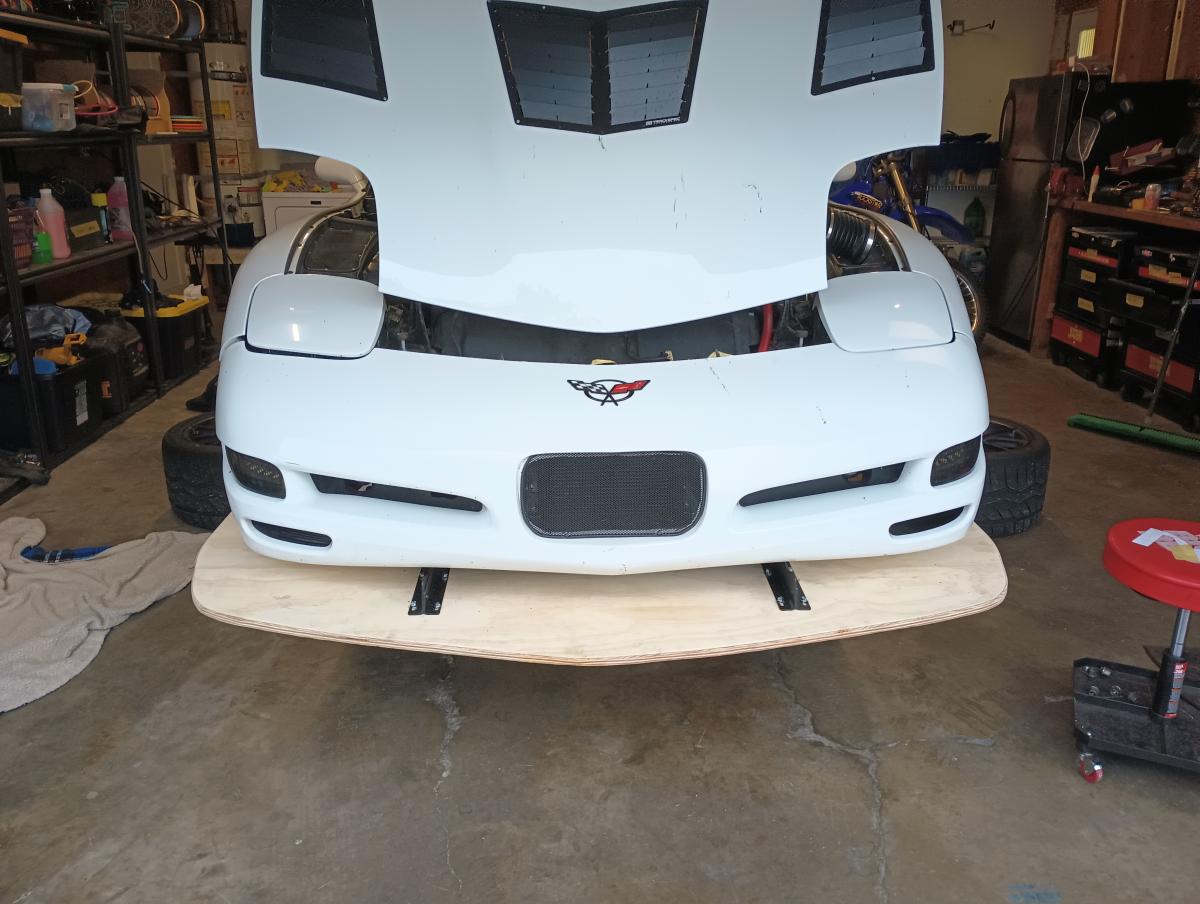
So with the main mounts in place and the splitter cut to shape, I was able to finally attach it all together for test fitting purposes. After faffing some with various holes for the mounts due to the incorrect template, I was able to get it all together, and it looked pretty darn slick and was quite solid! I hadn't added the side mounts yet either, but they shouldn't be all that hard, or so I thought.
It's worth noting at this point I had none of the OEM lower air dams on as they were all removed with the bumper. This will come to matter later.
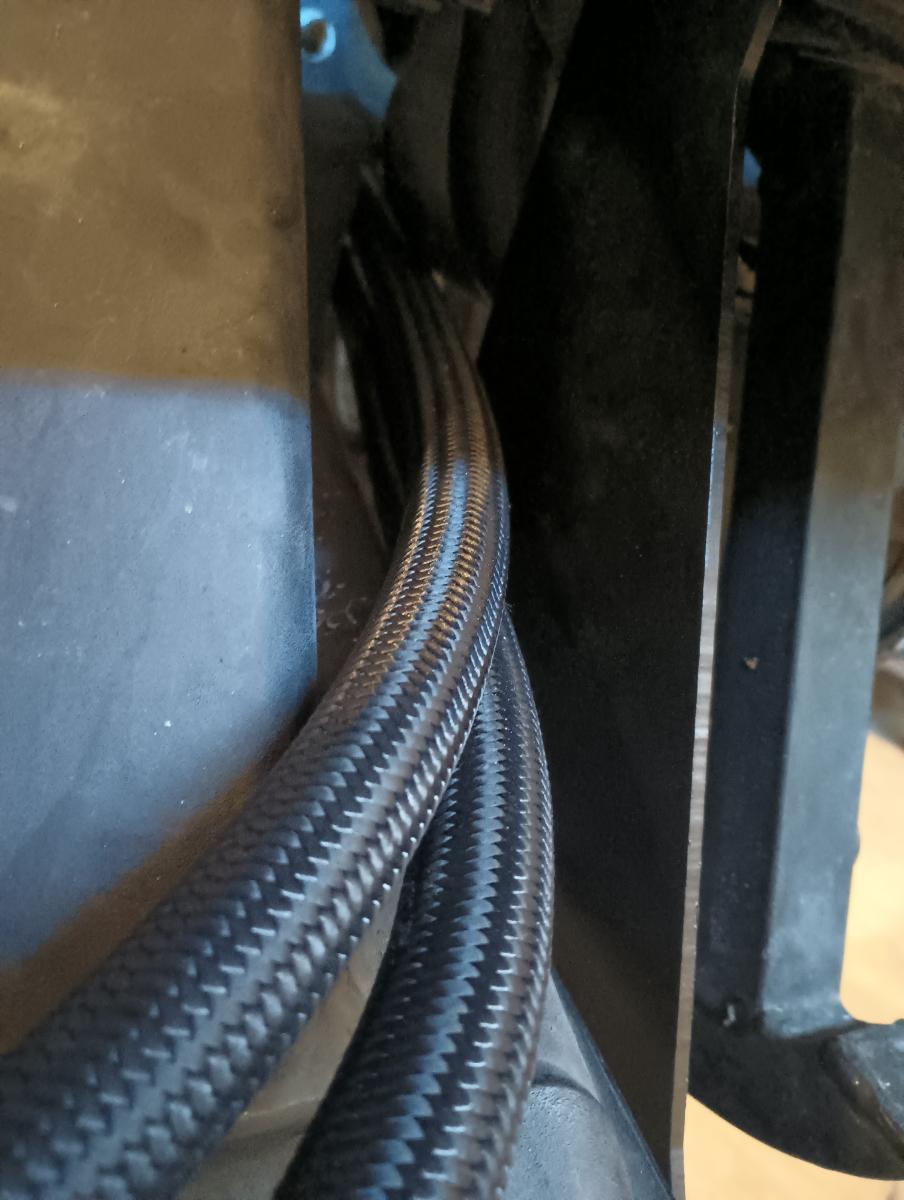
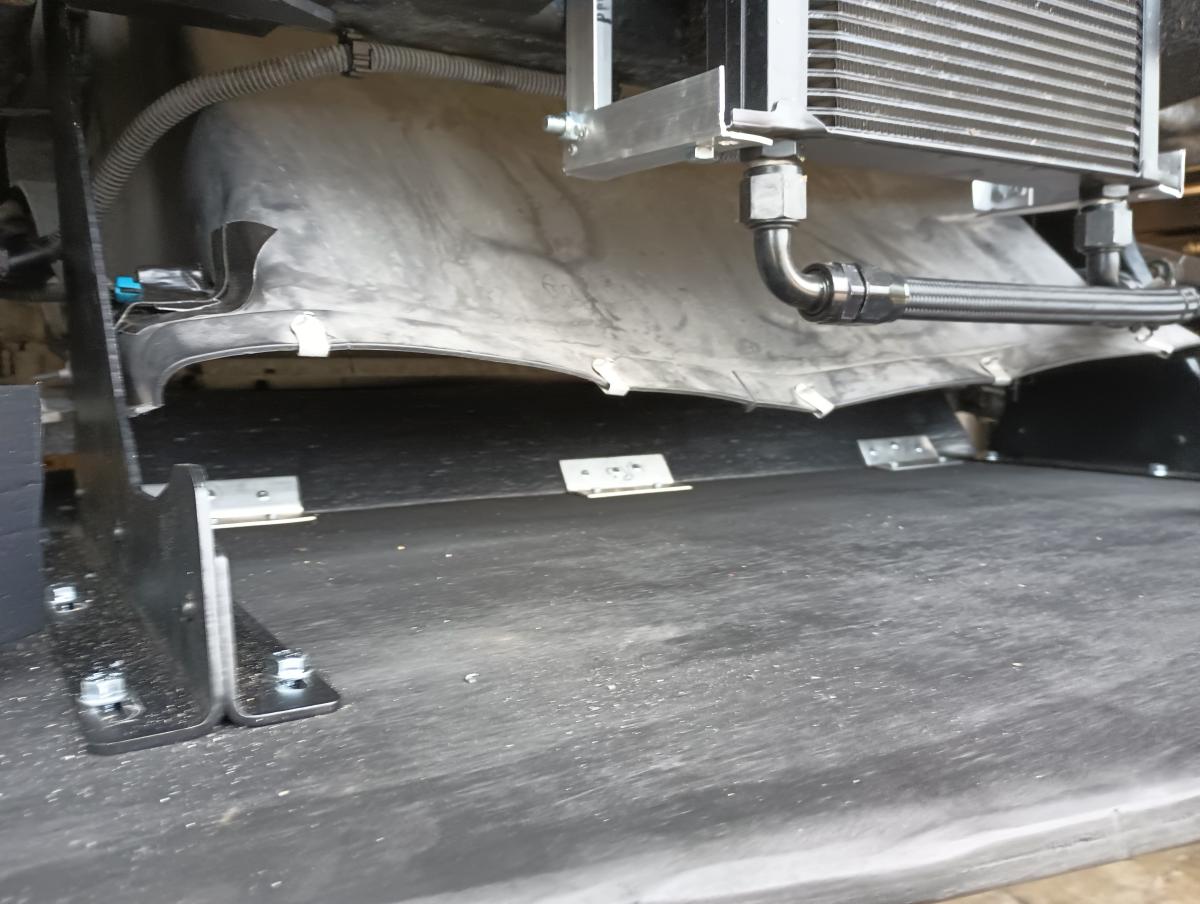
One of the first issues I did encounter at this point was that the oil lines were pressed right up against the solid steel splitter mounts as pictured above. This seemed like a recipe for an issue to me, so I put some rubber door trim and groilla tape over the part of the splitter mount that oil lines might rub against. Hopefully keeping it rubber to rubber for contact whill help ensure that these oil lines don't eventually rub through.
Next up came painting the splitter, which was easy enough. 3 cans of Krylon flat black paint and primer and I was in business. Some folks truck bed liner their splitters, which seems like the smart way to fly... but I wanted to keep this first one cheap and quick so I stuck with Krylon. Perhaps a future splitter will feature this.
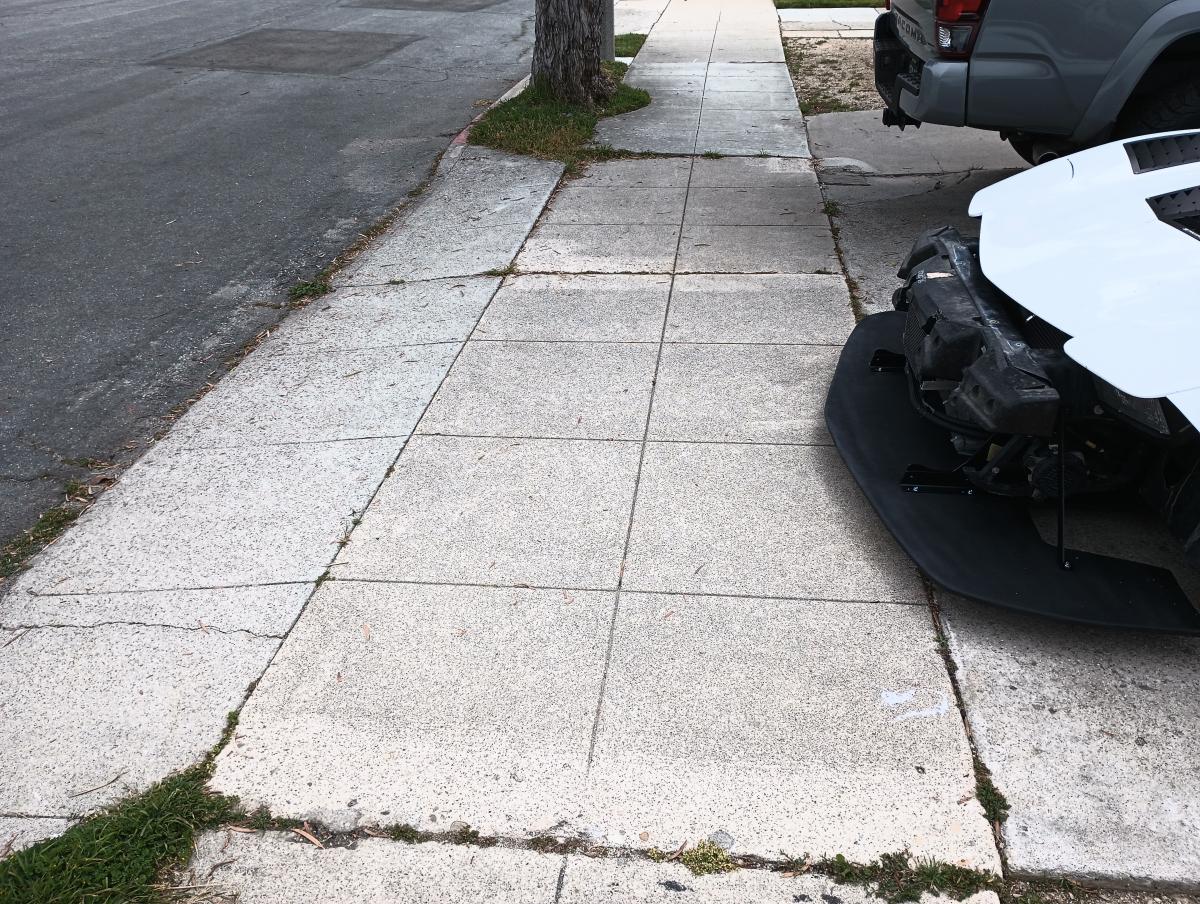
For fun I took the car for a test drive around the neighborhood without the front bumper reinstalled. Allow me to say... even with my car at OEM ride height you can prepare to drag on even the simplest of entries/exits without taking a notable angle when passing over them. Fortunately, it's all wood, and this front bit can drag sporadically and likely be okay for quite some time to come!
Next though began the complexities of the install that are well known, but not mentioned in the 9LR instructions
So while trying to figure this all out, I did get a response from 9LR on Facebook pointing me to their install directions on their blog. Overall, the directions work, right up until step 13. That step glosses over a whole bunch of shit, and isn't even accurate. 9LR, you dropped the ball at the 10 yard line with this one with your instructions! Hopefully they'll take what I have here and add in the information that is missing.
So the complexities that remain at this point and aren't mentioned are:
- You have to notch the brake ducts to allow the side mounts to work. This reduces the airflow through the brake ducts, but is important for stabilizing and supporting your splitter.
- You have to cut your bumper up to allow mounting with the side mounts. This throws a few mounting points off (literally) and definitely means there's no coming back from this install... which is fine as if you're doing this sort of mod to your car it is likley a track focused build anyways... but probably worth knowing incase you thought this install would retain your nice perfect OEM bumper.
- The OEM lower air dams don't work with the splitter mounts. I tried to finagle it all together and just gave up and made my own as it was a better result in the end anyways. So plan on getting supplies for this and burning a few hours making this all work.
Notching the front brake ducts
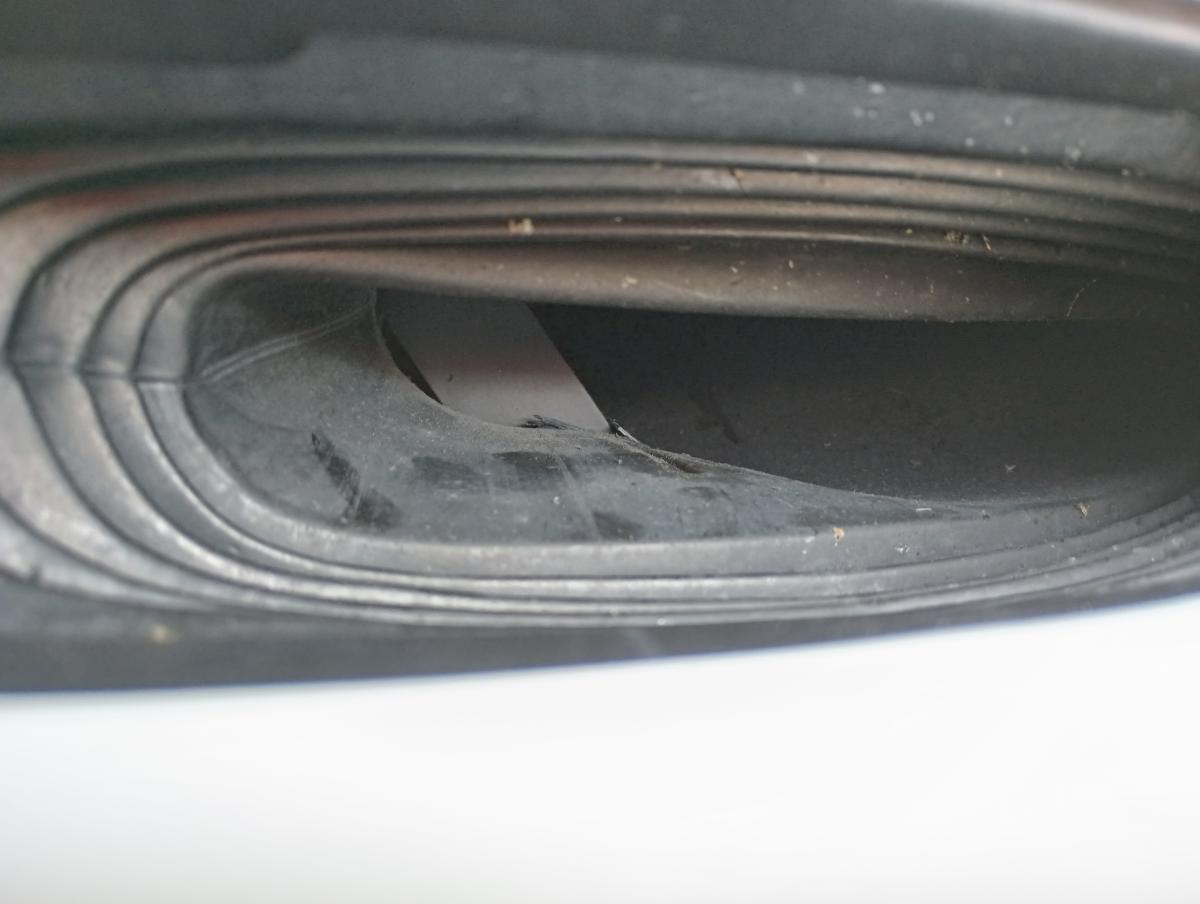
So hopefully you can tell from the picture what has to be done to the brake air duct. You'll essentially attempt to put the air duct back to where it belongs with the bumper off, and it won't be able to go there. So you have to cut through the brake air duct to allow them to let the side mounts slide through them. In the end you give up I'd guestimate 20% of your airflow through the brake ducts. Does it matter? To be deteremined. Most foks don't complain about it, so I'll presume it's A-okay. Besides, the effectiveness of these brake ducts was always a bit suspect anyways. I'm running the oversized C6Z06 rotors and brembo calipers, so I think I'll be okay.
Cutting up the Bumper to clear the side mounts
![]()
So here you can see the section of the bumper I had to cut away to allow for the side mounts to clear with the bumper on. As it would turn out, even this much cut wasn't enough and I had to go another 3-4" or so of cut out material. You'll give up a bunch of material to make this all work, and you will not have as many mounts to secure the bumper with anymore as you have to get rid of a few to make this work. Does any of that matter? I don't think it does and it all seems fine to me, but worth noting for folks who really value their OEM bumper.
Lastly the OEM air dams don't work with the splitter.
The whole "Reinstall OEM parts" gives others and even myself the impression that you can just use those OEM air dam bits for a while with your splitter. I even had folks ask me this very question on one of my facebook posts. Welp, spoiler alert, you can't! The OEM air dam bits won't fit in there for the life of you with this splitter. For what it's worth... why the heck would you keep the OEM bits? The OEM bits are flimsy and worthless. So no negative points to 9LR on this one, and something they should likely mention so folks installing these don't get halfway into an afternoon job only to discover they gotta go get a bunch of stuff they weren't even aware they'd need.
Luckily, fabricating your own air ramp up to the radiator is a fairly straightforward process. I used 3/4" wood screws, some angle aluminum cut into 3x short sections and bent to about 45 degrees, and then some 4" lawn & garden trim from Lowes (Note: I highly recommnd this stuff at this time, it's quite sturdy). I secured the lawn and garden trim to the aluminum using pop rivets, reached it back to where it belongs, and using a very short screw driver hand drove the 3/4" screws into place. This all came together to create my own air ramp from the splitter up to the radiator and an air dam, which I honestly think will outperform the OEM contraption anyways.
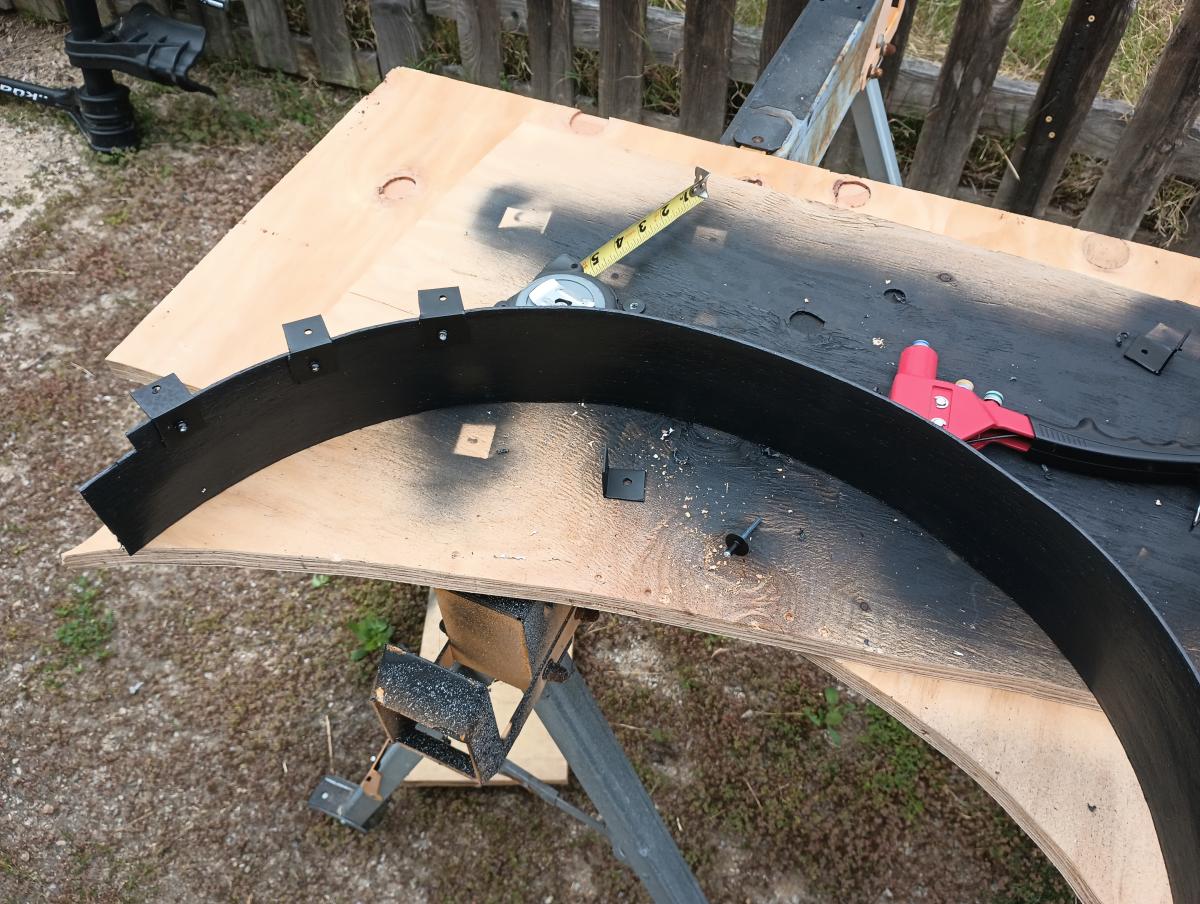
Continuing the use of the angle aluminum I had and the aforementioned lawn & garden trim, I cut sections for each side arm dam, and put 10 small pieces of angle aluminum drilled out all the way down each side air dam to secure them. I used black pop riverts to attach the angle to the air dams, which I then secured to the splitter itself using 3/4" wood screws.
Now does this look a bit hokey since the angle brackets show on the front and so do the silver screws going through them. However, did it let me get the air dam really snug right against the bumper without having to drill into the bumper? Yes, it also did that! It also worked really well as far as dealign with the complexity of the install order of the bumper and the air dam and the splitter. The air dam simply goes last on this job.
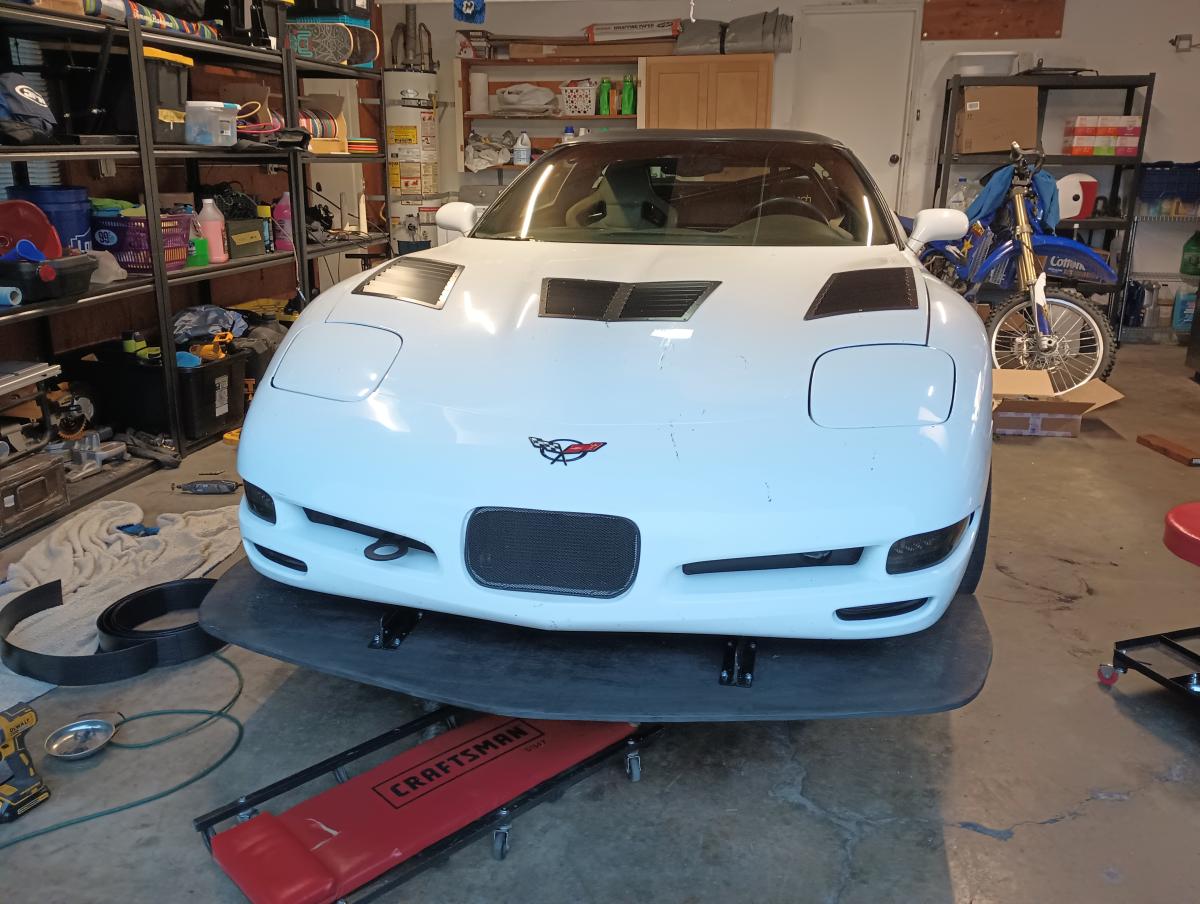
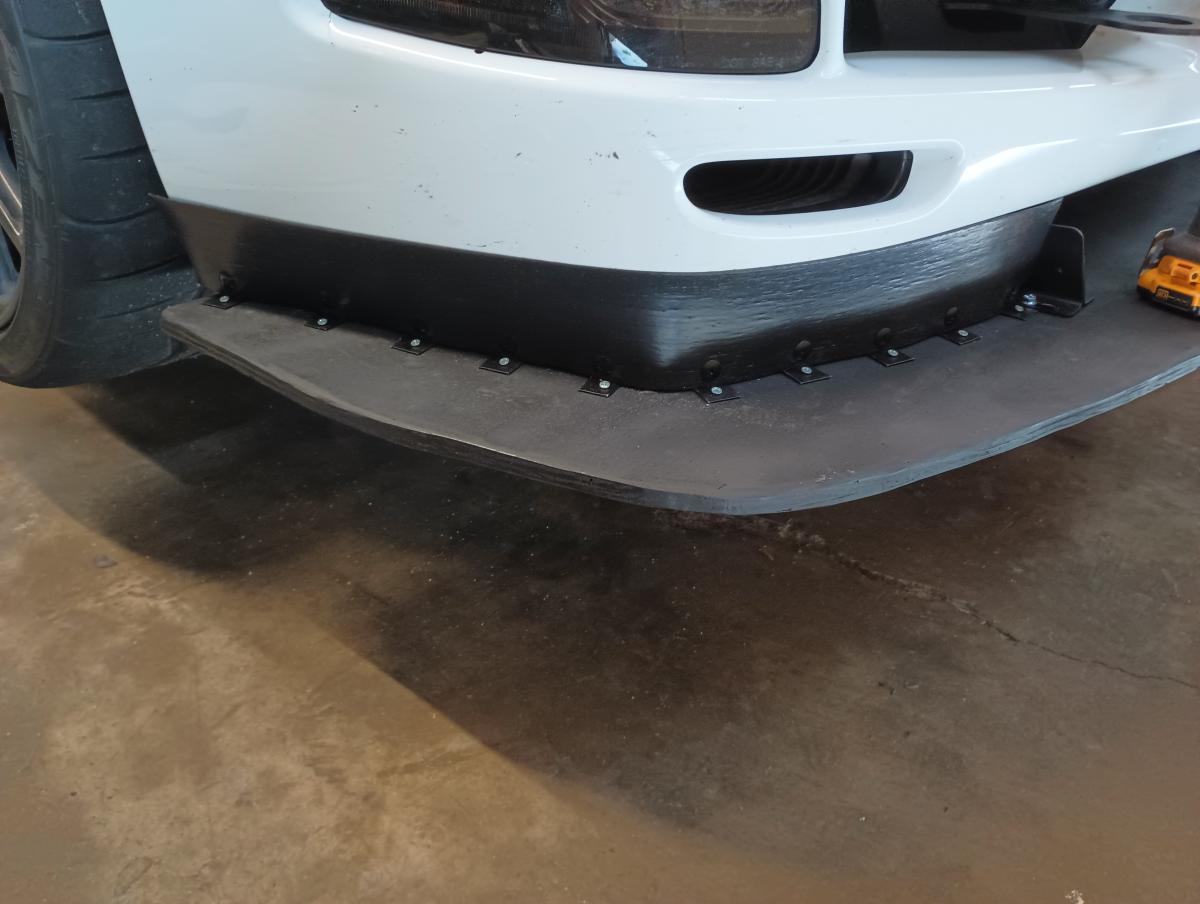
The Completed Project
So with everything all put together and installed, it looked good, and felt absolutely fine during some test runs around the local driving areas. Was I pushing it anywhere near what I would at the track? Not even close... and track results will ultimately tell, but overall not that crazy of a project to pull off the install on for a garage mechanic.
Some concerns going into the track day

So now having just a splitter and a largely aesthetic rear spoiler on the C5 Corvette, I was starting to worry I'd rather unbalanced the car. A lot of folks warn against just doing a splitter as you'll create a balance that leans towards high speed oversteer, as the front is planted with downfroce and the rear is loose. Other folks though have said that keeping the C5 front end planted at high speeds is a rather significant headache, so a splitter and hood vents will help a ton.
To try and combat this, I added an acrylic extension to my rear spoiler. This may add as much drag as it does downforce, if not more, but I'm hoping it will help balance the car out.
Ultimately, I believe the "correct" thing to do is add a wing at the same time as when you add a spoiler. Then you can balance out the cars high speed handling characteristics.
I also have concerns about how this will influence spring rates. I'm currently running spring rates that aren't excessively stiff, but give me exceptionally balanced and easy to control handling on the track. Will these become inadequate with this splitter and a wing added later? What will stiffening the springs do in low speed turns where I don't have as much downforce being generated?
How it went at the track:
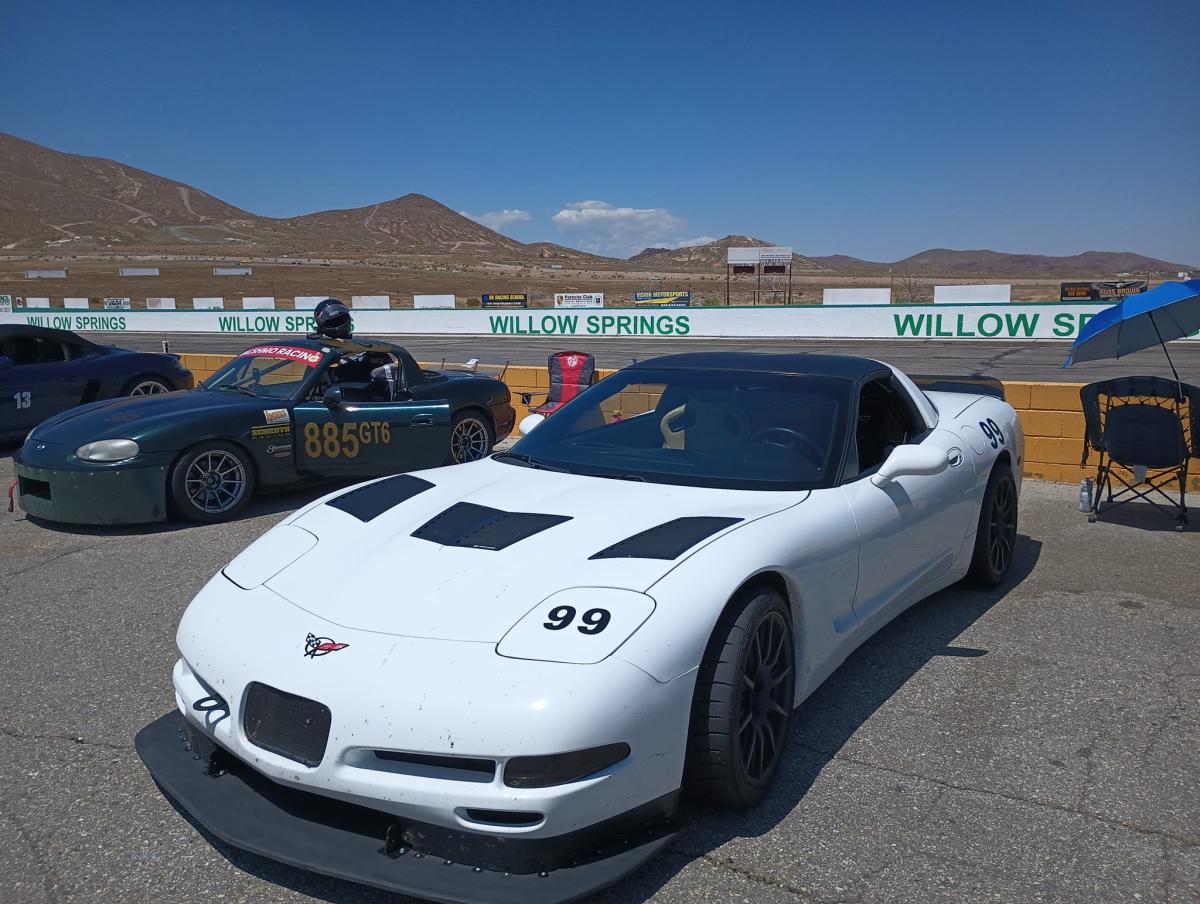
So I took this configuration out for two back to back track days. The first was at "Big Willow" IE the main track at Willow Springs. This is a pretty fast track and is often regarded as the fastest track in the west. It has huge sweeping banks and tons of support, and you can pretty much go as fast as you've got the stomach for here! One thing of note is that this track has a horrible reputation for off track excursions being generally quite catastrophic. A favorite track org of mine did an event here just last month and unfortuantely had a roll over at the event! To be fair though, it was an S2000, doing S2000 snap oversteer things.

My best lap at Big Willow was a 1:38.234. I feel pretty decent about it with this being my first time at the track. It also took me quite a few sessions to work my comfort level that much higher and higher. I do feel good that I was able to break 120mph. I definitely believe there's a lot more time to be gained carrying more speed into turn 9 and then back onto the front straight. Turn 1 and 2 I felt pretty maxed out on however. Turn 3-4 weren't always that consistent, but the rest of the track I don't think I left much if anything on the table.
So, was this car oversteering and had it become an extremely unstable mess? NOPE!
I adjusted my suspension settings just a little bit from 12 click of rebound in the rear back down to 9. This would normally result in a very balanced car with my previous setup, only oversteering when I really put some driver inputs in there to achieve it. Now, this setup definitely had more perpesnity to oversteer, but it was more akin to my 12 clicks of rear compression setup, so I was pretty familiar with it. I definitely never understeered with this configuration at Big Willow, although I will mention some things about understeer when talking about my second day at Streets.
One time, I had a rather "exciting" bit of oversteer where my rear stepped out more than I wanted in turn 3. Not sure if it was something on the track, but I suspect some debris was a factor as the C5 corvette right behind me also oversteered in the same situation, and he didn't have any aero factoring into things. They though spun out, while I reocevered and kept hoofing it, so... who is to say?
The second track day was at Streets of Willow Springs, which is a much slower, tighter and more technical track than Big Willow. To be honest, I much prefer streets for outright driver stimulation. Driving this track at speed I'm having to rotate the car a bunch, and with a bunch of traffic, I'm getting to figure out ways to make different lines work when I get awkward point bys with no assists on speed.
At streets, I want the C5 to oversteer and rotate. The lines I take reflect this, and I can carry a bunch of speed this way. Plus, it's an absolute blast to rotate the car around on this course!
Now the question the matters... did the car oversteer MORE with this setup than before? I can say that with the same suspension adjustments as the previous day, the car handled all the same. So oversteer was increased about as much as a minor suspension adjustment... but that was fine by me since that's what I like anyways.
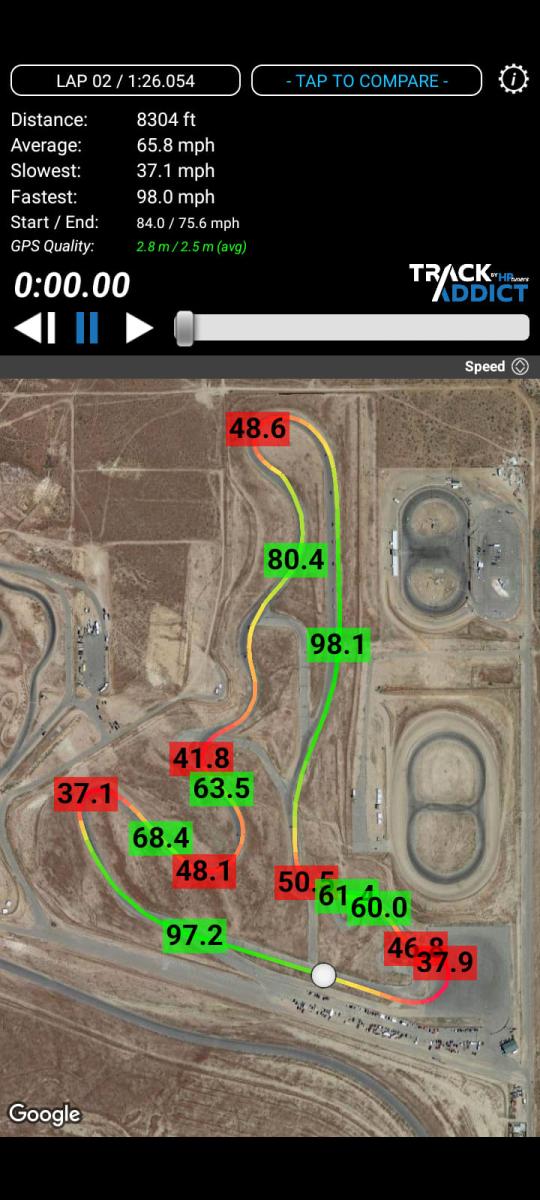
Above is my best lap time of the day, which at the time was my PB by .2 seconds. Not too shabby considering most folks were really struggling with tire temperatures all day long, with many folks leaving early over it. There was also a lot of debris on the field due to constant spinouts from S2000s, some I even have great footage of and will post over in my track day writeup.
It is worth mentioning, that I did encounter understeer sporadically throughout the day, but by that time I had usually put a shit ton of heat into my tires and was putting too much speed and steering demand early into a turn. So, this setup was fairly balanced.
An important mention on temperatures with this splitter setup
So a question a few folks have asked me now, is how does this splitter affect cooling.
On the highway, I noticed only a minor change in temperatures. Before, oil would stay about ten degrees below coolant levels, and coolant would fluctuate from at or just below the thermostat level. With this setup I was still very comfortable temperatures wise, but I now had coolant temperatures fluctuating around 200 degrees or so and oil as well. So a reduction in cooling, but far from problematic. This is not exactly a huge surprise given I've got hood vents and an oil cooler keeping things level
On the big willow track day, my oil temperatures peaked at a new high of 255 degrees, but I attributed that to the much higher speed nature of the track along with prolonged WOT driving. I thought nothing of it.
At Streets of Willow though, I noticed a significant difference in temperature. I hit a new high of 275 degrees on my oil temperature. I could consistently hit this temperature when pushing 1:26s, where before I would only see 245 degrees or so. It is worth noting though that I was running by far the fastest in my group (fast intermediate, I should be in advanced but didn't know the track org) so the track time alone and temperature difference may not reflect the pace I was running. I also almost never took cool down laps.
Further testing on an even hotter day where I got down another half second on my time yielded 275 degree oil temperatures, and for the first time ever high coolant temperatures! Pulling off the track and going for a cool down coast, the car actually burped up coolant! Glad that didn't happen on track...
Others are also reporting temperature problems, such as a fellow talking about issues with his C6.
The folks at Gspeed have a short but sweet video on the topic of C5 corvette splitters and cooling:
To try and combat this, Gspeed clearly recommend doing a forward leaning radiator. I should probably get on that, but the logistics of making that work are fairly involved, but likely inevitable. The major unknown factors I'd need to navigate are what you do for a proper cold air intake with theis configuration, and what can be done to retain air conditioning, as I find it useful for driving to and from track days.
In the mean time I am thinking I could perform some further refinements to the air ramp into the radiator to improve cooling. There's a lot of gaps in there allowing air to escape under the car instead of having to go up through the radiator. Another idea is possibly modifying the bumper a bit more to increase the space which air has to enter. To go even one step further, I could pull the bumper again and further refine the air going to the oil cooler. Right now it's just kind of mounted in there and I can distinctly point to a few aspects of the install that are surely preventing it from being as effecient as possible. I am running the splitter in the lowest available adjustment with the 9LR brackets though so there's nothing left on the table there to increase airflow.
A mention on the affects of brake/hub cooling:
So as mentioned and pictured above, this setup does requires notching your OEM brake ducts and consequently reducing airflow through them.
During the second to last session of the second track day, I started to experience significant pedal travel issues. I figured it was brake fade, attributed it to high temperatures, and then took a nice long cool down. Welp, when I came back onto the track, my brakes remained squishy and required a pump to build pressure back up. Once pumped, the brakes were as strong as usual and could easily lock up all 4 corners of the 315 tires I was on.

Welp, it turns out my front drivers side hub cracked nearly all the way around. This is a known problem with C5 Corvettes, so I can't point to the splitter. I also have 16 track days prior to this outing on here, and two back to back high temperature track days all going CW surely didn't help... but you gotta wonder... would just a bit more cooling in the area have helped?
DIY Splitter Ramps


