Amazon Seats In a C5 Corvette -- At the Track, with C6 belts, and with a 5 point harness
After my first track day, I knew that seats were next in order to upgrade The OEM seat on the drivers side had collapsed on one side and the seats and belts did not keep me in place. I was using my core to significant excess to stay in place along with whatever area of my body I could make contact with the interior and press against. It was tiring, it did not lend itself to positive car feel and in general wasn't ideal.
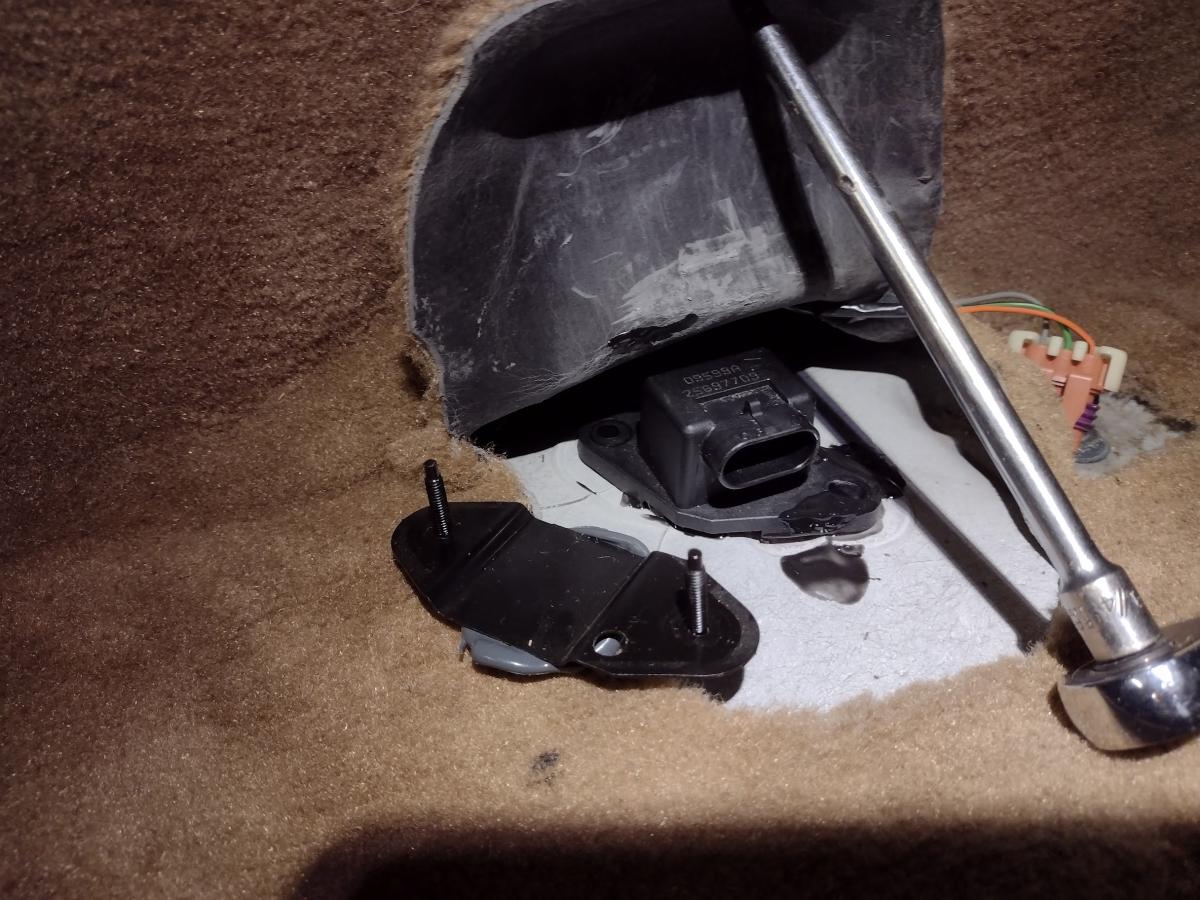
I picked up some seats from amazon and generic seat trays that were meant for the C5 Corvette. A lot of the reviews for the seat tray said it did not fit, and I quickly discovered why when my passenger seat tray would not fit. Come to find out, there is an accelerometer uner the passenger seat rails that the traction control system utilizes. I was however able to account for it by simply removing the glued on bracket it was attached to and simply gluing the accelerometer itself directly to the location where the bracket had been. This gave me adequate clearance to mount the passenger seat.
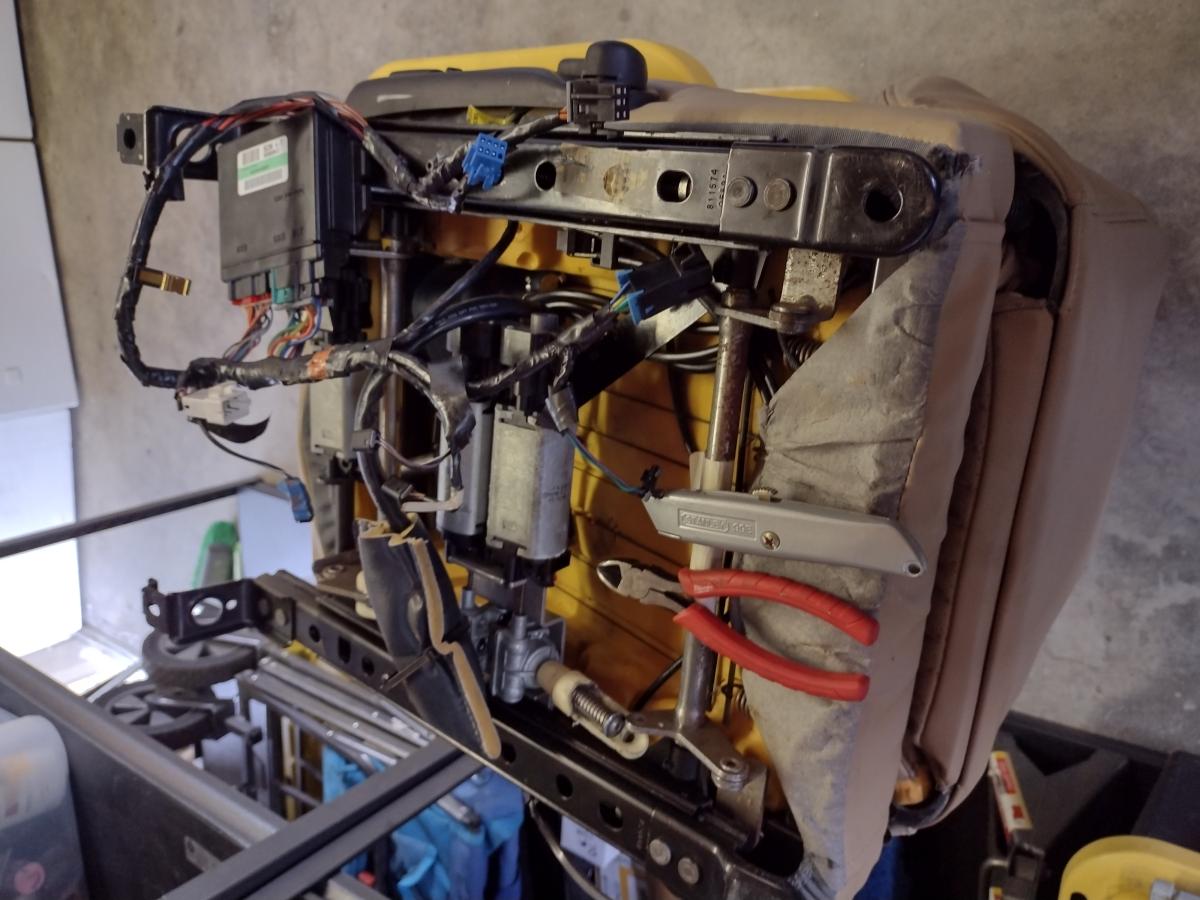
A few other aspects of the seat install were a bit of a headache. A significant amount of cabin controls are handled by the "controller box" under the driver seat. A person upgrading their C5 seats will need to remove all of these from the OEM seat. Doing so is a time consuming and sometimes frustrating process. With the items removed, they need to be secured under the new seats. This will allow you to have your seat belt light off, your interior lights come on when the door is opened, along with if you have power steering wheel you will be able to control it. Some users have also reported issues with battery draining as well when the control box is not plugged in.
NOTE: See later section for improved approach to attaching this all.
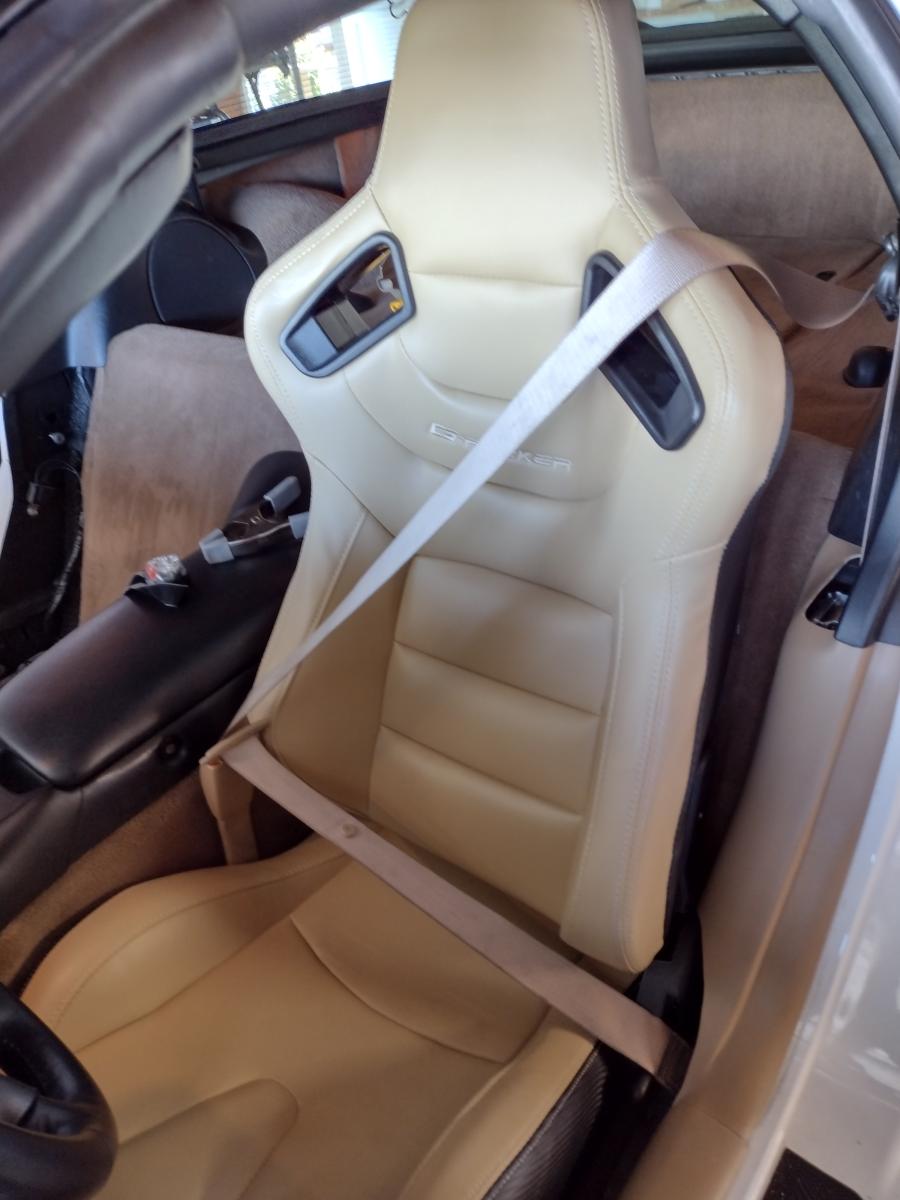
With the seats installed, next up were the C6 seatbelts. Removing the C5 seat belts is fairly straight forward. Where the C6 seat belt install gets tricky though is that you will need to modify the plastic molding along the side of the seats to allow the system to work. You also need to remove a very small amount of material from the C6 seat belt clip to fit into the Original C5 seat belt receiver. With a bit of finagling though, you can get it all installed. The only headache I encountere I was unable to work around was that I had to install the passenger side seat belt with a half twist in it as the C6 seat belt orientation was different.
Some people recommend doing this job with a "seat belt extender" that is already setup with the receiver that will fit the C6 buckle, which is wider than the C5 buckle. I simply took the C6 buckle, took 1mm of metal off of each side and it fit without issue.
Another important detail is that some people route the seat belt through the seat. I chose not to, and not only do I not regret it, but I do not think you would be able to fully retract the seatbelt and thus reset the retractor if you enganged the ratcheting system. Thus I cannot recommend going through the seat!
On the track the seats performed excellent. I was able to ratchet myself in so snug that I was borderline uncomfortable. The hold of the seatbelt was incredible and the improvement of the seats themselves was substnatial. I no longer see myself putting a harness setup in for quite a few trackdays. This has substantial hold, allowing me to have better car control and also retain superior
Overall, I'd call this a must do upgrade! Recognized brand name certfieid seats are of course better, and a harness setup (not 4 point though) is also likely a significant upgrade.
Things I'd do differently if I could do it over again... I would spend the extra money to get legitimate seats that are also certified. Increased safety, along with an improved ease of install.
Running the Amazon / Ikon Motorsports Seats with 5 point harnesses
So, against the reccomendation of nearly all brands... I'm installing sub belt slots into the Amazon seats so as I can run 5 point harnesses with these seats. Yep, I'm taking a risk. It's a calculated risk, in the sense I've researched high and low and I've yet to see a reason why this is a bad idea. The sub belt's purpose is just to keep the belt from rising up and transfering the pressure to your lower organs. A well positioned sub slot bolted down to a solid metal reinforcement has fuck all to do with the seat at this point. I've also not seen anyone quantify WHY it's a bad idea. Plus from what I can tell of al lthe other brands upcharge to add a slot, including Corbeau specifically... they do exactly what I am doing... So... fuck it I already got the seats, if I upgrad seats I'll just re-use the hardware anyways and I can still sell the seats with added sub mounts so... here goes nothing!
(NOTE: Sorry kids, but since this is an ill advised idea, I'm not going to tell you where I got the parts for this, please do not ask!)
I began first by ordering some Submarine Slots. I believe this were meant to go into a UTV seat. Not sure why this is a fine idea in the offroad world but not allowed in cars, but eh whatever.
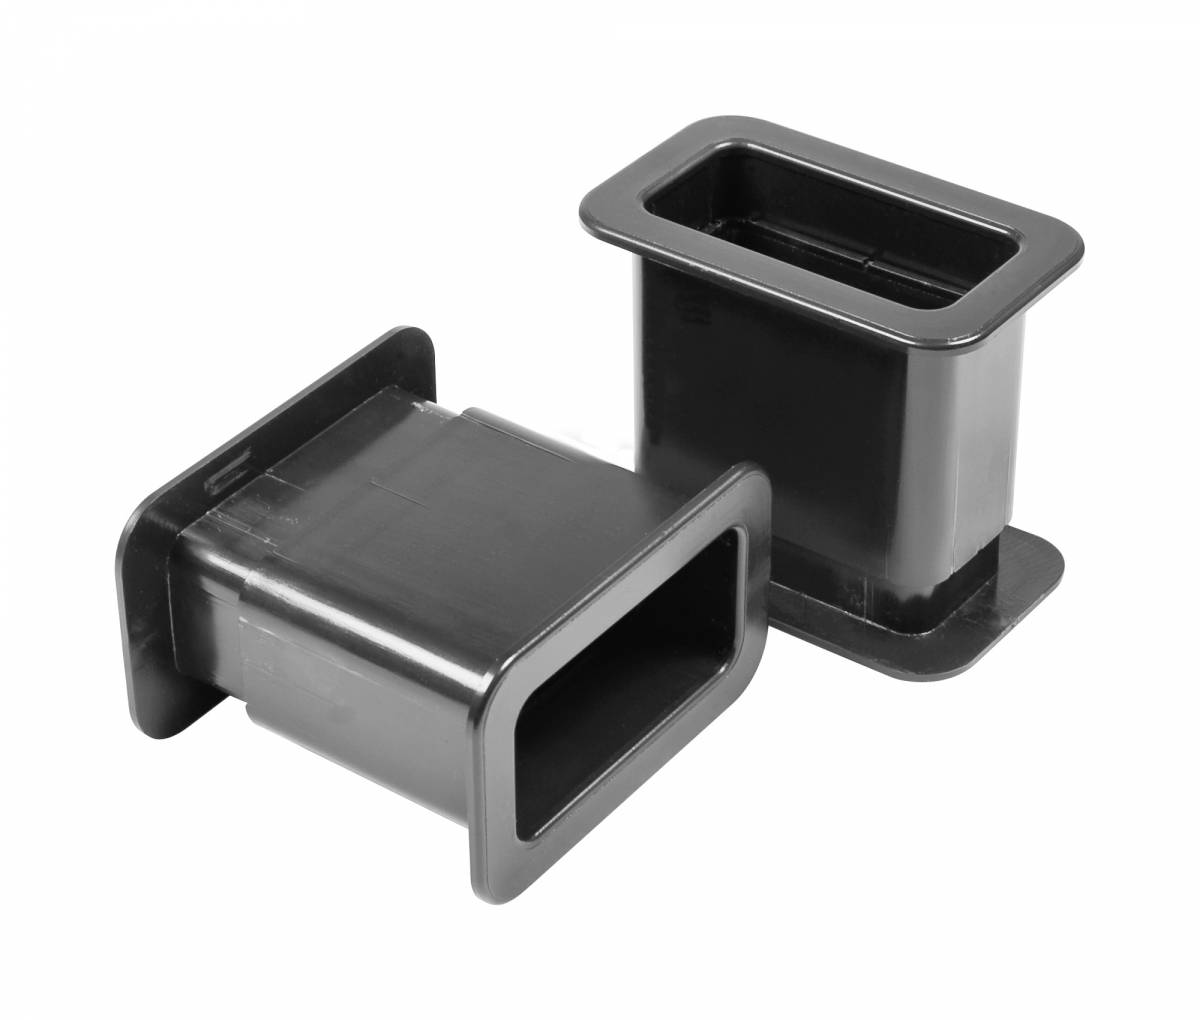
Next up, I sat in the passenger seat and determined where I should run the slot. I cut a hole in the bottom of the seat and inspected my way around the foam to verify this was all possible, and sure enough it seemed fine... so I went for it!


Sure enough... it fit and works. It doesn't look quite as good on the top but... looks are only so important here, we're mostly going for "function", which is a limited concept as well since this is supposedly a bad idea. I mounted the sub belt in a similar location on the other seat and moved on to the next task.
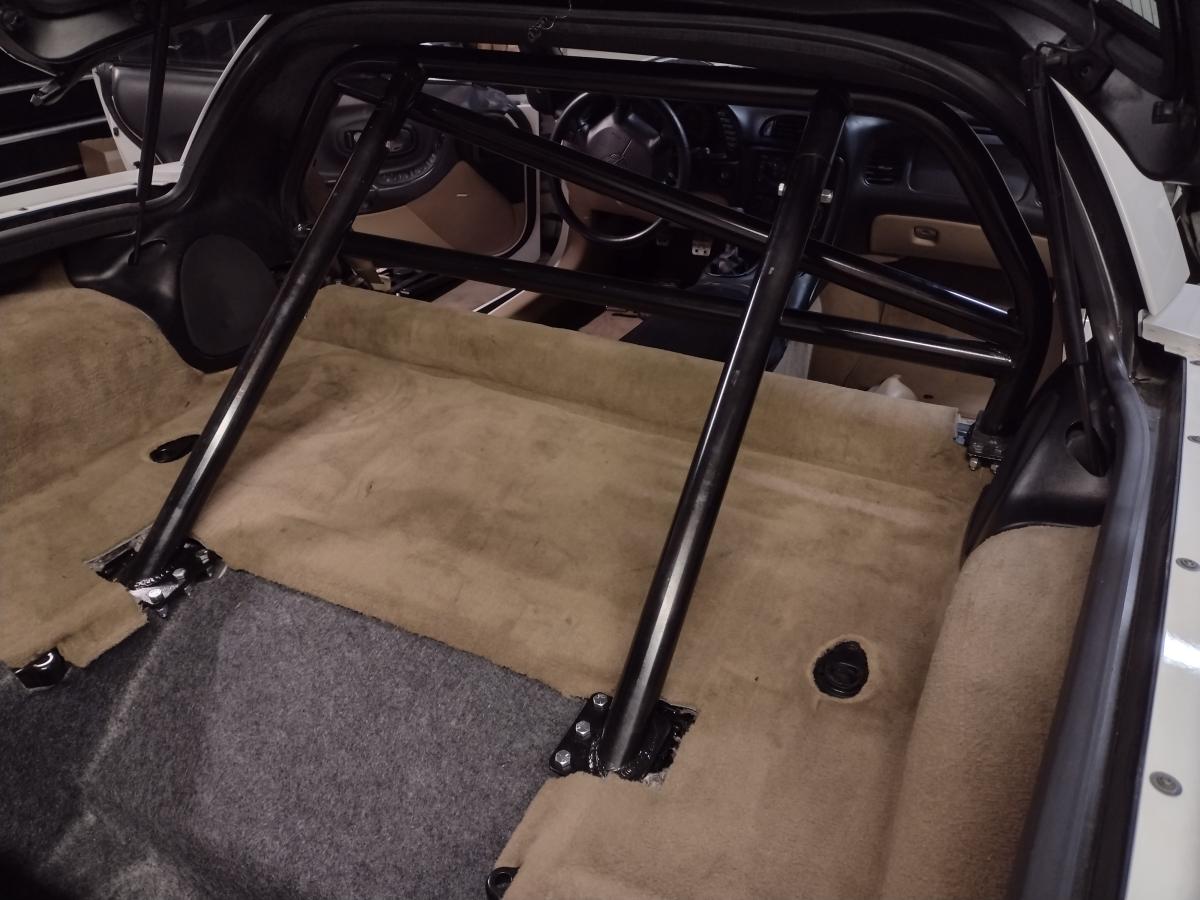
Outside of a rollbar or harnesss bar (I went with the Autopower race roll bar but there are many other options) the next task is to figure out where to attach the lap belts and the sub belt.
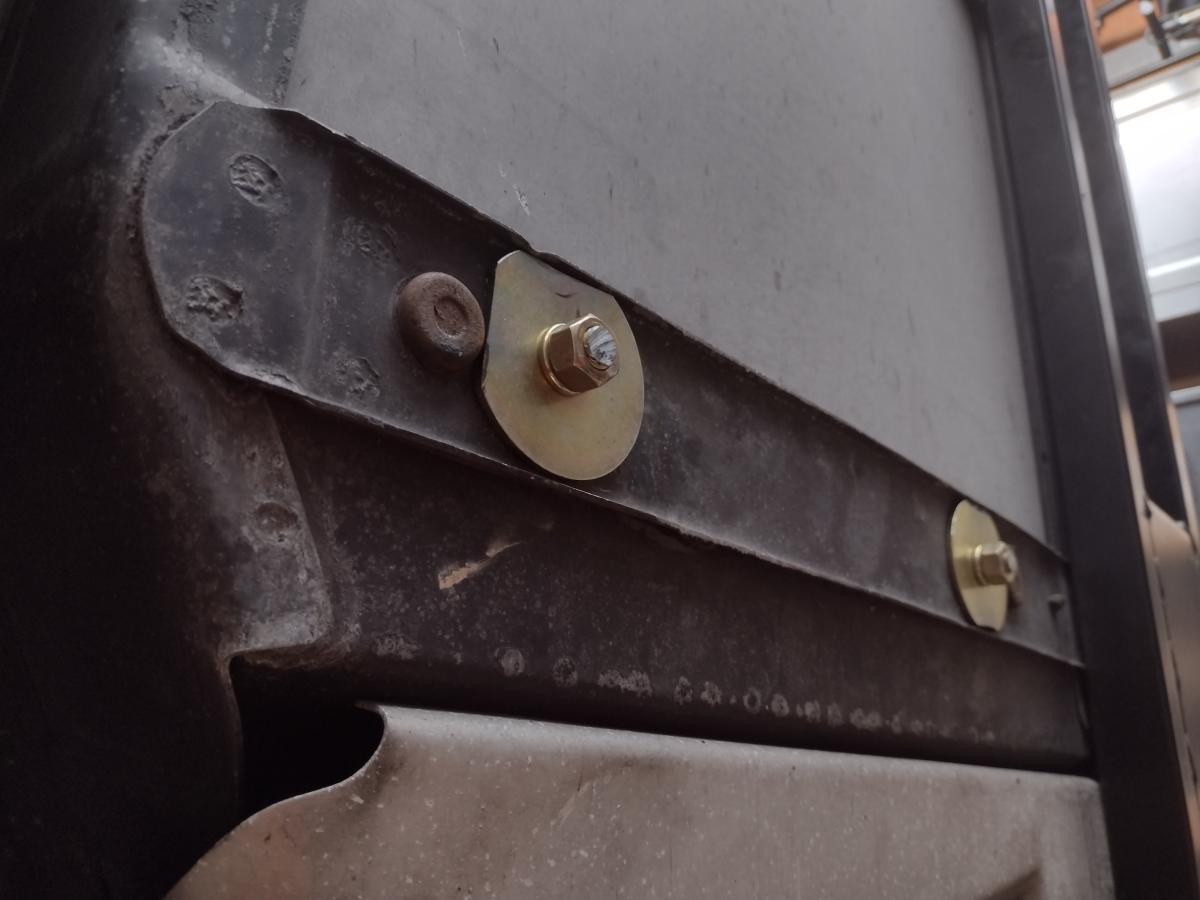
For the lap belts I went beneath the car and found where the OEM bolts for the rear of the seat are. I took the provided fender washers that come with the eye hooks you'll use to attach your harness to, and ground them down as nescessary to fit within the channel that the seat belts are in. I then lined them up, drilled holes, and bolted the eyelets right through there. This placed my eyelets just inside of my seat mounting bolts with no interference of anything. Reviewing a popular C5 corvette lap belt bar I feel pretty confident that this method of affixment is as strong as this product if not superior.
The sub belt affixment was a bit more interesting. In my case, I had utilized a specific low mount seat bracket that had a front cross member perfectly positioned for the sub belt. I drilled into that, and it lined up rather perfectly with the sub belt slot!
(I forgot to take pictures of the sub belt mount, so pictures to come next time I remove the seat)
With a sub belt and lap belts in place, all that remainder were the shoulder straps. These I wont bother documetning here in any special format as your choice of roll bar may vary along with the method for attaching them has no unique aspects to the C5 corvete. Just wrap up as you should with the correct length and you are in business!
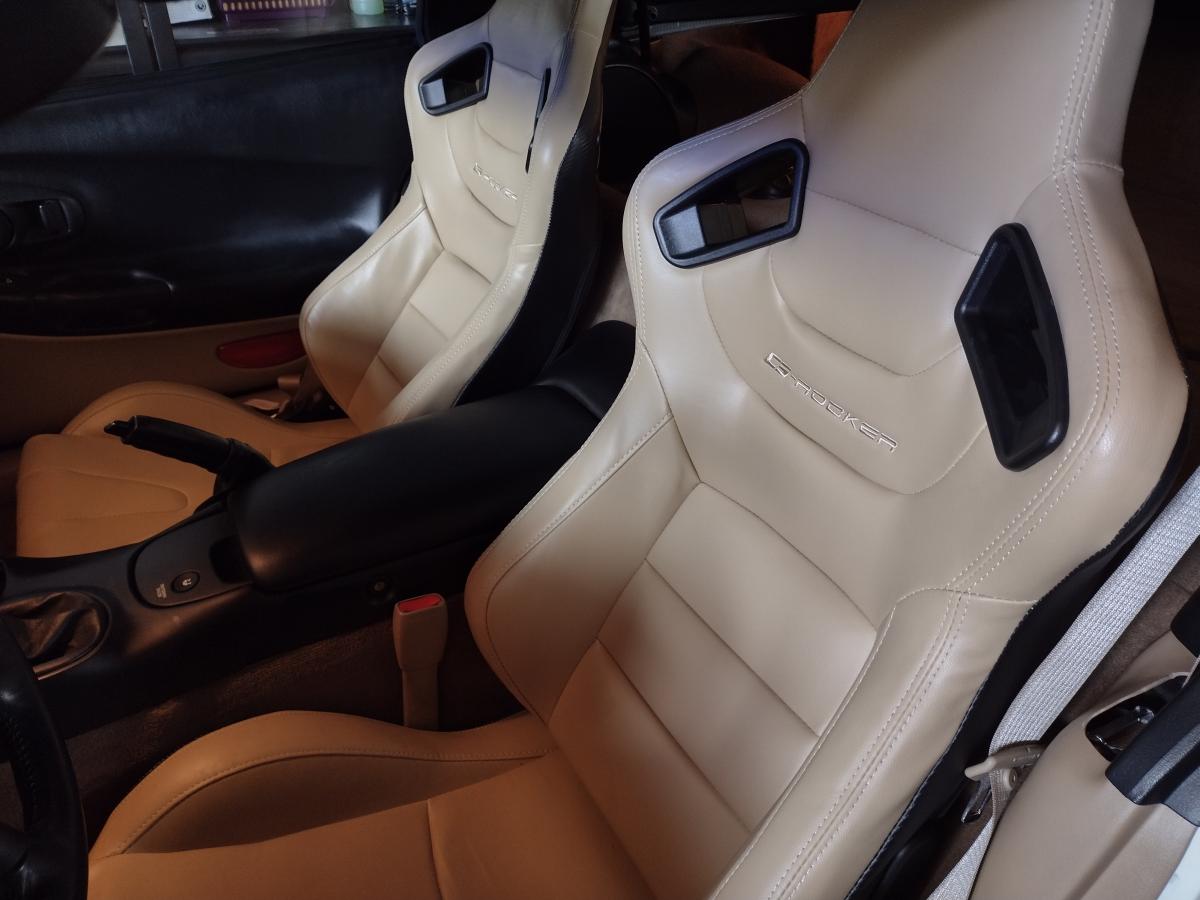
Here's what my C5 corvette looks like with both sets of 5 point harnesses in place!
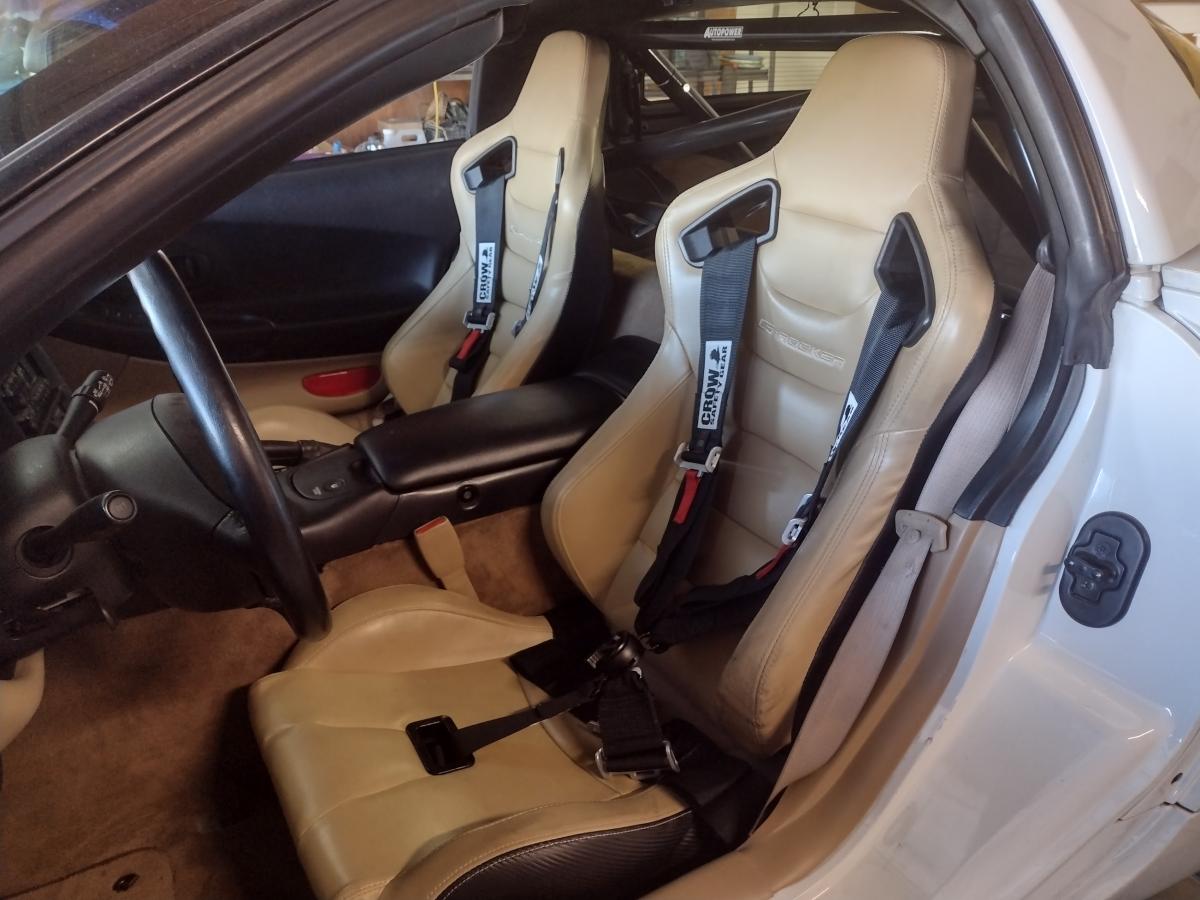 Note that these are mostly removable to get out of the way for street driving. The shoulder harnesses just fall below the seats, the lap belts are removed and stored in the rear, and the sub belt just sits out of the way.
Track Review with 5 point harness and HANS:
I was able to take this setup out on the track and test it out, and it worked great. I was able to secure myself in quite snuggly, and with myself being entirely bolted down to the steel at every attachment point.
As far as driver comfort/control, this was a big step up from the C6 seat belt, which was in itself a huge step up from the C5 belts. I found I was often still bracing against the car with my body during heavy deceleration or cornering, and I had to remind myself to trust the harness would keep me in place and focus on the controls and driving. I believe with this setup I am not only safer, but I will be able to improve as a driver as I am able to use my body to control the car more instead of using it to keep myself from moving all around the car.
I feel pretty safe about this seat and the 5 point belt as well. Some will naysay the safety of this seat, and apparently nobody recommends the sub belt.. but I've yet to see any evidence to the contrary so it seems to be more parroted lore than fact. The only story I've heard of these seats being an issue was from an individual streeting a 4point harness incorrectly.
The HANS device took some adjustment time both literally and then personally. At first the device was too restrictive and I couldn't look through turns at all. Once I set it up so I had a little bit of head mobility I was able to look, but not as far as in the past. There's definietly some compromise there.
Overall, I endorse this combo, and will continue to use it. It's streetable car, and this combination let's me doing everything I want.
Seat Control Module Affixment Revisited:
So having now lived with the aforementioned work for a while now, one thing that was a pain in the butt was the way the power control module fit under the seat. Prior to the 5 point harness, the wiring under the seat would occasionally catch and resist sliding forwards and backwards. This was bad both for seating position, and in general as it meant I was putting a lot of force into the wires which would inevitably fail. Once I added the 5 point harness though there was simply too much in that area, and the slider issues became a lot more common.

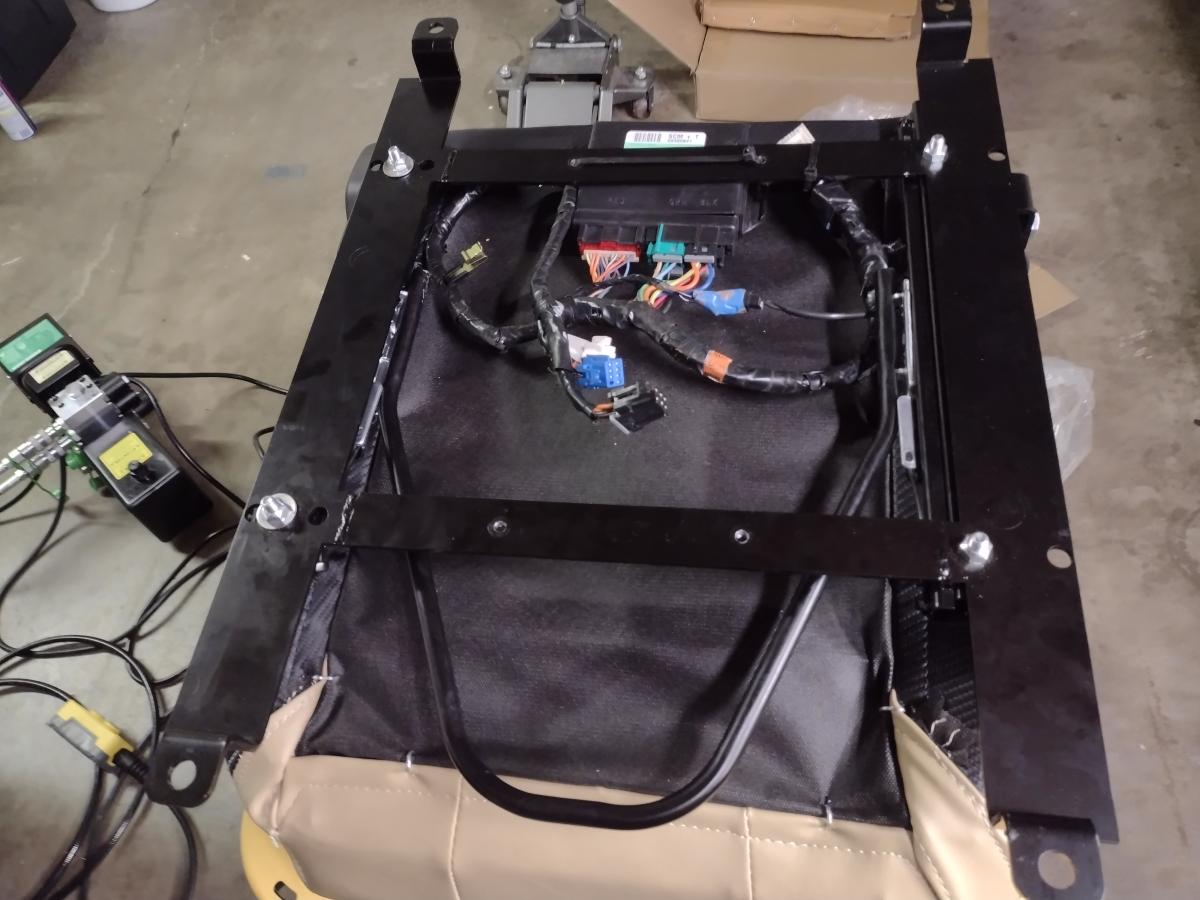
I began with removing the power control module, and marking all of the connectors I would need to keep. Then I cut off the connectors I did not need, and traced the wires back to the other connection. Using a variety of tools, I removed the wire terminals from the connectors, thus entirely removing the wire. Doing this let me trim the amount of wires down massively.

With the wiring all cleaned up, I then mounted the seat control module behind the carpet behind the seat. As you can see in the picture, I temporarily installed this using Gorilla tape while I research if those raised ribs are okay to affix the control to. One area of concern with drilling there or using self tapping screws is directly behind that is the GAS TANK, so I'm not going to mess around.
One additional modification I did was lengthen the seat belt connection. This was the one connection that simply has to go to the seat, there was no way I could fathom to make it removable. Still, with the additional length it was easy enough to install with the seat and now there are zero issues with the seat slider in the car.