C5 Corvette - DIY Accusump for Extra Engine Survivability

Article Sections:
- Backstory
- Why Get An Accusump?
- Development process
- Parts List and Installation Steps
- Track Testing & Data Driven Results
Backstory
It all began with the very common question many C5 owners have "how do I keep this car alive as long as possible".
The plan: Keep the car cool, keep the engine oiled, and focus on handling long before power. I've been following that approach from the getgo on this project, and since just before my 13th event I decided it was time to add an oil cooler for keeping things cool. The thought then crossed my mind... why not at the same time add an accusump to keep the engine oiled?
If you've been reading my articles for a bit now you may remember that my original article on doing a DIY oil cooler setup on your C5 Corvette included plans for putting in an Accusump. I was adding the oil cooler to help keep the car alive for as long as possible, and an accusump seemed like a fairly adjacent part to add even more safety margin to the setup while I was already in there. I had plans to mount where the windshield washer fluid reservoir was (see picture above), and hoped that somebody with a 3D printer and scanner would collaborate with me on designing something for this up. I know when I have the skill and know how I enjoy working with others... but alas most folks aren't like me and don't want to spend their spare time on other peoples bad ideas... which to be fair most folks they have plenty of bad ideas of their own they can barely find time for... so it is what it is.
Fast forward a few years and a 36 of events later... I've got a car that is winning time attack events and setting SCCA class records, and as I'm upping my competion level I'm now looking at more and more grippy which will tax the wet sump system even further. Luckily,I've leveled up my CAD skills and designed my own chassis mounts using said skills. I also finally ditched my ridiculous SLA (resin) 3D printer in favor of a Bambu 3d printer and then got an even bigger badder Bambu 3d printer. tires and... it seems like now is the time to take my increasing skills and needs and figure out how to add an accusump!
Why Get An Accusump?
So what even is an accusump and why would a person get one? Here's my short explanation:
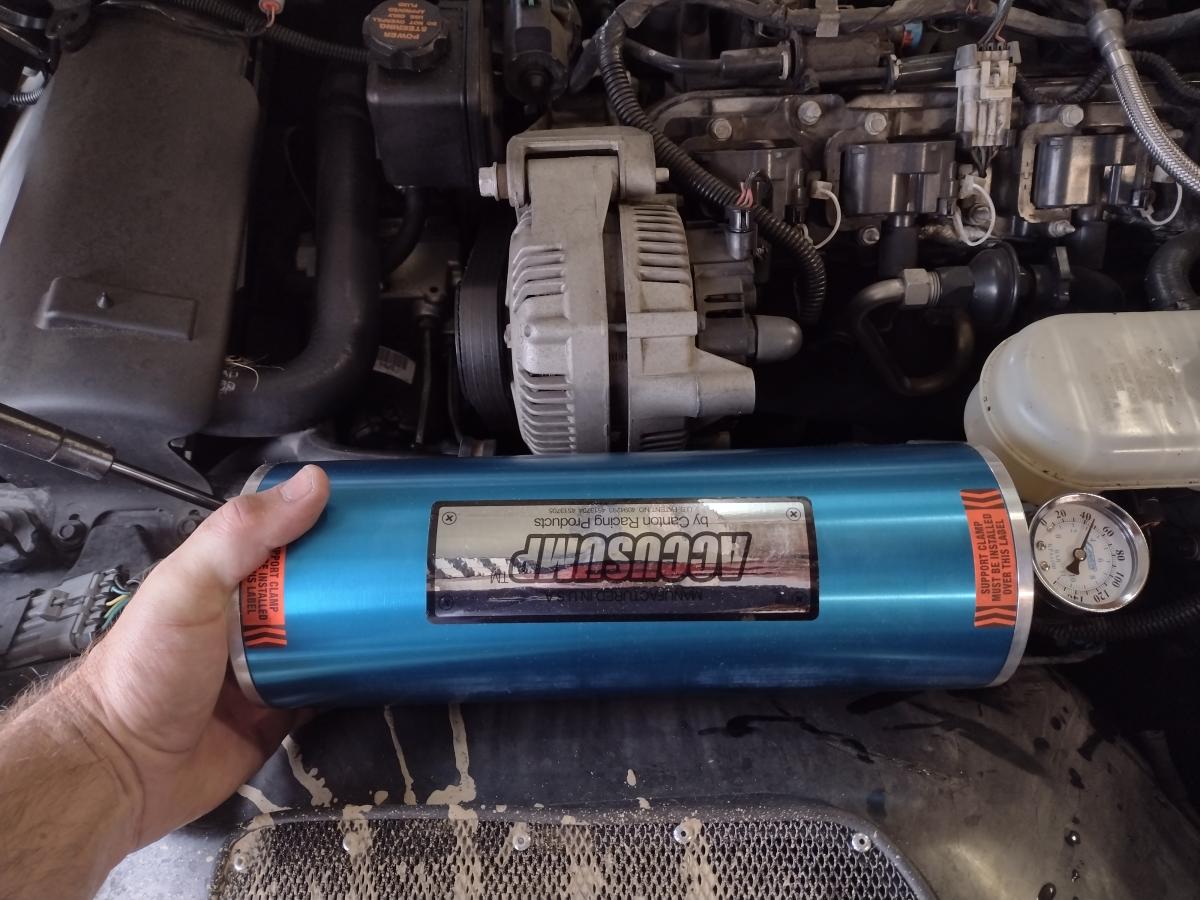
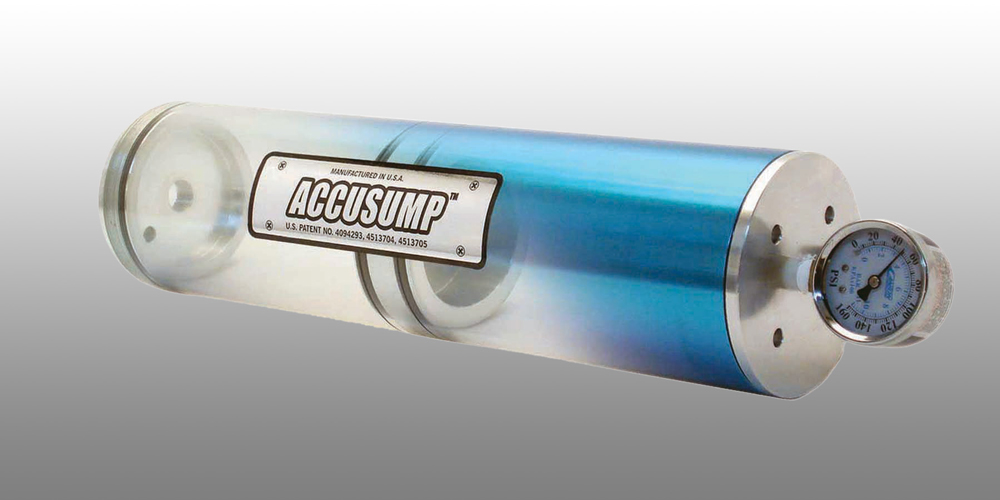
An Accusump is a cylinder with a piston in the middle. On one side of the cylinder you connect your oil system, the other side of the cylinder is sealed and only has air. Your oil system will fill the cylinder with oil, compressing the air on the other side of the piston and increasing the pressure there. The cylinder will fill with oil and compress the air until the air matches your systems oil pressure. In the event oil pressure drops such as oil starts to slosh away from the oil pump pickup, the air pressure on the backside of the piston will shove that excess oil back into the system, giving you a buffer against oil starvation in situations like hard cornering or heavy launches or should oil pool in the upper regions of the motor and not be returning in time to the oil pickup.
You can also get the full story from the company itself as interviewed by High Performance academy:
Now I'll openly admit, there's a lot of opinions floating around on these from different folks. Ive literally had conversations with groups of folks and had multiple people tell me these are worthless while others swear up and down they're amazing. Some folks even call these "a bandaid on a bullet wound", or "addressing the symptom, not the problem"... and there is some truth to it all.
Where the accusump is a bit of addressing a symptom is that in order for the accusump to be of much value, there needs to be a drop in oil pressure at some point. That means something is going amiss. There are many solutions folk use for this like baffled oil pans, dry sump configurations, etc etc. Heck the C5 Corvette specifically has it's "batwing" shape to help keep as much oil as possible by the pickup under notable lateral or longitudinal loads. So in the end accusumps don't cure problems, they make it so the problems don't matter... but you still have a problem... but given that any system can have a problem... why not have something that eats up small problems?
On my Corvette, I don't actually have an oil starvation problem that I'm aware of, knock on wood. However, I may start to find it as my pace continues to increase and I start to setp up into more aggressive tires like the new Vitour 100TW offering. When the situation comes up where I need an accusump... I'd rather have it already than discover I wish I'd gotten around to installing the damn thing.
PLUS there is one added bonus to mention with the accusump... engine pre-oiling. Ever notice how you turn on your car and it takes a moment for oil pressure to build up? Cold starts are some of the largest sources of wear on an engine. With an accusump however, you simply open the valve prior to startup and you've got pressurized oil already on it's way through the engine before it even tries to turn on. Nice little bonus huh?
So is an accusump as good as a 5 stage Daley dry sump system or newfangled baffled oil pan offerings some companies are coming out with? No probably not... but they are a reasonable part of the system that may just help increase your long term reliability should you ever find there's a limit you didn't know you C5 Corvette had.
Development Process
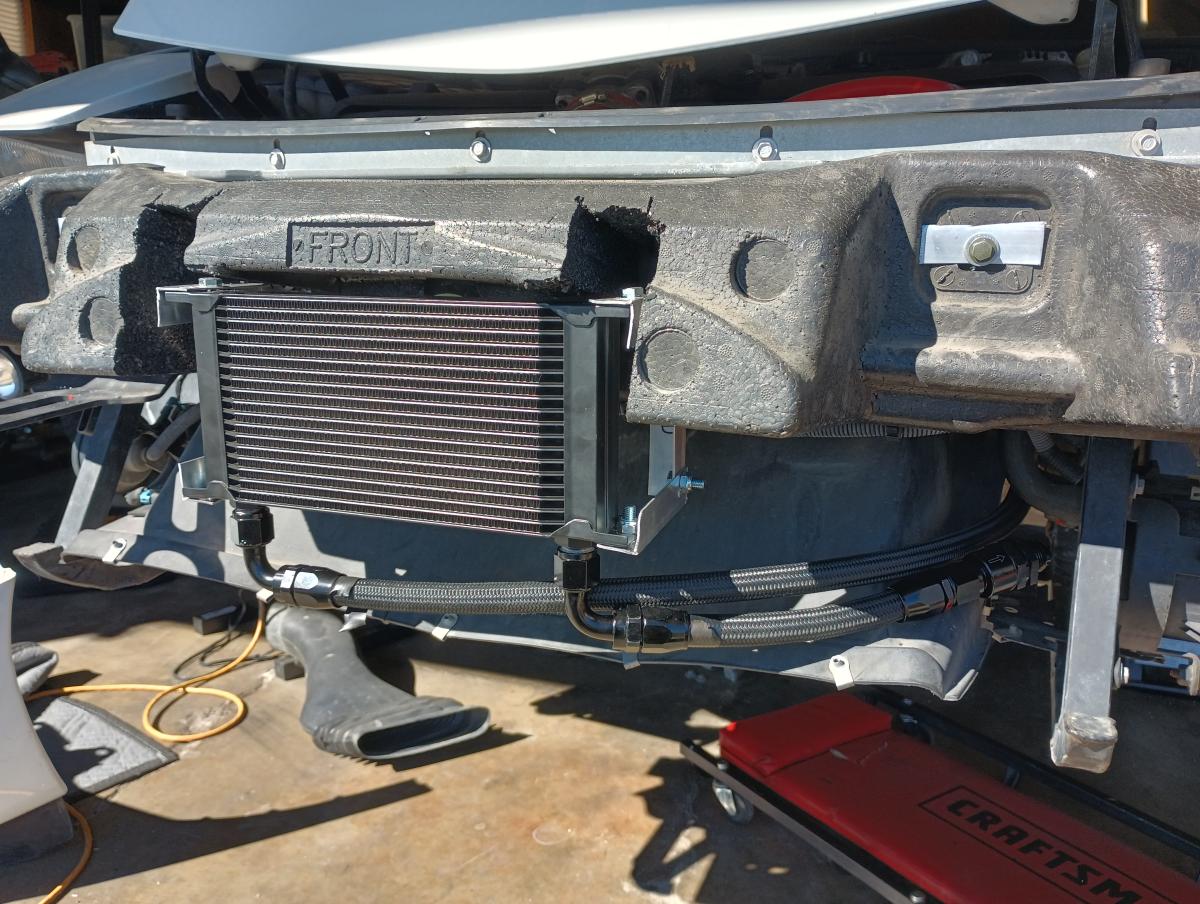
So I've already got an oil cooler setup. Most folks tracking a C5 Corvette seriously will want some sort of oil cooling, whether it's integrated with the radiator like Spec Corvette stuff does or they're using my front mounted design or any of the other various offerings out there. Assuming that's the case, it is fairly safe to design this mount around the assumption that a person interested in this will have some sort of forward oil cooling setup with a "send" going into it, and a "return" coming off of the oil cooler.
The plan then is to put a one way valve on the return side of the oil cooler first and foremost to prevent back feed, I can then add a T fitting somewhere down the line which will branch off to the accusump. Thus if oil pressure drops, the accusump won't backfeed through the oil cooler, it'll just focus on getting oil to the motor. From the T-fitting I can also put an electric ball valve mechanism which will allow me to turn the accusump on and off from inside the cabin.

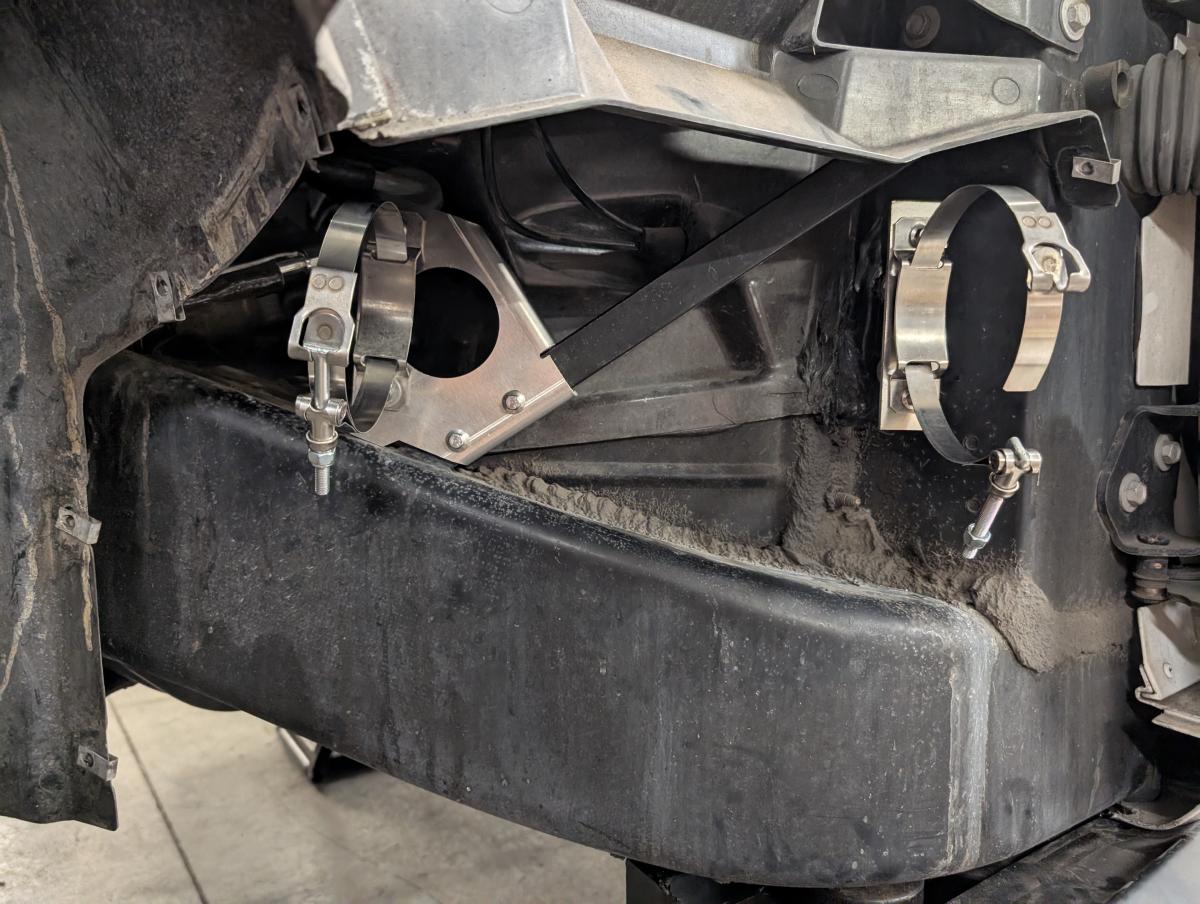
Now as mentioned way above, my original planned location of the windshield wiper reservoir wasn't going to fly... but a fellow had told me they had success putting it in the rear fender cavity, and sure enough, there's a fair bot of space here! I've seen several installs now that work in that space, many with interesting orientations. I went with the above orientation as it fits well enough and there are structures to easily attach to.
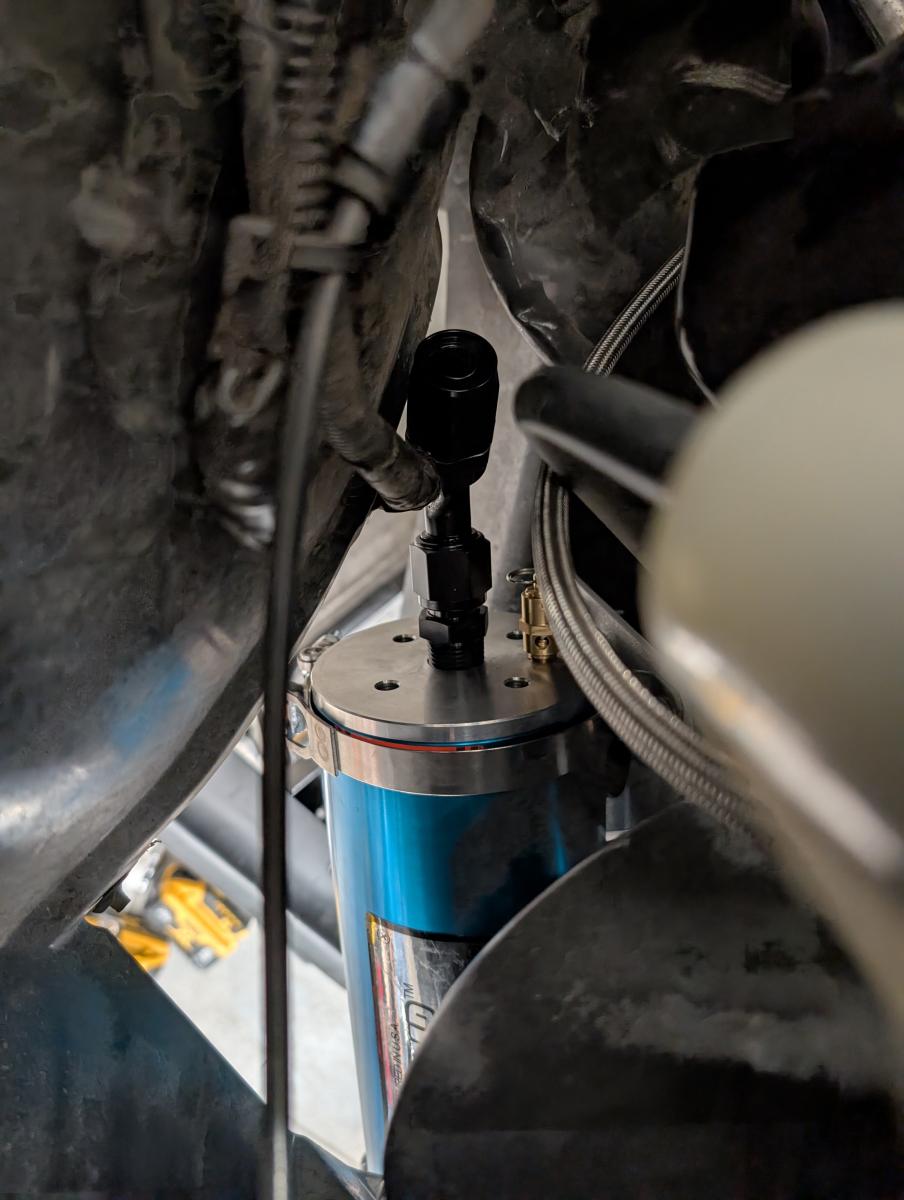
Not only is there a fair bit of space there, but the output side of the accusump has a fair bit of space as well. The space afforded to this install from this location will allow you to route an oil line out and along the frame, safely away from the headers and in general giving it a well protected location.

Another benefit to this area is that there are two exceptional locations to tie into for mounting your accusump. The first is pictue here, where the firewall and windshield structure is ties into the frame via this square tubing. A little bit of design in OnShape later, and I've got a sheet metal piece designed up that I can have made out of 1/8" aluminum, and I was also able to test print and confirm the location.

The rear bracket is a bit hard to see, but it connects to the chassis via a bracket that mounts under two bolts that help attach the firewall and windshield upright structure all together. This gives us a very strong location to tie into, and we were even able to make all of the bolts involved in this process accessible!
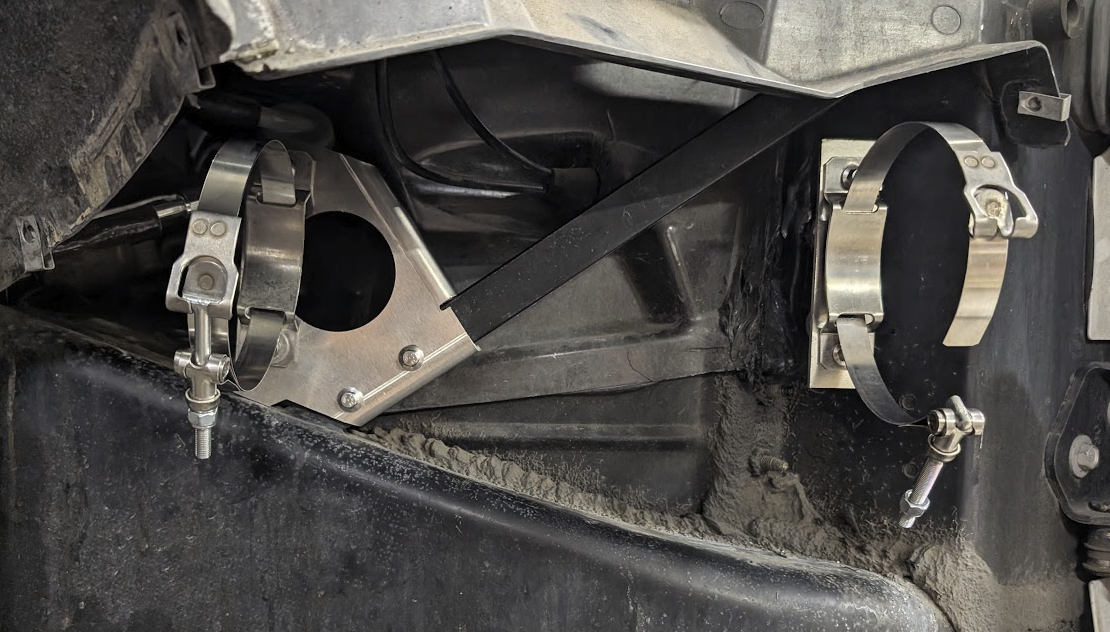
Here is a picture of the final aluminum brackets from SendCutSend in place all designed up and attached along with the band clamps that attach to the actual accusump in place. The left bracket is held in place by 2x M6 rivnuts through that square tubing piece for ease of removal and reinstallation.

In the end this gives us an exceptional place to mount everything up and we've got brackets that can be reproduced endlessly by SendCutSend to allow YOU or anybody else who wants to copy what we've done to do so! Mounted it looks just like above, with great
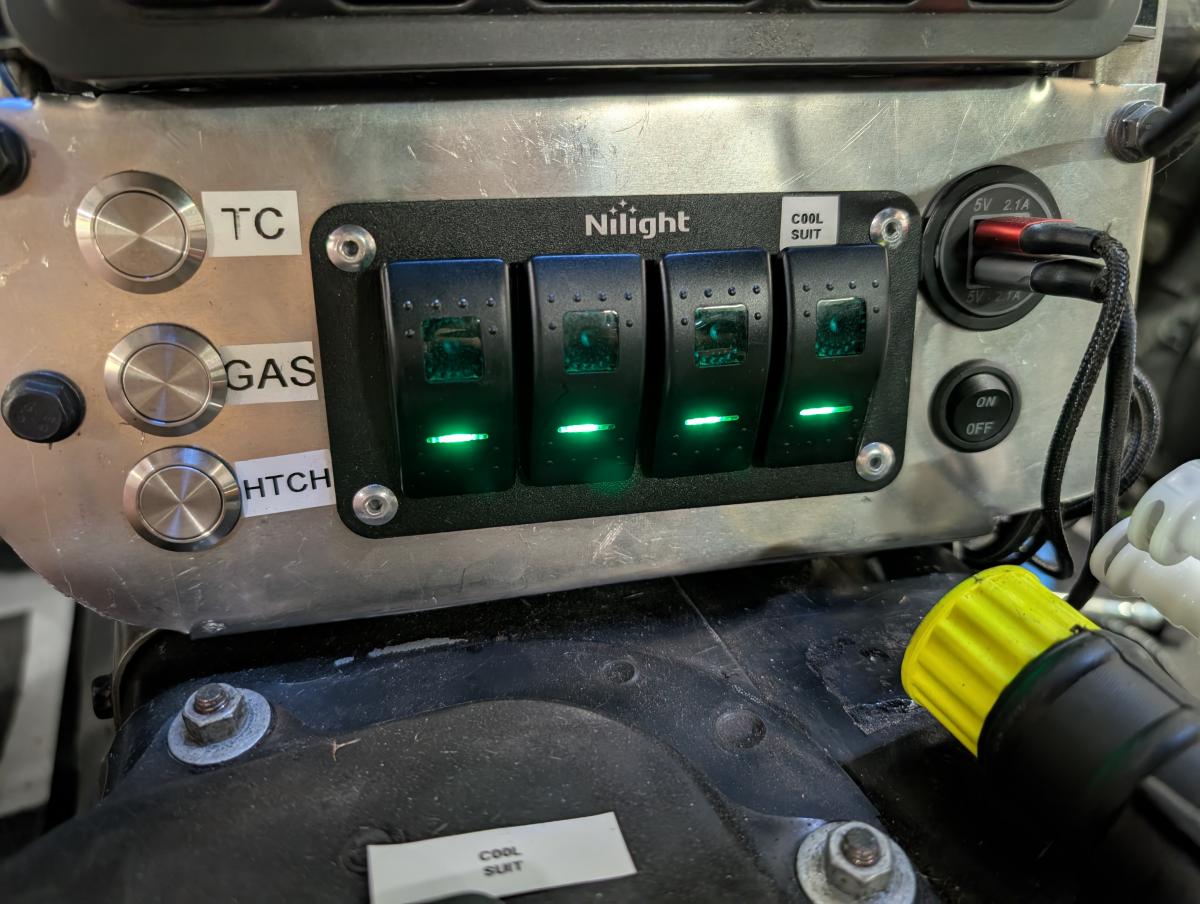
One thing we already had going on was some switches inside of the car. We took the 12v constant for the radio (which we don't have anymore) and brought it into this area and then connected that up to our switches. Now what switches you use, where you mount them, and how you get them power you will need to navigate, but here's how we went about it, and not only does it allow us to have accusump, but our cool shirt is on here and we have two spots remaining for transmission and differential cooling!
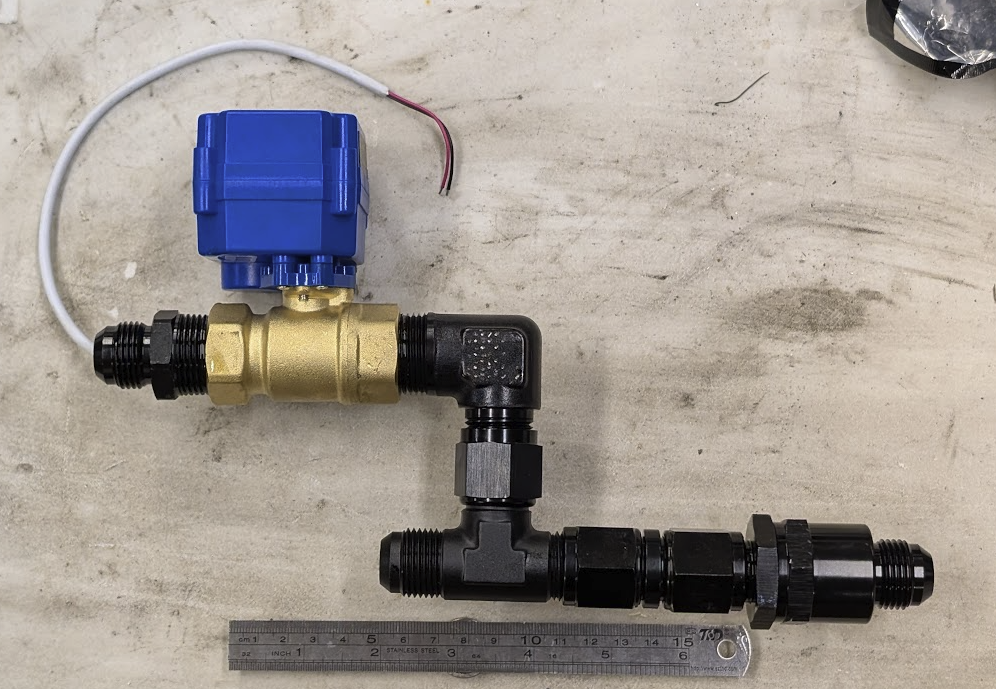
With the accusump in place and an oil cooler already plumbed in, you'll need a way to integrate the Accusump into the system. Enter, the Accusump Charge Manifold (A $1000 name for $60 of parts). The system picture above is actually oriented "backwards" from how I will mount it, but the jist goes that from right to left: Oil enters into a one way valve, connects via a female to female adapter to a T fitting, which has a female connection on time. The top goes up to a 90 degree fitting which is attached to an electric ball valve setup. The electric ball valve goes ontwards to the accusump, and the other end of the T fitting goes onwards to the engine return.
This design means that in the event oil pressure from the motor drops, the accusump will push it's pressurized oil into the system, but not possibly backfeed to the struggling oil pump through the oil cooler. The electric ball valve also allows the driver to easily turn on or off the accusump from the comfort of their car, making it easy to pre-oil the car on startup or to build up pressure and then shut off prior to turning the car off.
Parts List and Installation Steps
- Accusump (2qt)
- Accusump Mounting
- Brackets I designed and Used made by SendCutSend
- Accusump Mounting Bands (AKA Cable Clamps)
- Accusump Manifold Mounting Bracket
- NOTE: Only tested on my C5 Corvette, cannot guarantee it will work on yours. Reach out to me if you want to try the same bracket and I can perhaps mail out a 3d printed test template for you to try out!
- 10 AN Braided Line
- Loctite 545 - Hydaulic Thread Sealant (essential for sealing many fittings)
- AN fittings
- 10an Fitting (1x female, 2x male)
- 3/4" NPT to 10an (2x needed, sold as a 2 pack)
- 3/4 NPT to 10an 90 degree fitting (1x needed, sold as a 2 pack)
- One way valve 10an to 10an
- 10an Female to Female coupler (1x needed)
- Hose ends (4x)
- 1x 45 degree 10an hose end worked good for me on the accusump side.
- 3x straight 10an swivel hose fittings worked best for me, but come in 2 packs so you'll wind up with an extra.
- Electric ball valve (Brass is fine to preferable)
- Switches
- I used these 4 switch panels
- Any will do - I recommend GREEN lighting like I as red to me indicates an issue, green is good to go!)
- Wiring (Any Simple wire and wire loom will do)
- Tools
- Rivnut Tool
- Koul Tool for AN fittings (will make your life easier)
- 3D print your own if you want to.
- AN Wrench
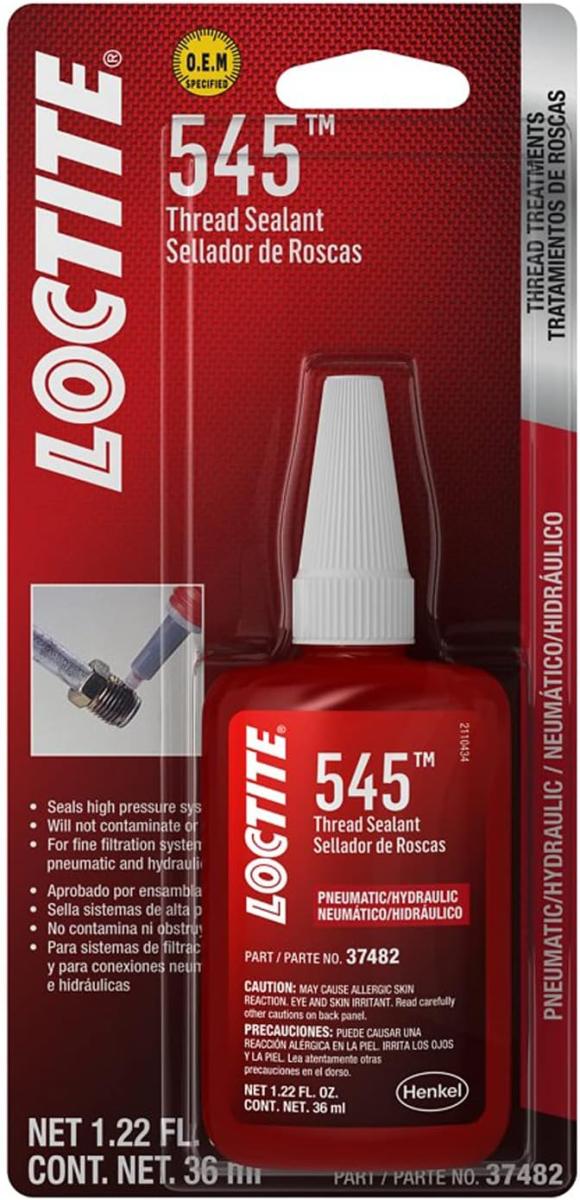
CRITICAL NOTE: You will need to utilize Loctite 545!!!!
Assemble anything that isn't an AN fitting with a fair bit of this on the threads... or come to regret it later. Also double check that all fittings on your accusump are actually in place, as I was unfortuante enough to discover that the pressure release for my accusump only came finger tight from the factory and did not possess any thread sealant on!
Installation Directions:
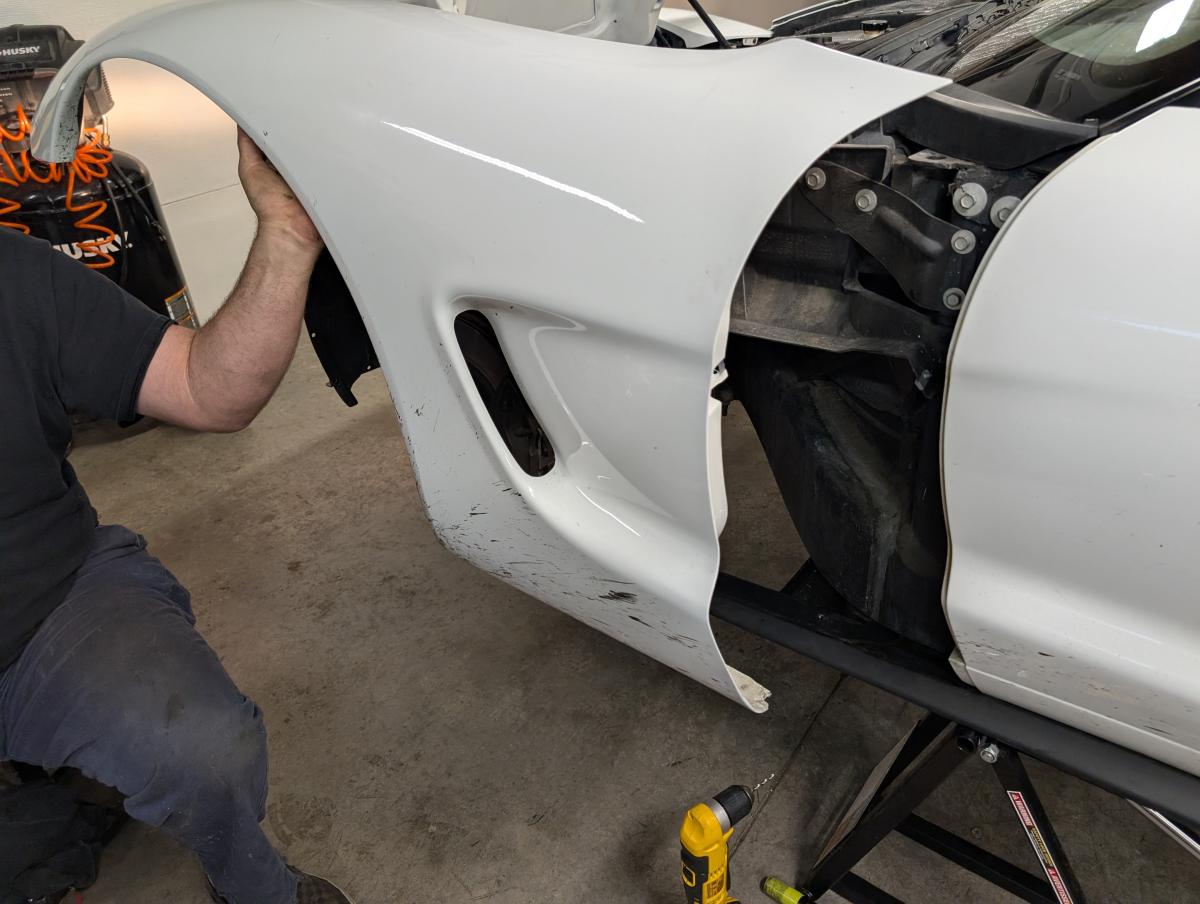
First you'll want to remove your front bumper, and front fender. Most folks willl immediately find this intimidating, but I assure you with patience and plenty of time to work on the car you'll make reasonable work of the removal and reinstallation.
This video has some helpful information on pulling the fenders.
Next up, you'll want to prepare the accusump mounting brackets. The rearward bracket is pretty straight forward, just attach your accusump mounting band directly to it, remove the two chassis bolts and install it. Easy peasy.
The most forward bracket does require just a bit more work, but not a ton. First, test fit it to location. Then, mark where the two rivnuts will need to be added. Pull away the bracket and then drill and place M6 rivnuts in the holes. Attach the band clamps to the bracket and bolt the bracket up to the two band clamps. You should now have an entirely ready to go accusump mounting solution!
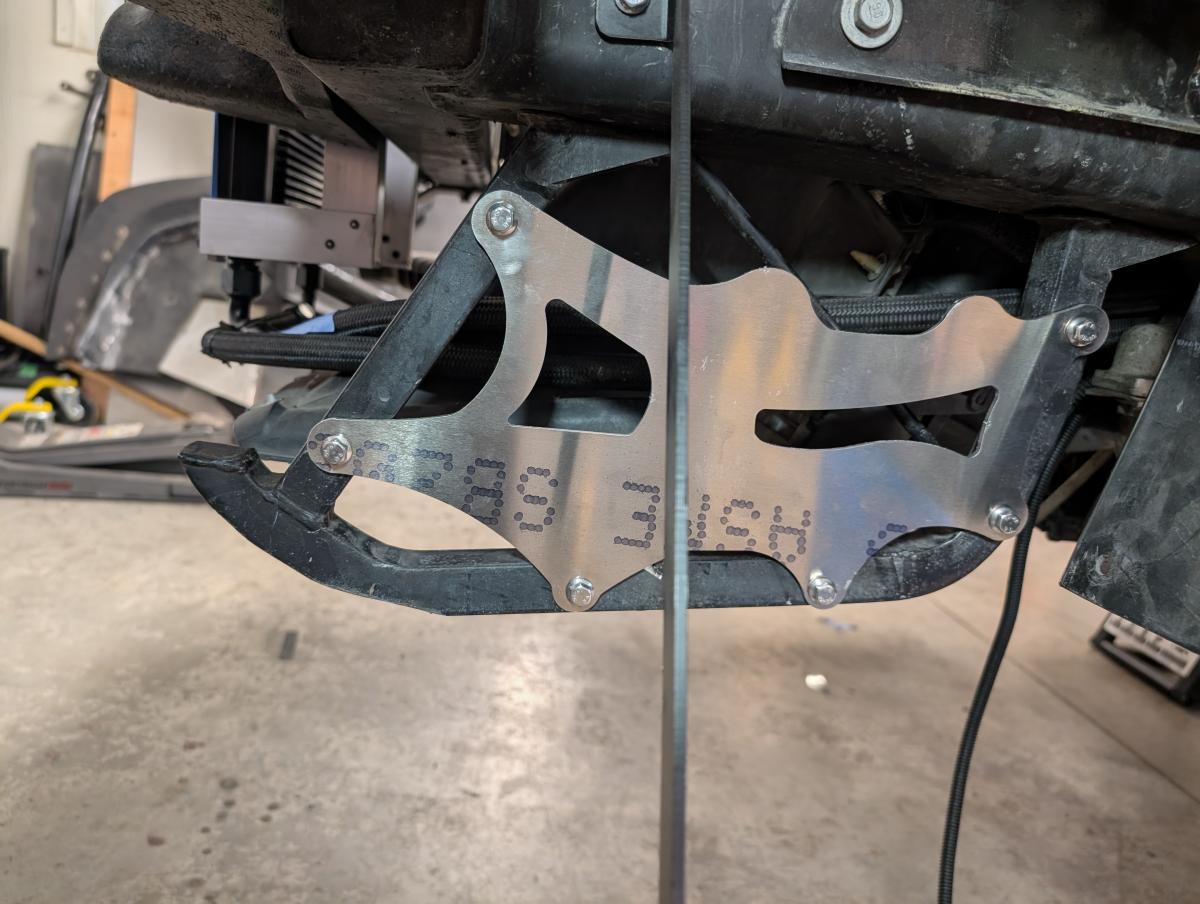
With the accusump mounted, you'll need need to assemble and place the accusump manifold. I've designed up a mounting solution that goes up front where the air injection system is. The vast majority of folks remove this system from a track going vehicle, so I'm going to assume yours has been deleted as well.
The manifold bracket I designed will mount up to several already existing factory locations on the radiator mount, but several additional M6 rivnut locations will need to be placed that match the pattern on the bracket. Mount the bracket up where you can, draw the remaining holes for rivnuts, and you're in business.
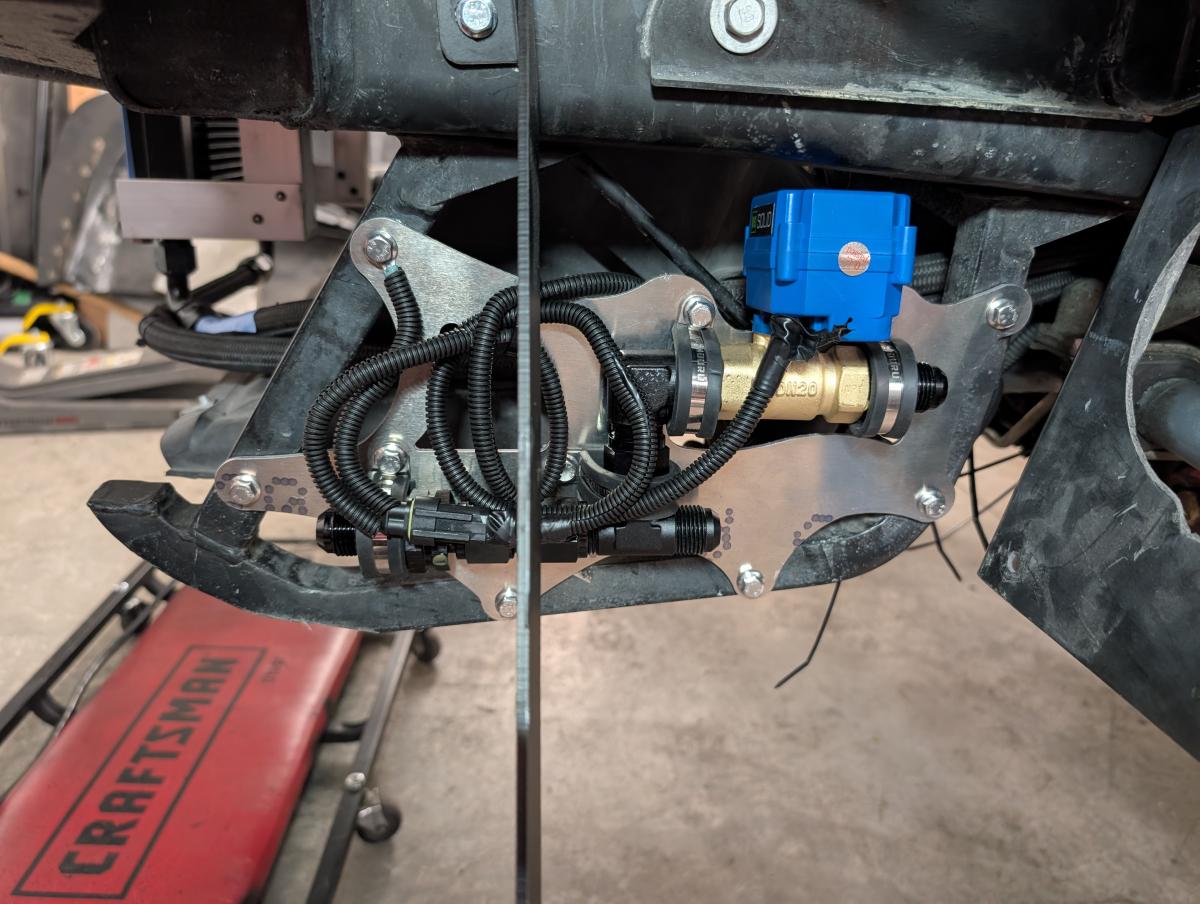
With the manifold bracket now able to attach to the radiator support, remove the bracket, and on a workbench place the manfiold on the bracket where it will be attached. You'll now want to attach the manifold to the bracket utilizing the rubber hose clamps. Put a clamp on the manifold first, index it's affixment holes to the bracket, drill a hole and add an M6 rivnut. Then bolt the clamp to the rivnut location... and rinse and repeat until the manifold is fully supported.
With the manifold now attached to the bracket, re-attach the bracket to the radiator support. Now all you need to do to complete the plumbing in of the accusump is build the remaining AN lines to connect from the output of your oil cooler, to the input of the manifold, the output of the manifold returning back to the oil cooler adapter, and a line between the ball valve output and the accusump.
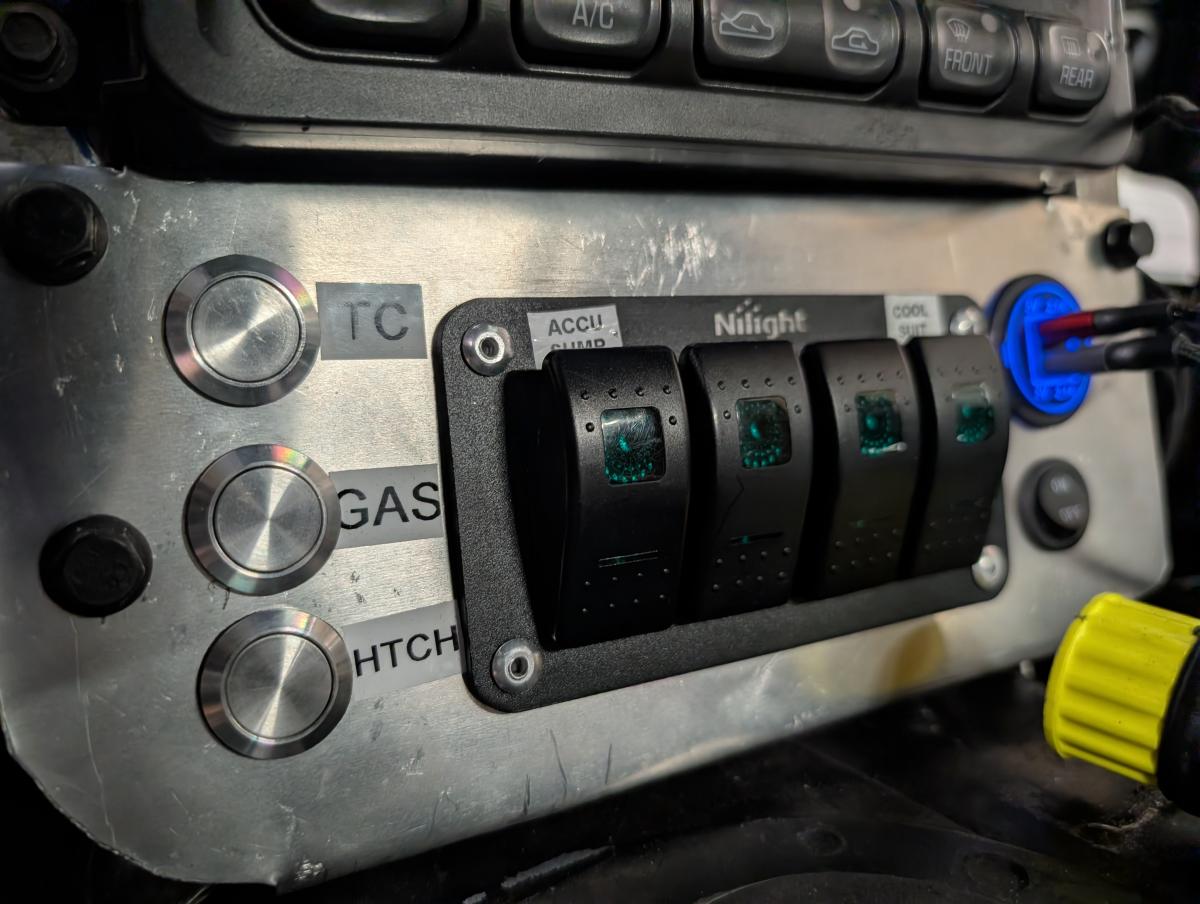
You'll need to wire up the ball valve to a switch somewhere easily accessible to the driver. In my opinion you'll want to plan for future expansion and give yourself a few extra switch spots... as you'll likely wind up just like me. Whatever the story though, make sure you have 12v constant (not ignition switched) to your switch, going onwards to your ball valve. The ball valve is a very low power draw, so no need to add a relay, Test that the switch actuates the valve, which should make a very obvious sound opening and closing. Power to the valve results in it being open, remove power it will close.
If you're wondering "Well just where do I run this through the firewall exactly?!?" well there's the factory wire pass through just behind where the factory battery mounts. If you've got a full dash still... you'll need to get under there and it may be a bit of a headache. Some "fishing" line like electricians use to get line through walls will help, just be smart with it so you don't damage anything!
At this point you should have everything. All of your connections are in place, the ball valve is in place and working... now it's time to add oil to the system and make it happen! Start with the accusump valve CLOSED by the way.
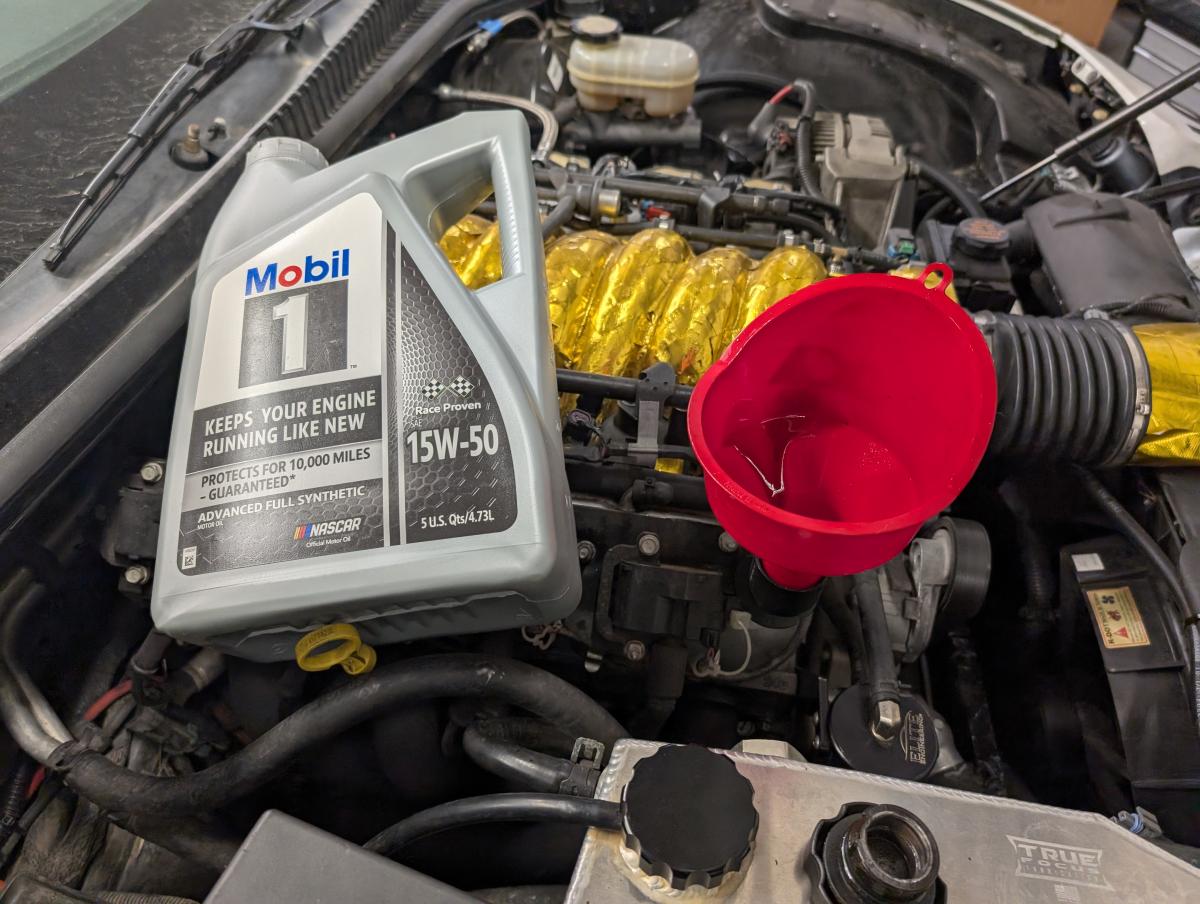
I'm going to assume at this point you had the smarts to plan for an oil change as part of all this. I personally recommend adding oil to your oil fitler in advance... not because it's the right thing to do (ASE actually advises against it) but because with this much system in place it's going to take a while to prime the system the first time. Fill the car 1 qt over, and start and briefly run the engine until you see oil pressure build. You may for a flash of a moment get a "low oil pressure" warning, and that's okay. Let it go, and presssure will build quickly.
Now that the oil system and oil cooler are all in place, again check the oil level. Fill it until the dipstick shows full, and then add one more quart. Again, start the engine and run it, waiting for the vehicle to come to idle oil pressure, cold idle oil pressure being okay. Now, open the accusump, wait 20 seconds, and then close the accusump. During the first 20 seconds the accusump is open you may see a slight dip in oil pressure, this is expected the first time you fill the accusump and the lines.
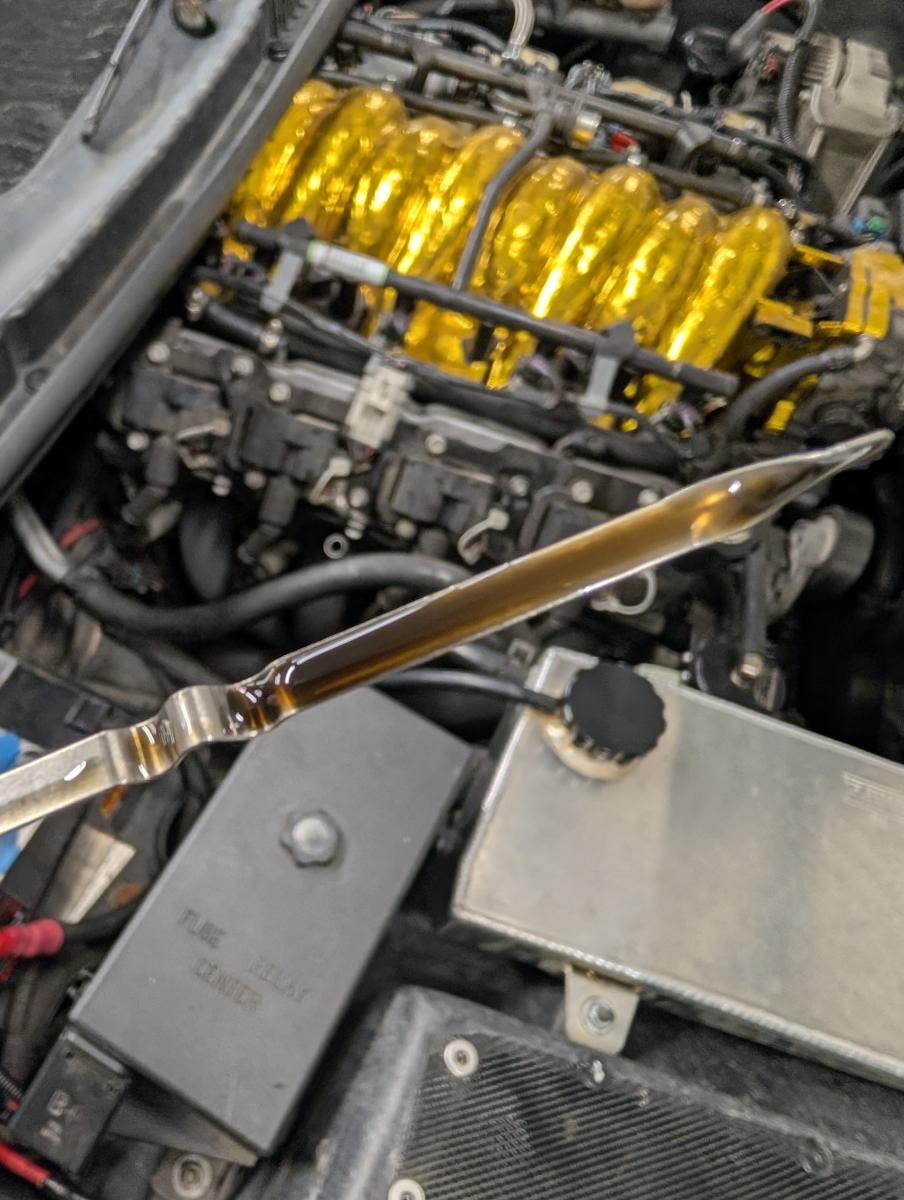
With the accusump full and the ball valve closed, yet again turn off the motor, and yet again check the oil level. The oil should be somewhere just under full to maybe slightly over full. Whatever the story is, yet again fill the vehicle to one quart over filled... and now you're done and ready to go.
From here on out, the accusump should always have 1 quart in reserve in it, and the sump will also have 1 quart overfilled in it. As your RPM increases and oil pressure increases that extra oil will make it's way into the accusump, and as RPM drops (or you have an oiling issue) the extra oil will discharge from the accusump.
Congratulations, you now have an accusump installed and you've added significant oiling protection to your engine.
Track Testing & Data Driven Results
 Testing began by taking my C5 Corvette down to Thunderhill for Hooked on Driving's "season ender" at Thunderhill on Dec 13th and 14th. I trailered the Corvette down, and drove it on Thunderhill East for Day 1, and the full 5 mile course. The entire time the car had some very cold temperature starts, generally ranging around 37 or so degrees to start the day out and ending at 45 or so degress for a "high". Every time, I would turn on the igntion, clear the bajillion warnings a C5 track car throws, set the car to oil pressure and open the accusump. I'd then watch as the oil pressure began to climb, pre-oiling the motor. I'd then start the Corvette, and go about driving my session.

Now a critical detail to include at this point is... I've never had oiling problems that I'm aware of. The car had gone 55 events prior to the accusump and not once on track did I get an oil pressure warning. Some folks report issues, I've just never had one. My oil pressure never dips below 40 PSI... but I want to keep it that way. On track, the accusump was no issue at all, excluding one time I returned to the pits, parked, and realized I'd left the accusump on. No worries though, I just started the car, and it built oil pressure right back up. While driving the car overfilled with oil for an extended period is a terrible idea, the short few moments it takes to repressurize the accusump is hardly that big of a concern. I will say I started to change my accusump shut off timing to when I was returning to the hotpits, and this ensured I never had an issue again and was a pretty easy part of my cool down laps.
So does it work? YEP!
Do you need it? Hard to say.
It's one of those things you probably will never know you need, until it's too late.., and if you have it you'll hopefully never know you needed it
A few fortunate folks were able to see a warning oil pressure warning and ease off... somehow surviving the situation. Those folks genereally go drysump, and I'd wager might have larger issues.
Are there those who wish they'd had an accusump? I can't speak "for the dead" but... there's plenty a tail of a failed LS engine, and at the track oiling failure is frequently cited as the cause.
Long Term Updates & Article Additions
So this article is hardly done. I'll be using the accusump on every event going forward with the car, and thus more testing on the C5 Corvette will be occuring. I'll also work to try and capture some better data logging of oil levels. Unfortuantely, the built in C5 oil pressure readings are only sampled at a paltry 1-3hz, and averages oil pressure over time... but we'll see what I can figure out.