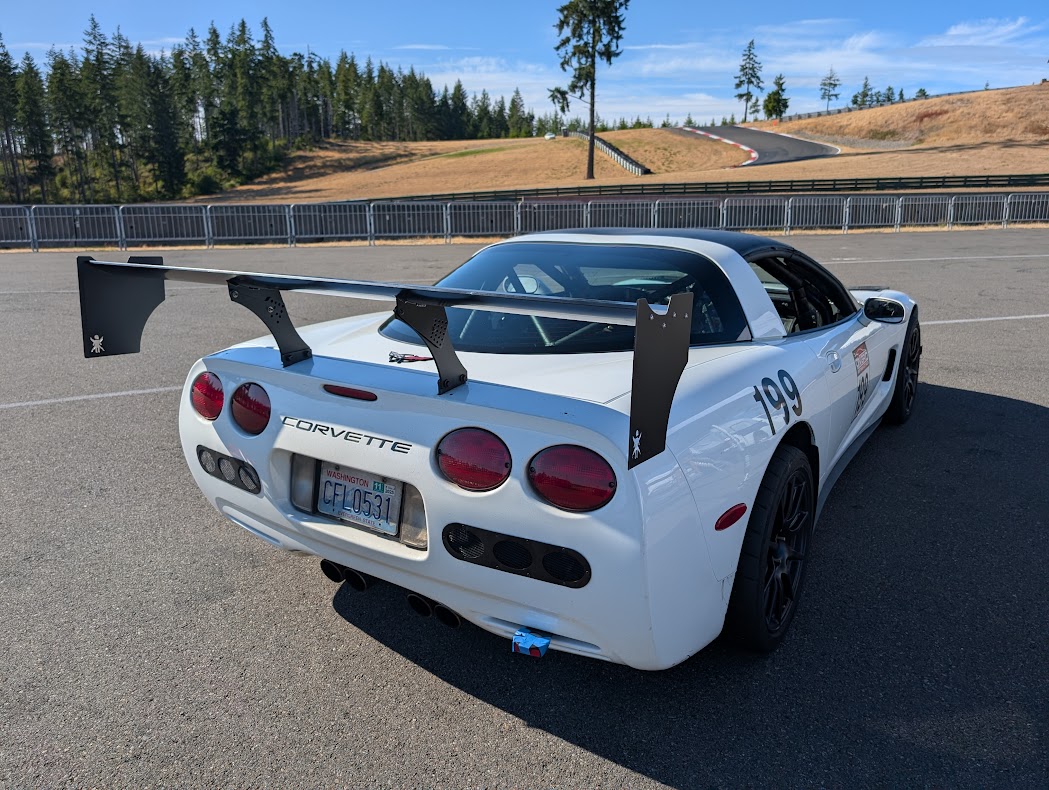
DIY Cool Shirt Setup For C5 Corvette
Race cars run hot. Combine that with most events happen in the warmer months of the year if you live in a more Northernly state, and you've got a recipe for overheating in the car. Air conditioning isn't really a great option, and that goes out the window once you put on a heavy SFI multi layer race suit many organizations require for competing. So what's a person to do? Get a cool suit!
Now there's a few players in the game, the big one being Coolshirt, and another being Fast Cooling. They're all solid options for the buy and send it crowd, but at $553 for a Cool Shirt cooler the price isn't exactly cheap. That's also just for their 7.5 qt option. Want 19qts like ours? You're looking at $600!
I like to DIY things, and I love a good challenge... so here's how I made up a DIY Cool Shirt setup for my car for a fraction of the cast of a full on setup. Not only was my setup cheaper, but I also include the frame you'll need to mount the cool suit into your car!
DIY Cool Shirt Parts List
- Cooler Parts
- Engel 19qt Cooler (same cooler as FAST uses)
- 3/4" to 1/4" brass barbed hose adapter
- 3/4" Silicone Hose (pump to 3/4-1/4" adapter)
- Bilge Pump (Pumps water through system)
- Pipe Insulation (keep that water cold and protect your pipes)
- 1/4" barbed hose splicer (For return line)
- Aqua Seal (Adhesive)
- Hose Clamps
- Zip Tie Mounts & Zip Ties
- #4 x 1/4" Screws (mounts pump to cooler)
- Mount Parts
- Seat Brackets
- Thin angle iron as nescessary (source locally)
- Electrical Parts
- Rocker switches (Any will do that match and fit on your setup)
- Waterproof 2 pin electric connectors (Great for any DIY wiring project honestly)
- 18 Gauge wire - 50ft (More than you'll need, but good to have around)
- 1/4" Wire Loom (Optional, but recommended for durability)
- Useful Tools You May Already Have
- DC Power Supply (Great for bench testing things to make sure they work)
- Wire Stripper (About as convenient as it gets)
- I'll add more as I think of them.
NOTE: This all assumes you will purchase a shirt ready to go, hence I haven't listed them. That is a bunch of tedium to make and worth the money for the time in my opinion.
Precursor - Geting the Right Coolshirt Fittings
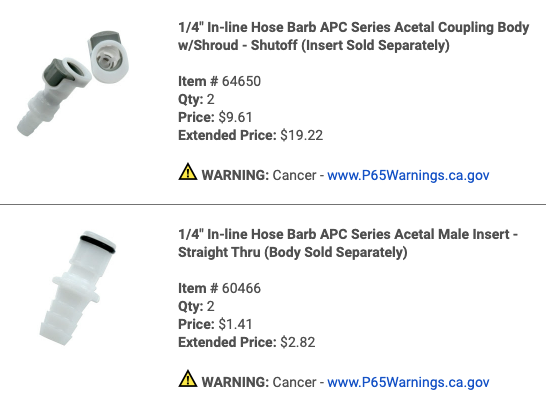
One of the largest headaches surrounding a coolsuit is that the fittings used to connect and disconnect are all specialized. You can't find them reasonably on Amazon, your local hardware store or plumbing supply shop won't know the first thing about the connections... and that leaves you order from McMaster or US Plastic. They both have terrible web sites, so linking these products is hard... but we'll try!
The connectors between FAST and CoolShirt systems look similar but are not cross-compatible. FAST uses CPC PLC-style quick disconnects, while CoolShirt uses APC or proprietary variants.
For the Fast Shirt:
We used these female connectors from McMaster: 5012K67. We'd love to link you to the product, but McMaster's website is TERRIBLE. We also don't have a part number for the male connector either.
For UsPlastics, we believe these are the right connectors: Female shutoff connection and male straight through 1/4" hose barbe connection. I have ordered them just now to test and will update later!
For the Cool Shirt setup:
They appear to utilize this for their female disconnect and this for the male connection, with those links being to UsPlastics. I haven't tested this and I cannot confirm anything about this statement. If you try this please let me know so I can update the article for others!
Getting the Cooler Ready & Tested
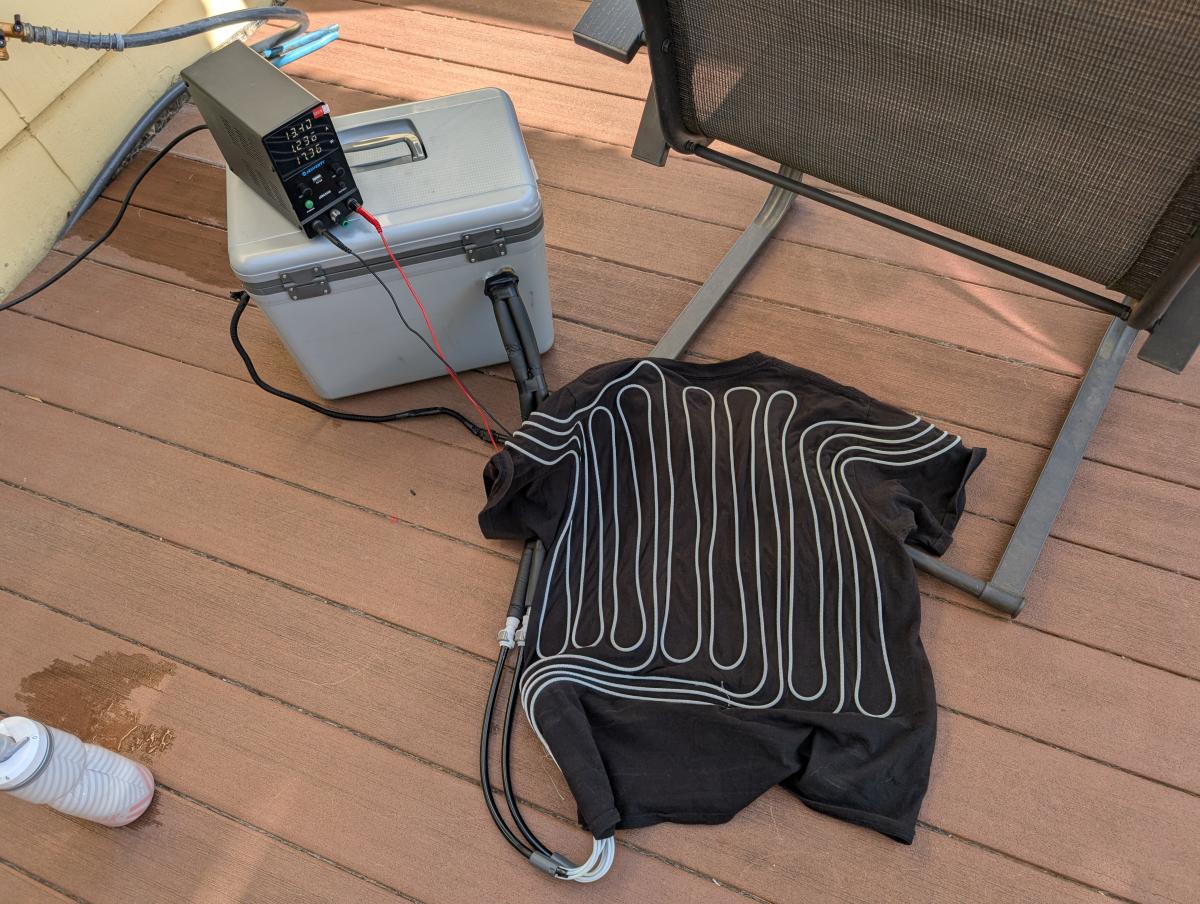
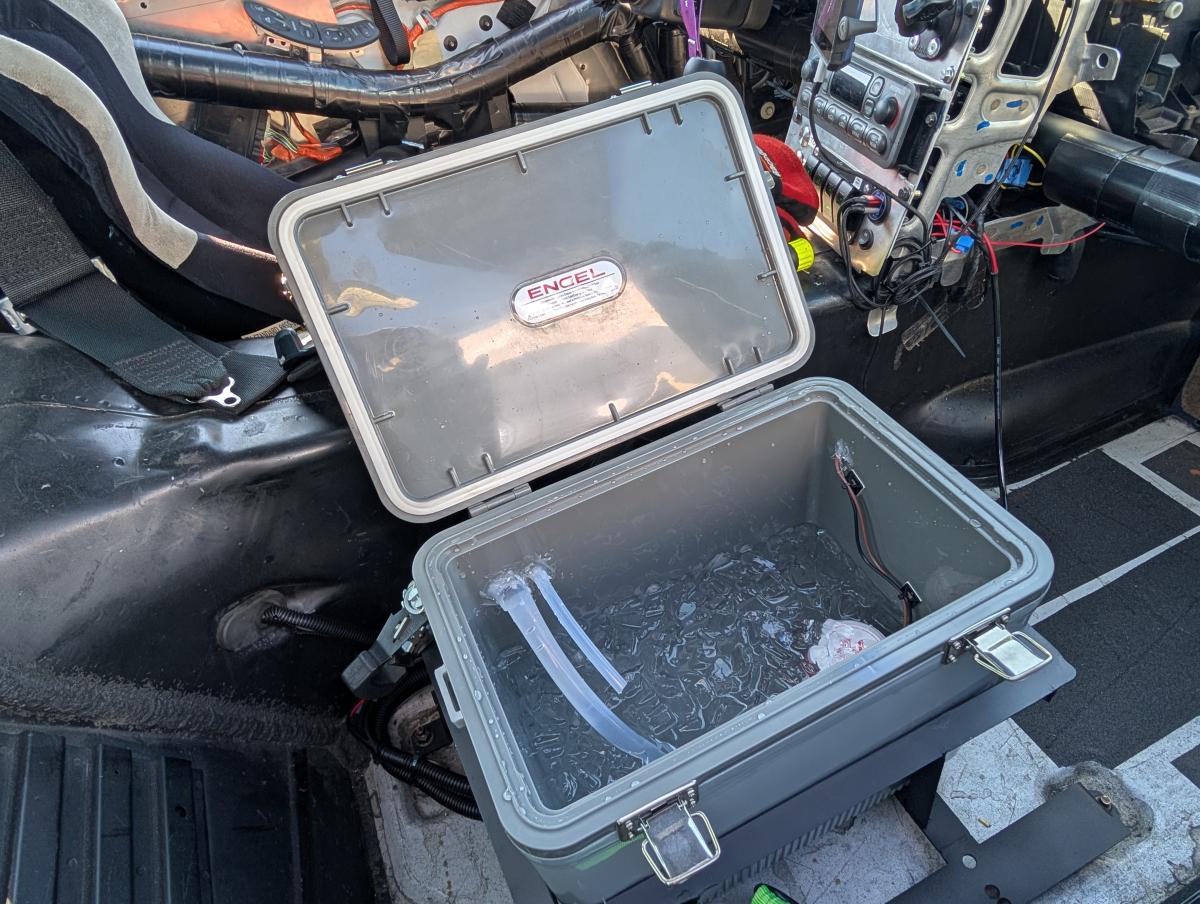
So with the Engle Cooler linked above, you'll want to first make sure you're thinking of the orientation of your mounting location. For our situation, we've mounted the cooler to a passenger seat bracket, so the cooler opens towards the passenger side of the car, and the hoses exit on the drivers side of the car. If you mount your cooler elsewhere, just be aware of mounting locations.
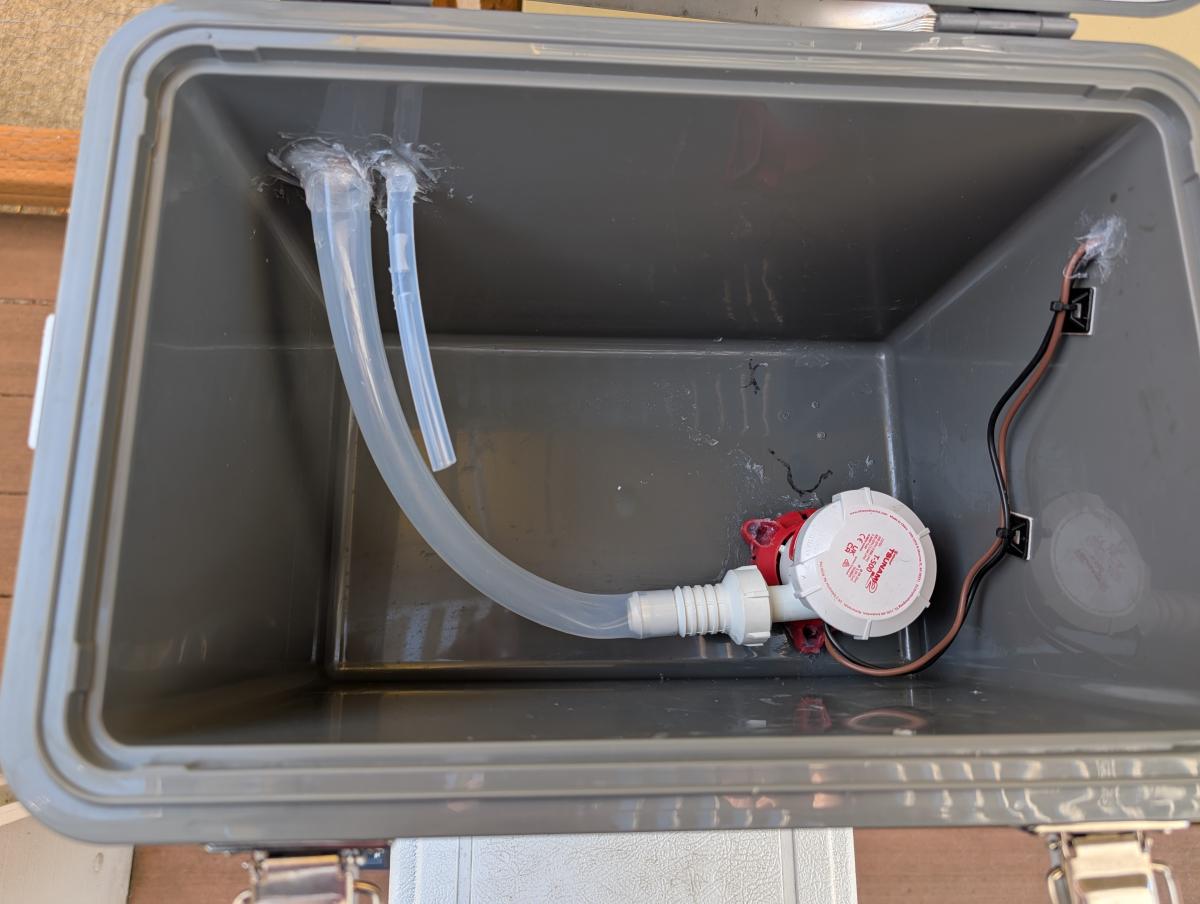
You'll want to put your pump in the bottom of the cooler furthest from the where the lines exit the cooler to go to your cool suit setup. Your return line will also return right there, but return the water high up in the cooler and in the opposite corner of the cooler to help ensure that you aren't just pumping the same water returning from the shirt right back out. You want time for water returning to mix with the cold water in the cooler!
The pump will be secured to the bottom of the cooler with thin screws, and then you'll want to cover everything with aquaseal to ensure none of the water leaks out of the cooler into the actual foam exterior of the cooler.
Wiring from the pump will pass out the cooler towards the front of the car if you're following my steps, or towards whichever side you will feed power from should you be striking out on your own. I recommend using the ziptie mounts on the side of the cooler to help keep the wires from flopping around and possibly adding strain to the cooler.
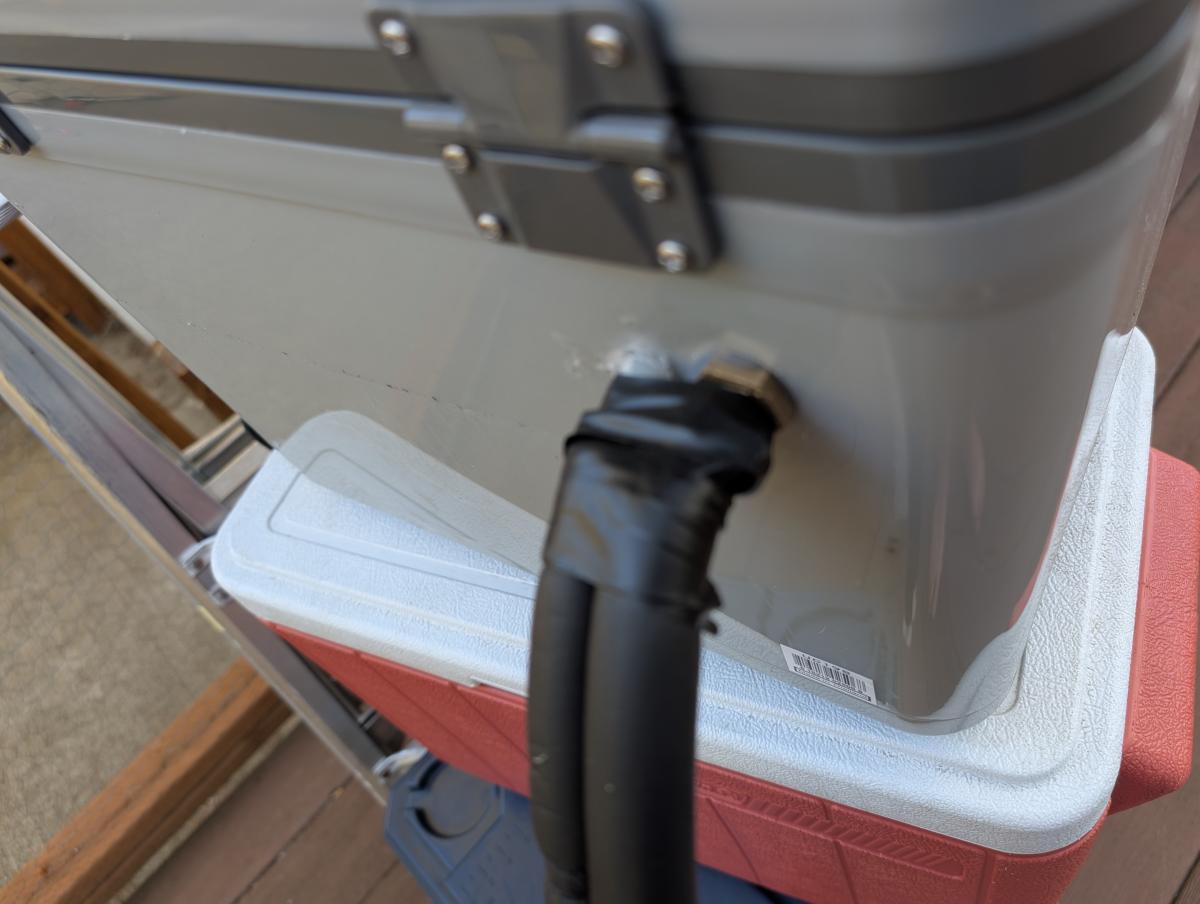
For the hoses moving through the cooler, you'll want to drill appropriate sized holes to fit the 3/4 to 1/4" barbed fitting and the 1/4" brass barbed splice fittings. Run the hoses as seen in the cooler picture prior to this, and secure them into the cooler itself with Aquaseal. Now you've got a leak free connection!
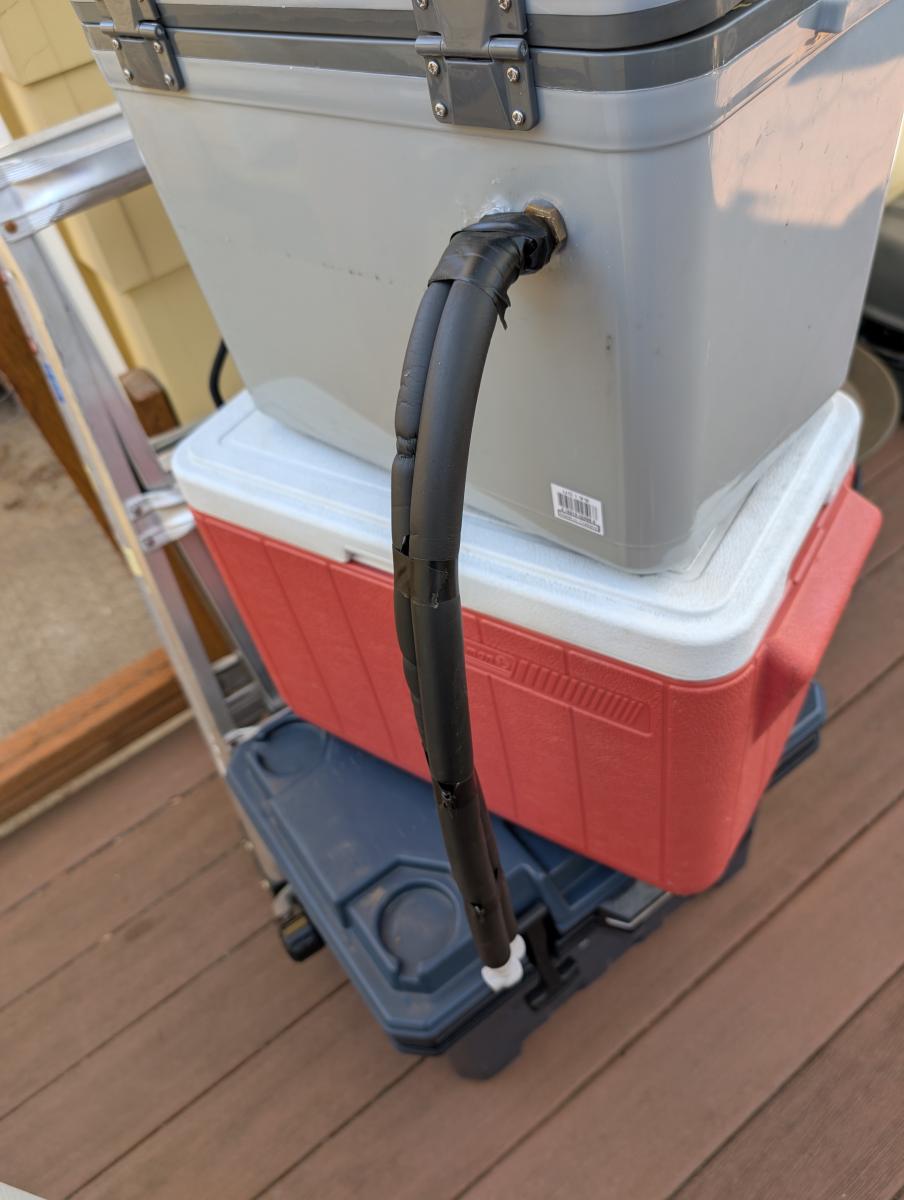
The hoses themselves you'll want to wrap in the hose insulation. This will both protect the lines and ensure that the water coming and going from the cooler does not pick up unnescessary heat from the car itself.

Something I didn't do but another fellow showed me in their cool pump setup was they secured some sheet metal in their cooler to help ensure that ice added to the cooler wouldn't slosh around and damage the pump or wiring or hoses. Seems like a smart addition, and I'll probably add something equivelant to this myself!
Now that the cooler is complete, connect up your CoolShirt to the cooler and grab your DC power supply. Fill the cooler with cool water and as much ice as you can get away with poaching from the freezer, and give the pump 12.4 volts. Cold water should circulate through the shirt and there should be no leaks or surprises.
One thing to note for those first feeling a coolshirt on them... the initial sensation can be a bit odd. Like your skin is "crawling". For those who've had the joy of morphine applied in the field, it's a bit like that "washing over you but somewhat itchy" sensation. Give it 30 seconds to normalize with your body and the feeling normalize and you'll start to find yourself quite cool. Also note, if you don't find the cooling effect to be all that significant, it's notably more effective when underneath a race suit and held against the skin by a race harness.
Assuming everything works and doesn't leak at this point... congratulations you just saved $400+!
Building The Bracket
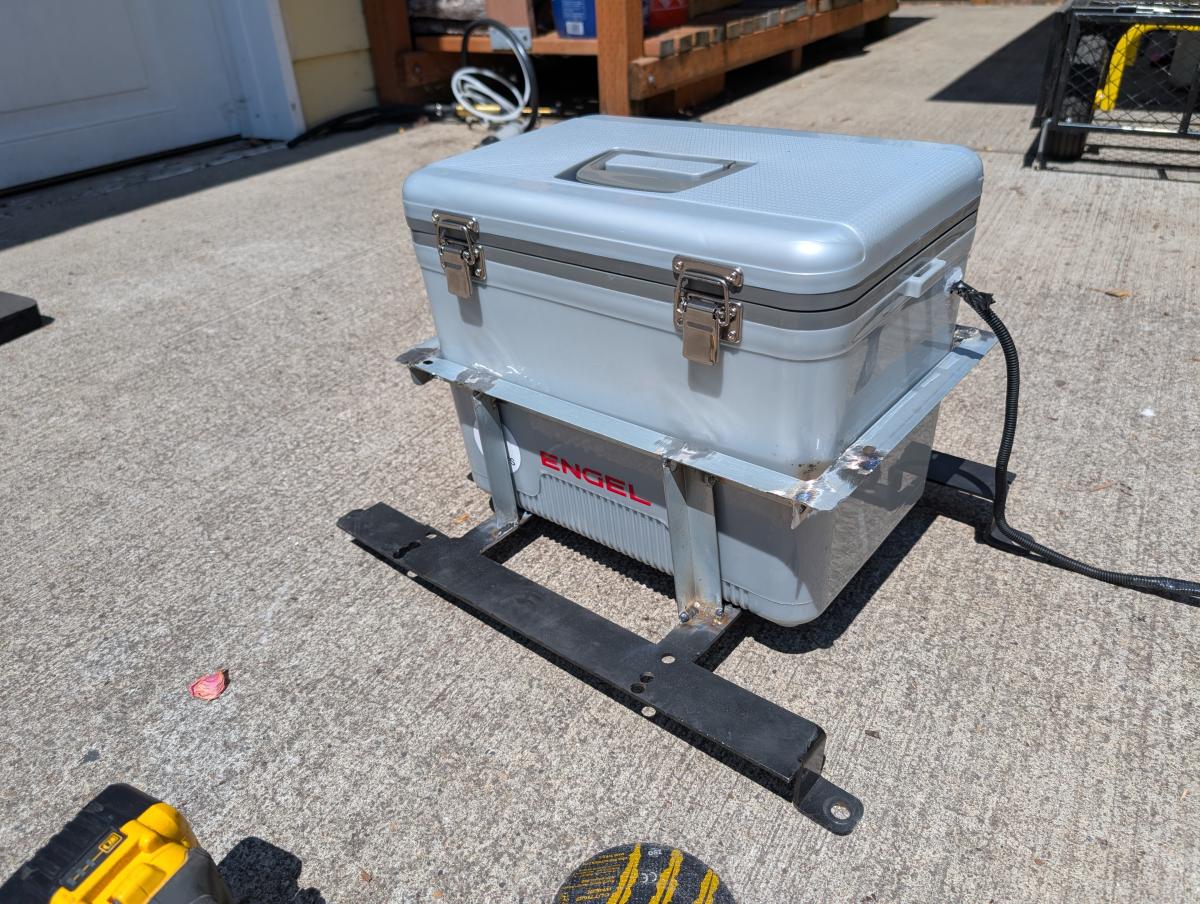
Next up, the bracket! You're going to have to DIY this for just about any car you have. You can do this part yourself with a simple welder and cutting tool, or you can have a local fabriactor build you this for pretty cheap I'd imagine. I just so happened to have all sorts of metal working tools and a decent 240v MIG setup so I welded mine up myself!
I can't really provide meaingful exact dimensions for this. It's one of those things where if you have the know how it's all self explanatory. Seeing a picture will pretty much sum it up as well. That said, here's my general notes on what to do:
- Cut out one of the cross members of the seat bracket, and weld it back on so as the two cross members are at the correct width to fit between the feet of the cooler. This will help secure the cooler in place. I advise cutting the rearmost bracket to help try and center the cooler the most.
- At a height just over 50% of the cooler, build a bracket out of angle iron that the cooler fits just inside of. The cooler is tapered in dimension so the cooler will slide into this area and fit nice and flush.
- Cut pieces of anggle iron to go up from the seat bracket to the cooler bracket you just made. Mark where it all needs to sit and confirm fitment. Tack it into place, and test removing and placing the cooler back into the bracet. It should all go smoothly.
- Weld everything up. Clean welds as nescessary and prep surface for painting. Paint to help ensure it will last a long while and not rust.
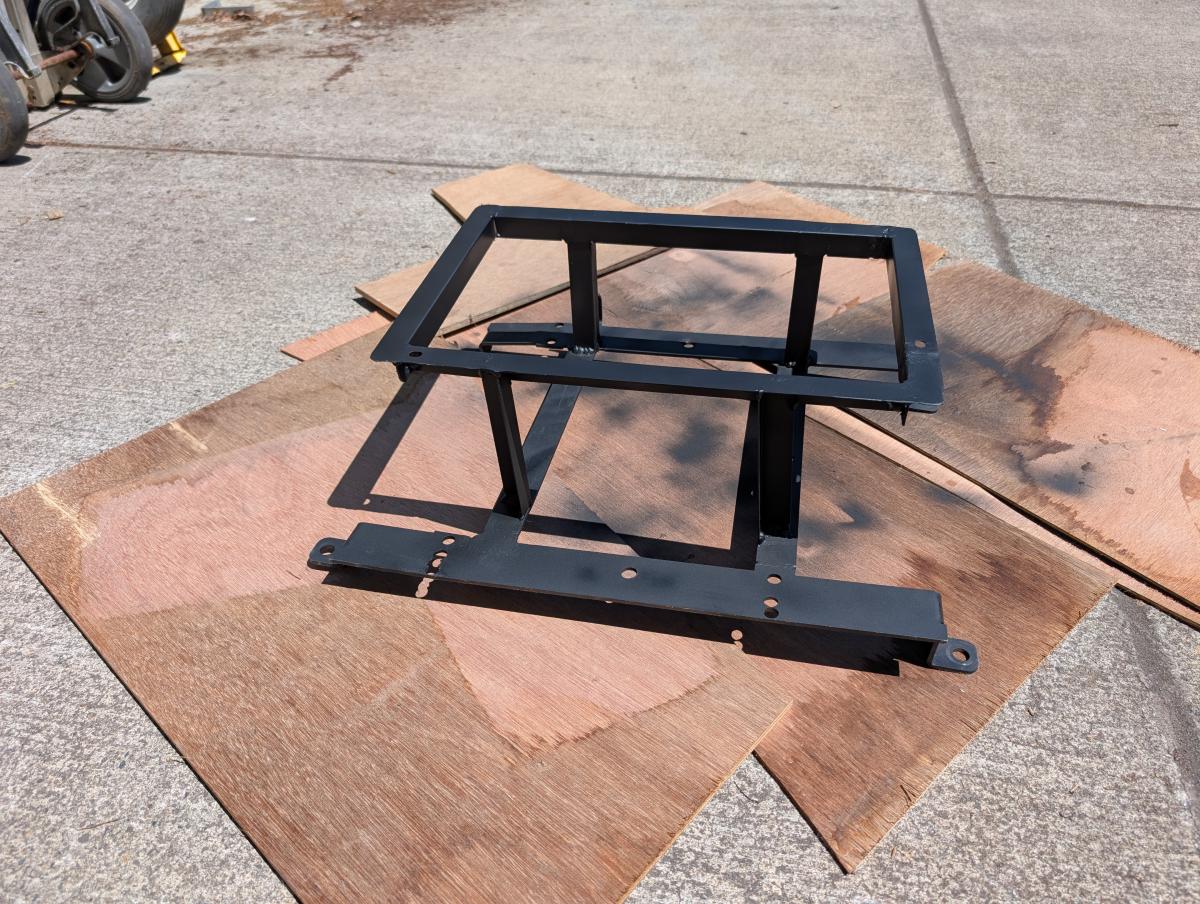
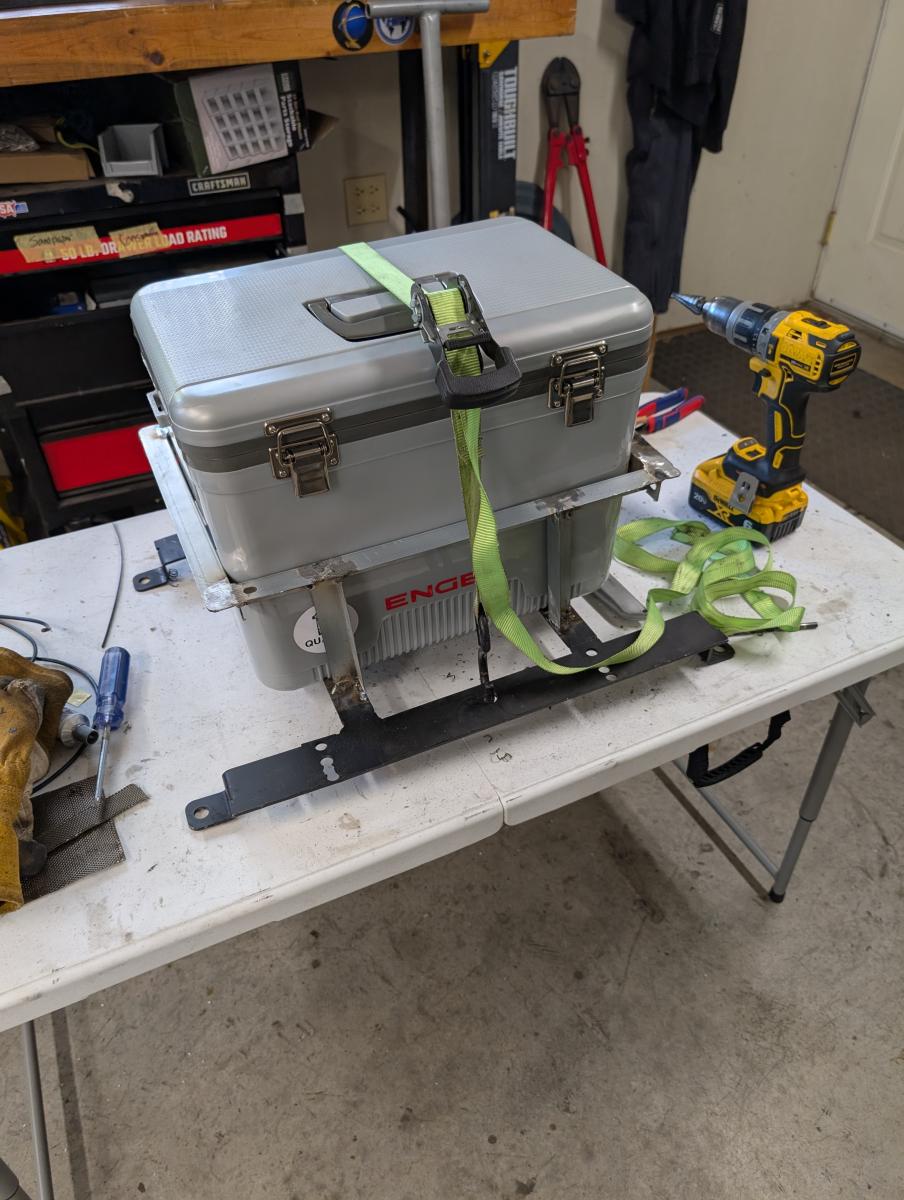
Your finished bracket should look something like this. Please not some of the holes in my bracket are from old projects. Only two holes were drilled to allow for running a strap over the cooler to secure it to the bracket.
Wiring in the Cooler
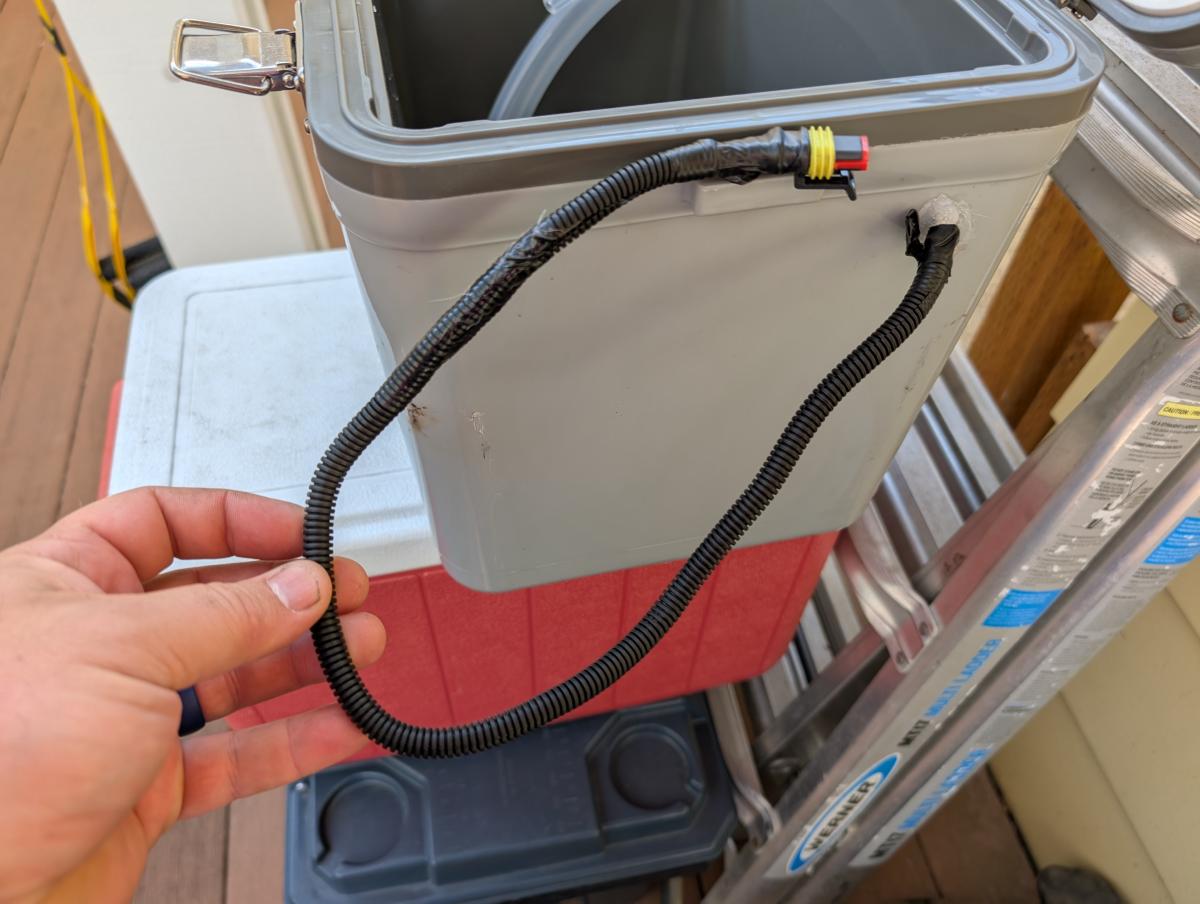
With the wire from the pump now exiting the cooler, I highly suggest attach the waterproof electrical connectors I linked in the parts list. I don't nescessarily recommend them because they are waterproof, though it is helpful, but because it's just so easy to work with these as a DIYer! I also wrapped all of my wire in wire loom to make my life as easy as possible. Incase you don't know, start by wrapping electrical tape around your wires, then route the electrical tape out the gap in the wire loom and wrap the tape around the wireloom. The wireloom is now held in place on the wire!
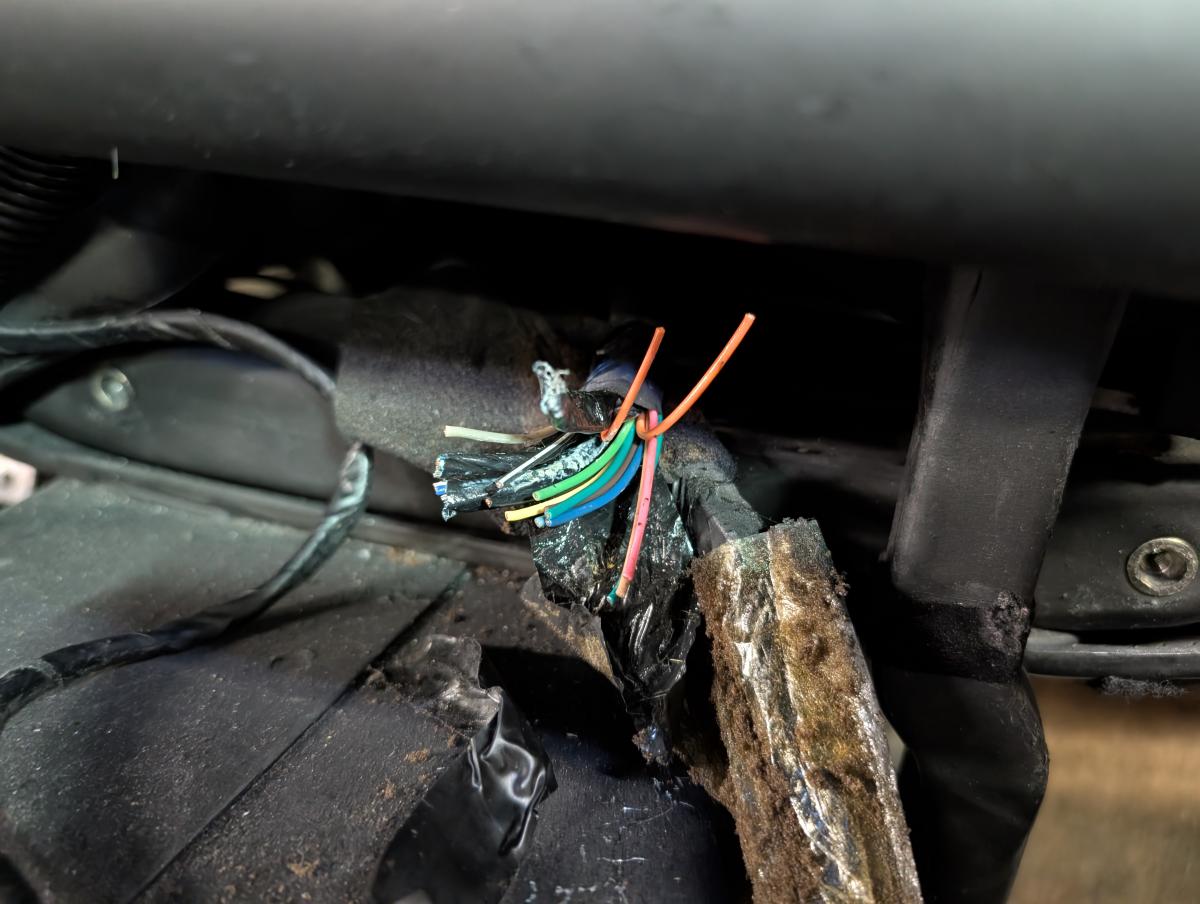
Next up... you're going to need power for the pump. It's a very low draw pump so you won't need much. In my case I had already cut the wires for the stereo. One of these two orange wires was constant power to the stereo... so I checked both for 12v, figured out which one was appropriate and use that to run power to and through a switch to the cooler. As the pump is so low power draw just going straight through the switch is fine, but keep in mind for larger loads a relay is recommended instead.
It's also worth mentioning why I went with the constant 12v vs switched 12v. In the rare situation where a red flag comes out you will need to sit on the track. You will likely want to turn your car off as it is a larger contributor to the heat you are trying to fight. With the pump being able to access 12v constant you can sit through a black flag or any other sitting situation (all black waiting in hot pits perhaps) with the cool suit keeping your temperatures regulated!
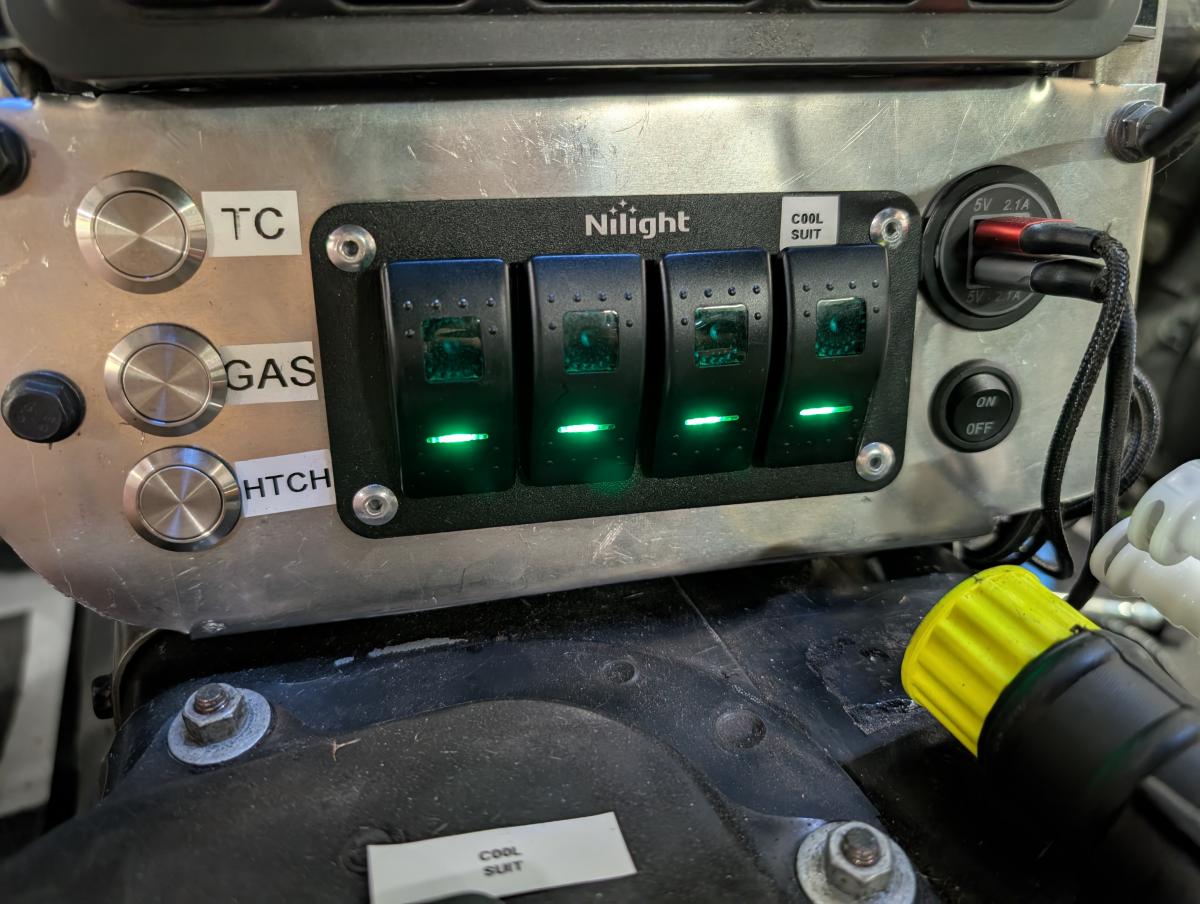
For switch location... I have a custom panel where the cigaratte lighter and ash tray used to be on my car. Won't be using those! I use the 12v cigaratte power for the USB switched charging on the right, and I utilize the stereo constant for my 4 switches there. Only one switch will power any significant load, with all other switches eventually powering relays. This worked wonders for me with the Cool Suit.
How it worked on the track
So the first event I took it out to was a double header time attack event at the Ridge Morsporst Park. The day was actally cooler than forecasted, but in the afternoon got into the low 80s with a lot of sunshine. While perhaps not fully nescessary, I was running a bit hot in my race suit out there on the track!
With two bags of ice and an overnight stint to let them melt a bit my cooler was only half full. These can hold a LOT of ice! The ice held up quite well throughought the event, and the cooling the suit provided was much appreciated. I was able to keep my focus that much better with this in there, and the weight was low enough that it wasn't such a huge factor.
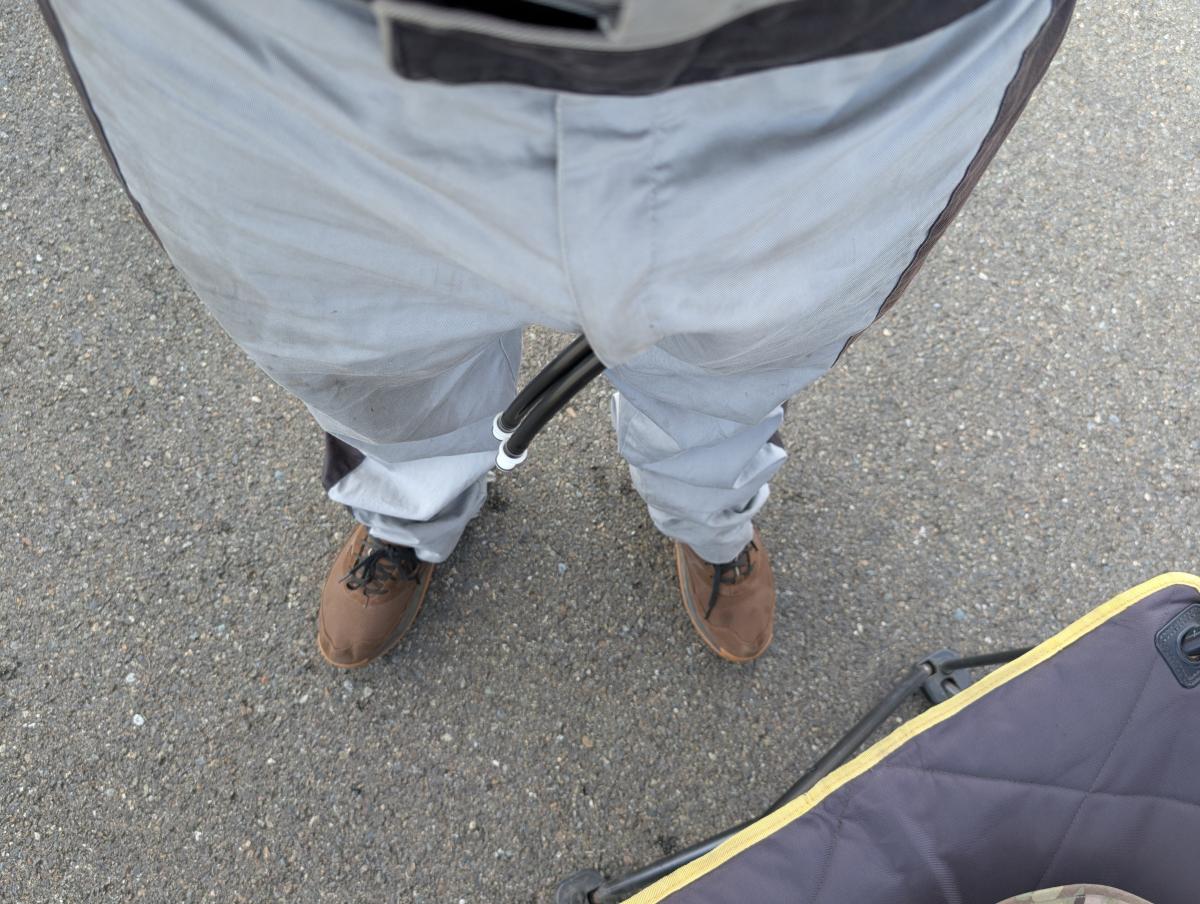
One thing you don't hear a lot about with Cool Suits, is just where the hoses are routed. Welp, on most suits they're routed right out the bottom of the zipper. This works well enough, but does look a bit suspiscous walking around the pits!
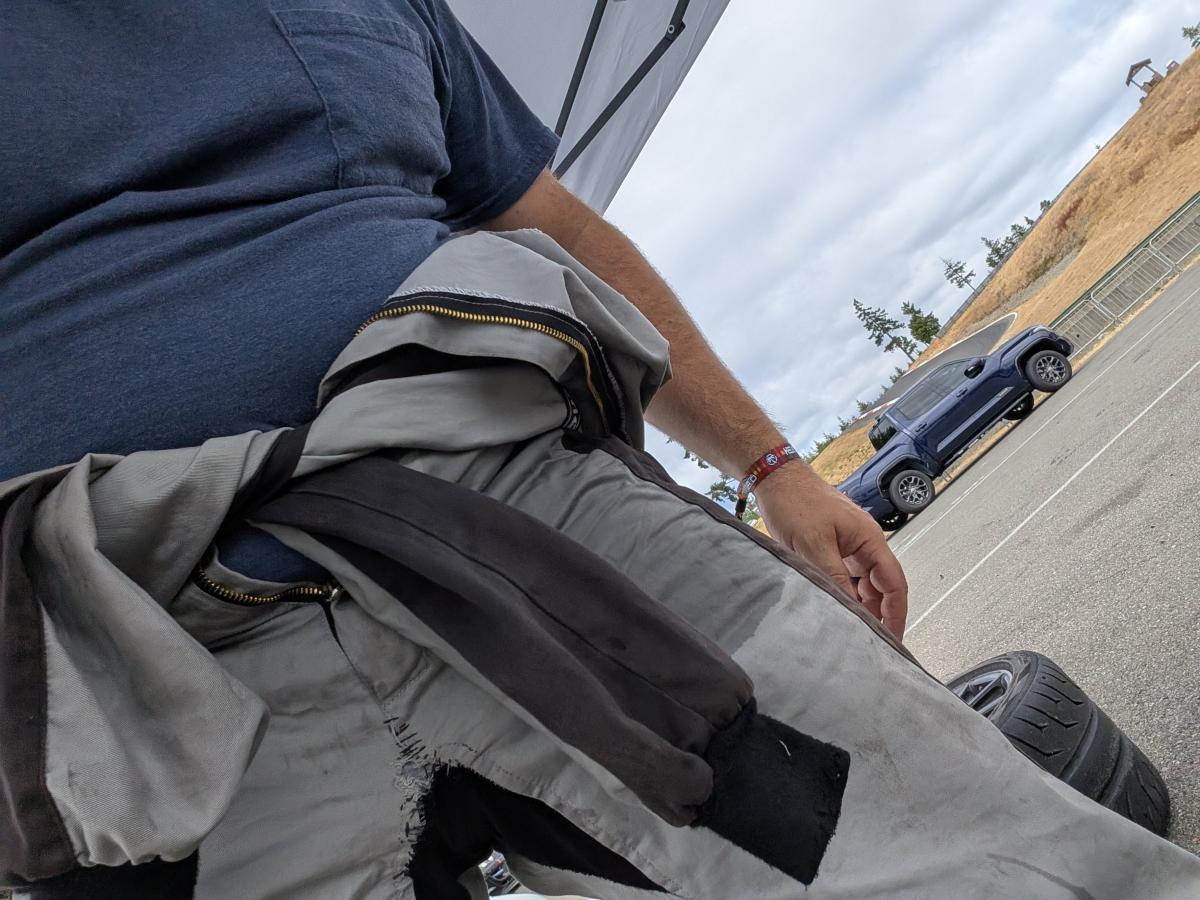
Another minor detail of note... if you have a leak... you'lre going to look REALLY cool getting out of the car in the pits! My leak was on the FAST cool shirt I was gifted for towing a fellow.