Can you do your own DIY car rear wing and what is THEORETICALLY involved in doing so?

So I'm just dumb enough to think that i can sometimes do stuff myself either better or for cheaper. I also just sometimes enjoy the process enough to want to do it myself even knowing I'll get worse results than if I just paid somebody with more experience to do it for me. Still, call me a gambler but I want to try it for myself.
So when it came to my 1999 C5 Corvette project track car and having unbalanced aero and desiring for more rear aero, I just wasn't satisfied with the options. The best looking options were $3400~, and that's a no go on a car where the goal is to keep it from getting so expensive I'll cry if it gets wadded up. The other common affordable option is about $1700 on black friday sale, and while that's not all that crazy of a price and a known good and working product... I'll be honest it just looks ugly and utilitarian.
So, I decided to investigate doing it myself, and I'll blog about what I find as I go.
First step, finding the wing / aerofoil:
So right off the bat... you need a wing right? That's the whole point. Well, this is a typical amateur move i'm sure where you're looking at the solution before fully identifying the problem and troubleshooting just what the precise answer is... but hey maybe you're like me and just like to go for it instead of taking a perfectionist approach.
So knowing that, I asked around and here are the various wing suppliers I was able to find:
All of these have CFD data backing them up and come at the modest recommendation of a race shape that has tested and installed all of these on different race cars. Are they perfect? Will they work best for you? Who knows!
Second Step, designing your mount:
So ideally you aren't entirely blazing an entirely new trail on this one. I can't imagine the kind of maniac that would buy a brand new car and then make their own stuff on it themselves on a whim, but if you are that person you're a beast and I support that! So, ideally some folks have come from ahead of you and you can take look at their designs for inspiration, but want to add your twist to it or possibly just try and make it yourself!
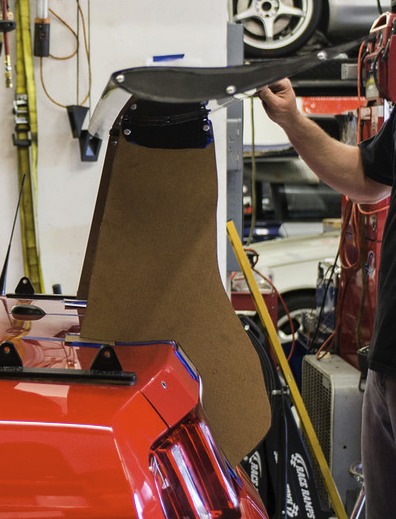
You'll start with either cardboard to come up with the general shape you are thinking. Check that it's about right and iterate as nescessary. Then, ideally transfer your design to 3/16" pressboard, cut it out and place it on the car to test that it's about right. Pressboard should be at least solid enough that you can even put the wing on there to see if it's going to all work together.
One thing I learned is that SendCutSend can actually get you parts in MDF! These are nice and inexpensive compared to getting the full aluminum parts, but are great for test fitting. One bummer of this though is that there is of course a turnaround time and shipping time from SendCutSend, so it does slow the process down... but it does get you the exact part you designed up (if you are using actually CAD, not cardboard aided designed) so you can really make sure your stuff is just right!
Whatever method you use to get your test parts, check their fit, measure and adjust, make new ones... and Iterate as nescessary until you have a shape you are mostly confident in!
Third Step, get the chassis mount and/or Chassis Mounts cut out of the actual material.
So in my case, I believe I'll be going with 1/4" aluminum, and my intention will be to work with either SendCutSend or a local shop if I can find one with reasonable enough prices. One would hope a local shop can do it for less as shipping isn't a factor... but who the heck knows.
Here's a good video I'm likely going to reference should I choose to work with SendCutSend:

Final Step, mount it up, and send it!
So the description for this step is very very much oversimplifying things. I can't deny that when I hit this step I will likely be just sending it on a hair of faith that the wing is right and a few details are correct. One thing you'll surely want to do is make sure the angle of attack is right, not just in relationship to the gravity of the earth, but the likely angle your wing is even going to be experiencing airflow from. Apparently positive angle of attack is not all that uncommon for wings that are rear mounted on a slantback car, just like my C5.