C6 Corvette Seats in a C3 Corvette

The C3 corvette is a pretty darn awesome muscle car bordering on sports car. It was way ahead of most muscle cars of it's time with 4 wheel disc brake from the factory, IRS, and all sorts of other solid features letting it perform exceptionally well for it's time. There's also a host of aftermarket options to make the Corvette's really hang it out there and have fun. A lot of oem features of the Corvette however really show their age when you begin updating other aspects of the Corvette, the generation not having changed throughought the 12 years of the 3rd generation corvette's history. The seats are a big point of contention, being a slippery material and lacking bolster, which results in you sliding all over the car as you navigate through turns. As planted as your corvette may be in actuality, if you're personally sliding all over the place inside it sure doesn't feel planted!
My C3 corvette is no exception to the seat issue. Infact, ontop of my seats not being terribly great, they were damaged, and had suffered several decades of squirrel traffic moving in and out of them. Don't believe me? Here's what I found under the seat when I removed it in August of 2018.

Another point of contention with the C3 Corvettes is that there is very limited aftermarket seating options. You can order Corbeau seats with adapters, but they're known to raise the seat height and often have very slim waists. That's pretty much it for aftermarket options. From there, you can take C4, C5 and C6 seats supposedly, but little to no documentation exists on the process, and nearly all of it also states it will raise the seat height and make personal fit difficult. Another option includes Pontiac Fiero seats of all things, which can be recovered with Corvette logo'd leather from a Mr. Mike's leather upholestry.
So with my seat destroyed, and my body sliding all over the Corvette, I began to research just what the options were. After a bunch of tooling around, I found a forum post where an individuals wife posted up all pictures of the C6 seat conversion that had been done. I was able to gleen a little bit of information, but not a ton. It intrigued me, and a great deal on some C6 corvette seats popped up near me... so I jumped on it. I purchased the C6 seats uncertain of just what fitment would go like. I figured I could sell them on Craigslist for a small loss if necessary, so why not.
So here is my (ongoing) documentation of fitting a C6 Corvette seats into a C3 corvette.
Initial Fit Impressions of the C6 seat in a C3 Convertible (1968)
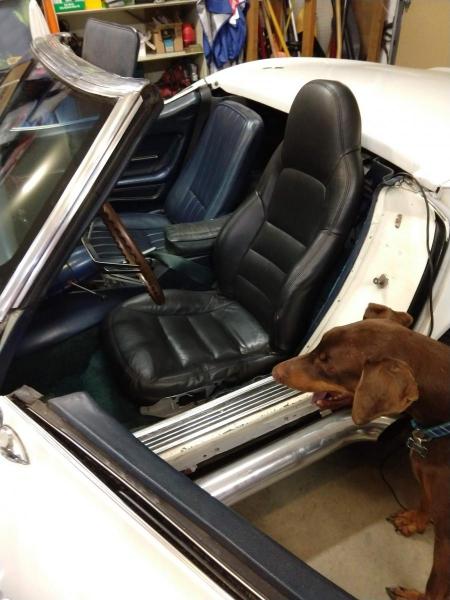
With no rails installed on the C6 Corvette seats, I just tossed the driver's side in to get some initial impressions and take some pictures to determine if this is even a ballpark good idea. My dog Bodie is in the picture thinking the same thing I am. These look pretty good and there's some serious potential here!
Some key initial observations relative to my 68 Convertible Corvette:
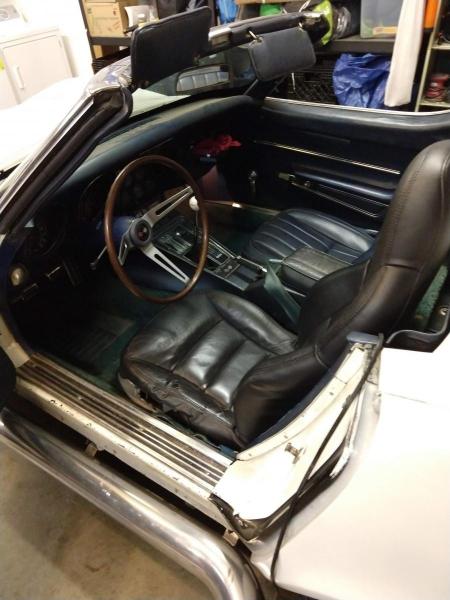
- Bolster: Yep, it's there and feels great! I'm a 38 waisted 5'10" stocky individual and it feels exceptionally comfortably. The additional bolster does make entry a bit more particular, which will be interesting as getting in the Corvette with the hot side pipes is already a bit of a dance. More on this to come.
- Seat Height: At this time seat height seems like it will be pretty darn close to OEM. It is currently at or lower than OEM, based on my "butt feeling" (get it, gut, butt?). Then again, this seat is currently lacking rails. My intention however is to not install the C3 corvette rails that would allow seat position adjustment and instead bolt the seat as far back as possible, since there's where I put it anyways
- Seat Position: This is not something I've heard others mention, but I personally noticed with the seat "test fit" (IE: placed with no bolts) into the Corvette that I felt that I was a bit more forward than the furthest back OEM seating position. This had me feeling a hair more cramped than I'd like for space, but more time will tell. It could just be in my head.
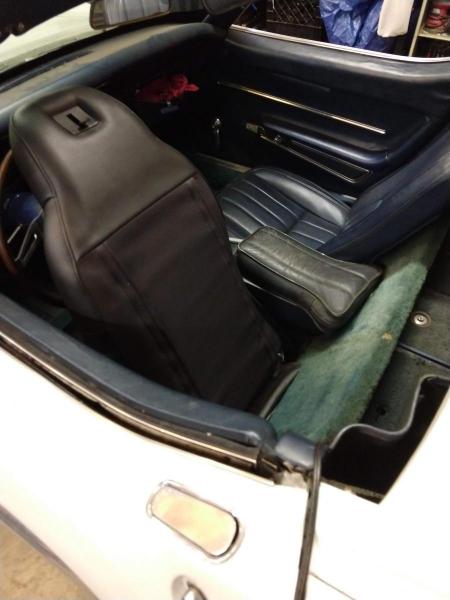
- Seatback release / Forward tilt: I have no idea what the correct term here is, but being able to recline the seat all the way forward to access the rear of the Corvette is important. I'm pleased to announce the mechanism works great, and even with the giant steering wheel on my 68 the seat can go forward enough to allow access. It's not the best access, but it is still functional. Pictures below.
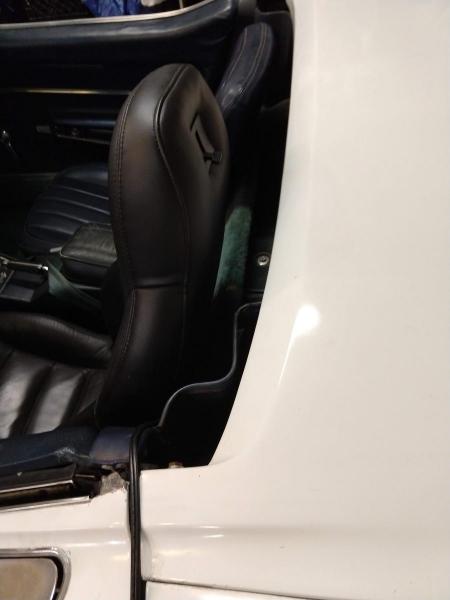
- Rear deck Space: Nothing would stink like these seats going in and rubbing up against the rear deck of my convertible. Pictures below though will show there is more than enough clearance!
Bracket Fabrication and Installation

Brackets to attach the new C6 seat to the C3 bolt postions is necessary if you wish to keep modifications to the internal of the Corvette minimal. Personally, I don't want to be drilling any holes into the body of the Corvette I can't undo.
The above picture captures the bracket I built to mimic the OEM adjustable rails. I used 1 and 1/4 inch wide steel, 1/8 inch thick. I ran a longer 15" piece, with a 5" piece up front, 4" piece running perpendicular in the rear. The smaller pieces you say were used to space the 5" front piece and the 4" perpendicular rear piece up. This allows a bolt head, which is approximately 1/4" thick to be used inbetween the front and back to bolt the seat to these rails.
With the bracket pieces in place, you'll want to weld them up so as they match the OEM sliding rail brackets. I frequently checked fitment while making these to ensure they fit into place without issue.

The hardware used for this process are relatively straightforward, albiet a few half cooked ideas of my own resulted in a variety of additional bolts. In the end the winning combination was 3/8" x 1.5" course threaded bolts to hold the bracket down to the Corvette itself. To attach the bracket to the seat, I leveraged button head bolts (allen) as they were the lowest profile, aproximately 1/8" inch. This worked well with the extra layer of 1/8" steel added in the bracket above to add spacing. On my C6 seats there were a few screws holding items in place on the seat frame as well. I placed a small washer between the bracket and the seat frame when bolting them in place to give those thin headed screws some breathing room.
Other obvious items are washers and locknuts. You'll want your seat to be nice and secure in place, and this seems like thest way to go about it to me.

Here you can see the rails test fit on the passenger side. You can see here the bolts are already welded into place. You'll want to drill out the OEM threaded holes significantly larger to give yourself some general tolerances with the setup you're building. I did say I wanted to avoid drilling holes if possible, and in this case I feel it's okay as if you choose to go with the OEM seats you can still use them in the OEM location and the body not having any new holes, just larger original holes.
When welding the bolts in place, started by drilling a pilot hole, and then using a step bit to get larger holes than necessary. Then, I used an extra socket to tighten the bolt down to the rail where desired, and then tacked around the bolt to secure it. I would frequently check fitment after any tacking, and a few times when constructing the bracket I would break off the welds on the bolt and replace it in a slightly different position to get fitment just right. This is where the slightly larger holes with the step bit comes into play as it will let you break the tack welds and adjust as necessary.

With the brackets now containing the bolts, and put into place on the frame, the next step I took to make life simple was tack weld in a crossbar to help keep the alignment of the two sides of the bracket correct for adding the seat. Please note that when welding on the Carpet in the Corvette, I would recommend dousing the area in water before hand and sticking to just very quick tack welds. I also doused the tacks with water afterwards to avoid a fire.

Here on the drivers side I have the C6 seat frame attached to the rails I made. Please note I removed the crossbar after attaching the rails to the C6 seats. What I did prior to this to attach the seat to the bracket though was testfit the seat with the bottom cushion removed. Unfortunately it's not easy to remove and reinstall with the seat bolted to the floor, so it's best to remove the pad for test fitting and measurement, then bolt the bracket to the seat, reinstall the pad, and then bolt the seat bracket to the actual floor.
With the seat bracket in place, mark a few points of reference on the bracket through the OEM holes in the C6 seat frame, with the marks corresponding to the position of the C6 seat in the desired location. In my case, as far back as possible.
Remove the seat and the bracket (which isn't bolted in, just resting with the bolts in the holes) and then check fitment outside of the Corette. Mark where you'd like to drill holes so as you can bolt the bracket to the C6 seat. Once there, I recommend using a step bit to drill your holes as it goes much quicker than drill bits in my opinion.
Next up, bolt the bracket to the seat, and install into the Corvette for test fitment, just like the picture above. Presuming everything is good here, you can remove the bracket for cleaning and painting. You don't want these rails to just rust right up, so I recommend an etching primer and then some simple black paint. While the paint is drying, you can reinstall the seat bottom cushion as you should be able to tighten everything from below

At this point, the rest should be simple. Bolt the seat to the now painted bracket. Install into the Corvette, and tighten the nuts onto their bolts which should be sticking through the floor. At this point, you should be all good and your installed seat should look something like this.

A few helpful pointers to keep in mind that helped me, and may help you:
- Always check under with a flashlight and visually underneat whatever you are drilling on the Corvette. I've seen countless mechanical nightmares when people start just drilling through things as if nothing could possibly be behind them.
- Step bits are awesome and work better than drill bits for a lot of the holes needed in this process. I recommend them
- Go too long on most of your bolts. They would have to be 3" or more in excess of the needed length to have any potential downside on the bottom of the Corvette, at least based on what is under my Corvette.
- Tack often, don't get too excited with the welder and make everything bullet proof. Wait until as late in the process to weld everything up solid.
- Don't get dismayed if something was lookign good for fit, but then the next step causes issues. Grind off your tacks, and go for it again. Steel is good like that. Sometimes it helps to just walk away.
- Grind the edges of your bracket to be nice and rounded. This will help everything look clean and less like a farm job.
Some Pictures of the final product


