2017 - Install Stainless Steel Braided Fuel Line on the C3 Corvette
With the Corvette progressing further and further along I have begun to find that little details which didn't matter before are starting to stand out in contrast to the excellent work next to it. These little details are both annoying and enticing, as they stick out in stark contrast to the excellent features (annoying), but are tasks I can easily handle (enticing). Most recently, with the latest 383 build in the corvette along with the engine bay painted and tidied up, it occured to me that the cheap rubber fuel line and tin fuel filter jangling around just wasn't cutting it. The motivation for this grew beyond aesthetics though, as the the carb fuel rail fit poorly, and I was seeing too much fuel pressure at the carb (9psi). As I intend to really dial in the carb for the best streetability and performance, I wanted to remove all of the possible variables for tuning.
This brought about my desire to go with a fancier stainless steel braided fuel line configuration with AN connectors . I'd seen the fuel line adorning various car configurations at the car shows I'd taken my Corvette too, and it seemed like the direction everyone went. The problem I kept getting caught up on though was the specifics of making it all work. Suffice it to say, there is no pre-made ready to go kit for Corvettes. There are so many different configurations for alternator, power steering, and AC that it just would be impossible to make one. Oh yeah, and add varying fuel pumps into there. Then all the different heads with accessory mounting... there will never be a kit for the C3 corvette.
Just what did I need? What were the sizes? What connection sizes to what connection sizes? How do I even search summit racing for all this crap? I did some searching here or there, got overwhelmed by the task, and just moved on to more managable tasks in my life. Finally, with a bit of downtime in my work where I was just watching computer scripts run and fail or succeed, along with some extra money in my bank account, I set about determining parts I was most likely to need to complete the job.
A few key basics defined the path I was going to take.
- A dual feed fuel line braided stainless steel hookup for my carb of choice (Summit Racing Vaccuum secondary 750 cfm street & strip carb) already existed for sale on summit racing. This came in size -6an size, so -6an was the size I would run with.
- I needed a fuel pressure regulator. None of the ones I saw had -6an connections, but were 3/8" NPT connections for people using an according size of fuel hose. This necessitated the purchase of adapters.
- I wanted a nice inline fuel filter, better than the one I had. I went with an earls performance inline fuel filter. I figured why not spend the bit extra here to get superior filtration
- Whats a fuel pressure regulator with a gauge to determine what fuel pressure I am actuall getting? The dual feed line above comes with an gauge port (which leaks if not properly sealed).
These few items came together to form the majority of what I NEEDED. The rest of everything else I ordered was just based around working with these various parts. I'll have a full parts list at the bottom of the post.
How does one even assemble the connectors on these braided stainless steel hoses?
Lucky us, summit racing put together a video on the topic. Seems easy enough right? Adding in a koul tool really helped make the job of adding the hose ends pretty straight forward and I would recommend it in addition to the video below.
What route did I wind up taking?
So I had an initial plan in mind, but this of course quickly went to the wayside. Fortunately, I ordered some extra parts just incase, which wound up being notable overkill.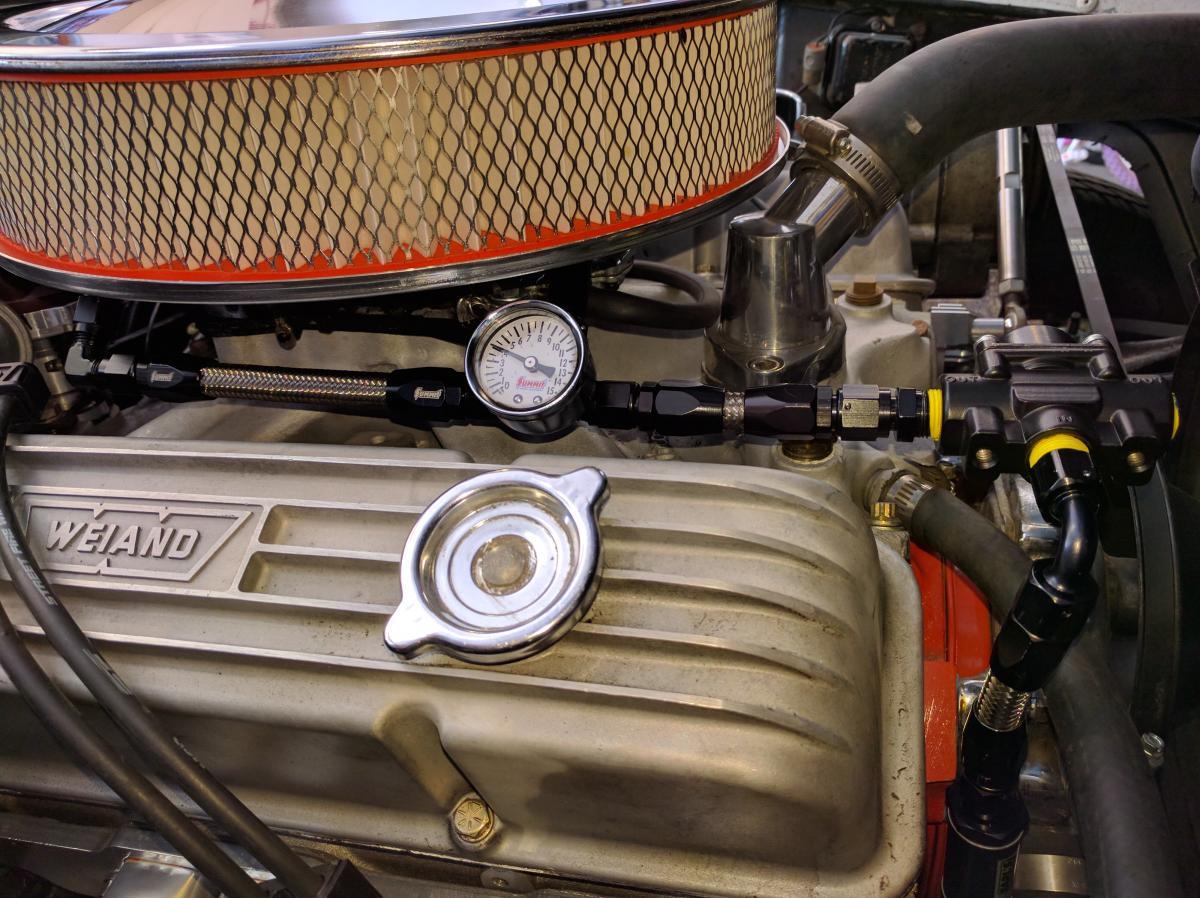
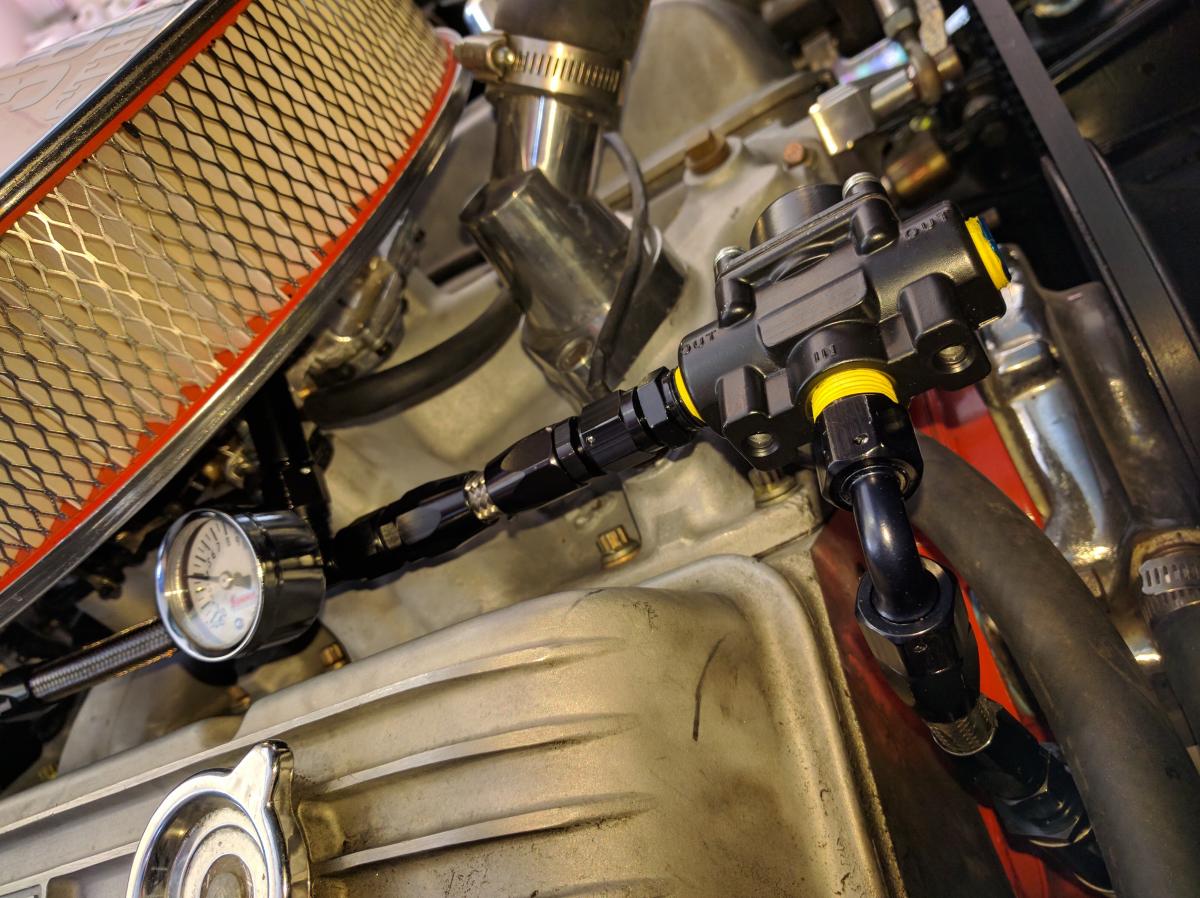
Here you can see the jist of what I had. Please bear in mind this configuration may not work with what you have, as you may have other accessories in this area (air conditioning) and a different fuel pump.
Here is a list of parts I used, in order from carb to fuel pump.
- Carb duel feed line. $48
- Fuel pressure gauge. $14. Mounted in n carb dual feed line gauge port.
- female -6an to hose connector. $5
- Short length of hose (2.5" maybe, cut for yourself to fit)
- hose connector to female -6an. $5
- -6an male to 3/8" NPT male. $3
- Fuel Pressure regulator. $14
- 3/8" NPT male to -6an male. $3 (same as #5 above, just reversed direction).
- -6an female to -6an hose, 90 degree. $14
- Short length of hose (will require measuring on your own part, about 3.25"?)
- -6an hose end to -6an female. $5
- Earls inline fuel filter, -6an male and -6an male. $36
- -6an hose end to hose -6an female. $5
- short length of hose (will require measuring on your own part, around 4"?)
- -6an female to -6an hose, 90 degree. $14
- -6an male to 1/4" NPT connector. $3 (NOTE: My Holley fuel pump had 1/4" npt connectors. No idea, it was there when I got the car and continues to function).
Additional things to order to make this work:
- Koul Tool -6an connector tool. $30 (overpriced for it's simplcity, but will save you a lot of headache)
- 3' of braided stainless steel hose. $15
- Yellow thread tape rated for gasonline. $3 @ local hardware store near me.
TOTAL COST AS ASSEMBLED: $217
How was installing all of this? How does it work? Are there any more pictures?
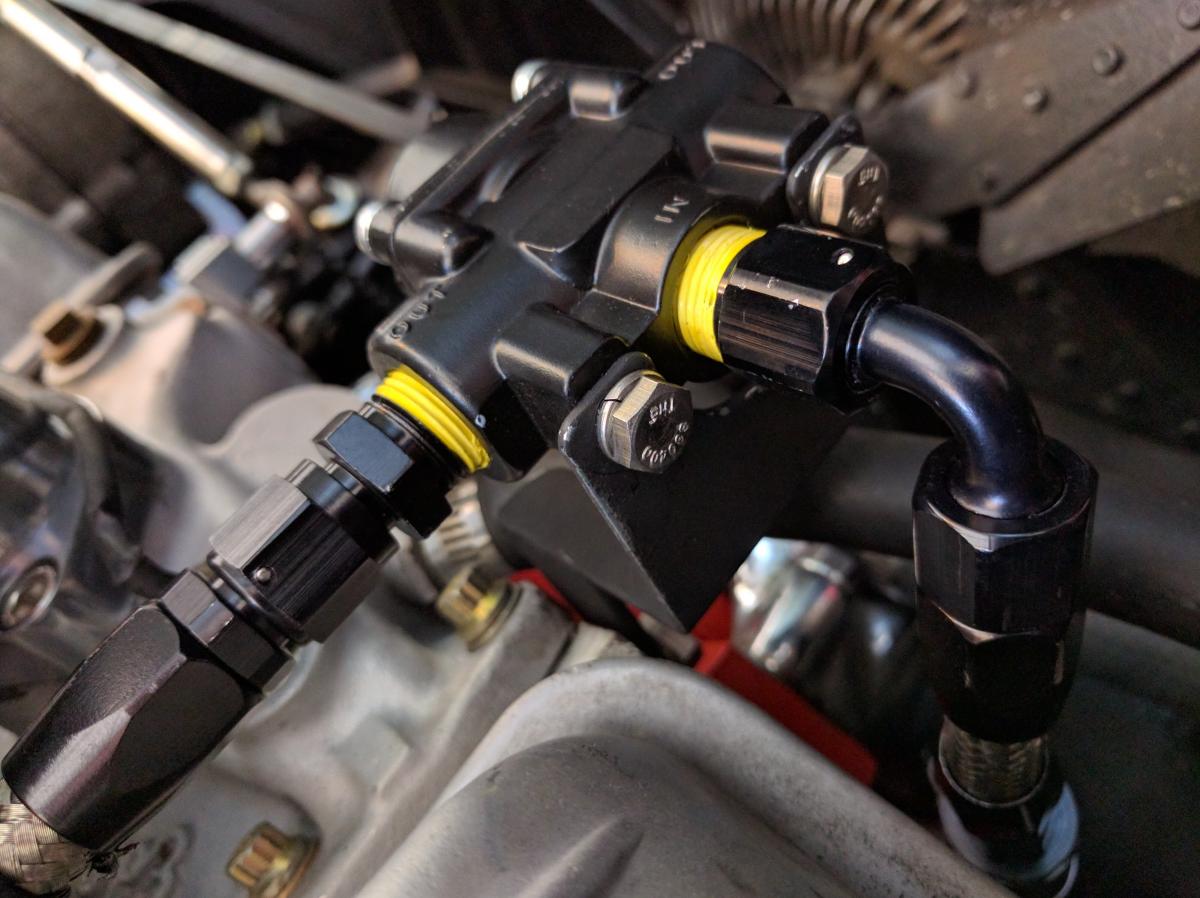
Installing this was relatively easy, surprisingly so infact. Setting up -6an hose is relatively straight forward, and easy to verify that it's done well. With some basics (Koul tool) that I was able to make short low stress work of it all. While attempting to mock up this configuration, I tried a few various strings of connectors, mainly hard connectors all the way out to the fuel pressure regulator as I was unaware that there was a gauge port on the dual feed line. In the end though this configuration wound up ideal in all regards. It is a simple configuration with lots of options and flexibility, along with requiring the last amount of fittings. The reduced fittings aspect saves money and reduces potential points of failure.
Additional bracket
A few concerned people mentioned the lack of a bracket to support the fuel pressure bracket. With hose on both sides of the regulator, myself and many others mentioned that the vibrations relative to the engine would be fine and soaked up by the natural play in these items. Still, for the sack of thoroughness, I felt better geting a bracket fabricated up to hold the fuel pressure regulator in place. This cost 1.5 hours of time from a local machine shop, so... $145. You can decide for yourself if this is worth it or not.