DIY Ski Binding Mounting
So I've been a snowboarder the better part of my life. While my parents were awesome and got me outdoors to ski at a young age... I hated it. The reasons were numerous and really not about the activity and more about a lack of positive reinforcement... so when snowboarding suddenly popped up on my radar and it would be just a me thing, I dove head first into it.
Fast forward 30 years, piles of medals and fun adventures and travels with snowboarding... I'm still in love with with shralping, but there's a direction shift going on in late life for me: The love of learning and the process of discovery. From wrenching on cars to Ham radio to CAD to whatever... any chance I can take to learn and do something new has become really appealing to me.
Re-enter skiing. It started again as a "Now I have a way to be mediocre on the hill with friends who are learning too" and has now become something I enjoy a fair bit more. There's a lot of specs and details to know and skis that work for different conditions so a lot to learn there. PLUS, skis can be found CHEAP with some patience. $75-150 can regularly get you pretty solid skis with decent bases that just need an edge sharpening, minus a hearty tolerance of lift line dings.
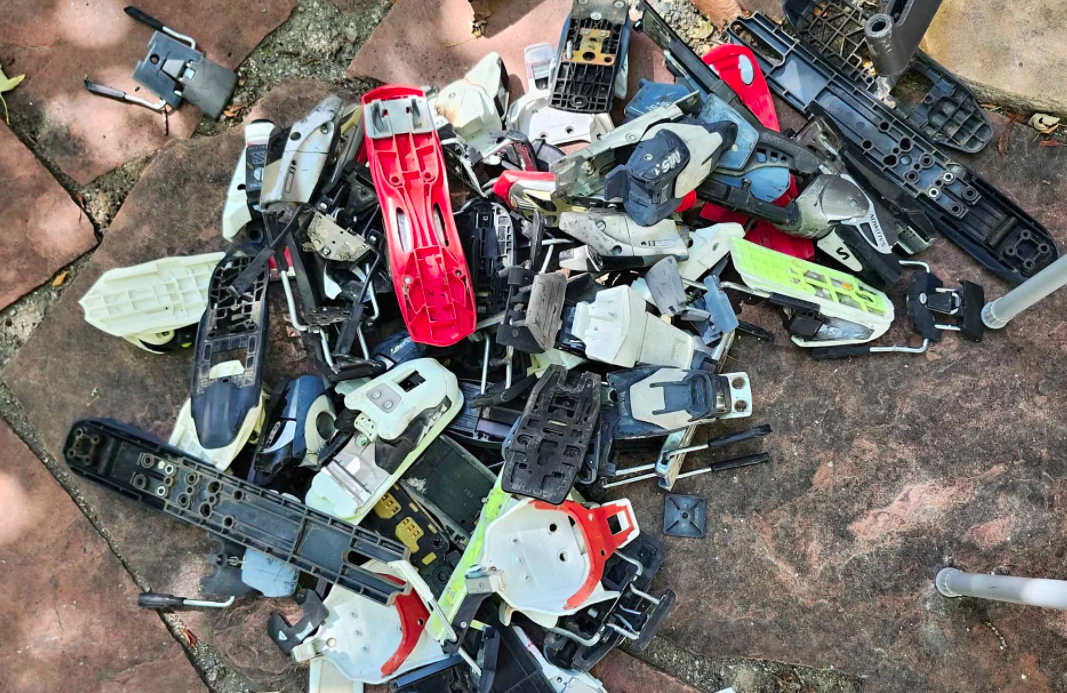
This is where ski gear gets WAY harder than snowboarding: Bindings.
I've got no idea how or why skiing hasn't solved this problem. It's likely one of the biggest barriers to entry and drives costs way up for everybody involved and feels archaic next to snowboards. Just DRILL & SCREW those ski bindings right into your nice new ski. It's value is now forever forever reduced outside of somebody with your exact boot size.... especially if you want to carry forward your bindings.
While folks generally see their skis as digned up, bindings, especially metal ones like Look, are considered a far more durable good. So folks will treat themselves to a new ski, carry over the bindings, and then be left with a blank.
So take advantage of this and utilize it to get yourself cheap skis and bindings. Deals happens all the time and with a little bit of spare time throughout your week you can get a $200 setup that hangs with $800 used setups. It just takes some DIY.
A Quick And Essential Forward Regarding Liability
While I do think hiding knowledge that can hurt folks behind public scorning is ridiculous, there are some legitimate concerns doing anything yourself. Honestly though there can and have been concerns as well when hiring folks and I've run into them enough that I like to do stuff myself. In life there are few guarantees, and even when you get a guarantee there's no guarantee it'll be honored or you can enforce it... which I've found is almost impossible for the average person.
So all of that said be aware of at least the following
- Doing anything in here is taking your well being into your hands. Good on you, but it's your choice and yours alone.
- I can't guarantee/warantee/promise/any-word-in-existance that anything in this article is correct, accurate, safe or advisable.
- As a huge fan of natural selection, if you proceed with this, you acknowledge that any outcome (good or bad or lethal) is a result of natural selection and for no other reason what-so-ever.
- I can't promise this won't damage/destroy/ruin/excommunicate your gear. All of this is at you and your equipments own risk.
First, Essential Binding Knowledge
It is worth acknowledging that when a shop mounts bindings right, they don't just measure the binding location up, drill some holes and slap the binding on. Nor do shops just set DIN based off a chart. A good shop like Hillcrest Sports will test the bindings eject at the expect forces for the DIN setting you should have with torque testing tools. You aren't going to be able to do that reasonably as a DIYer reasonably, so you are taking your legs well being into your own hands a bit... and you are on faith trusting that the ski still ejects at the right DIN value.
With that little bit of truth out of the way, there's a few things to get right to help mitigate those risks, which honestly seem vastly over stated by online parrots.
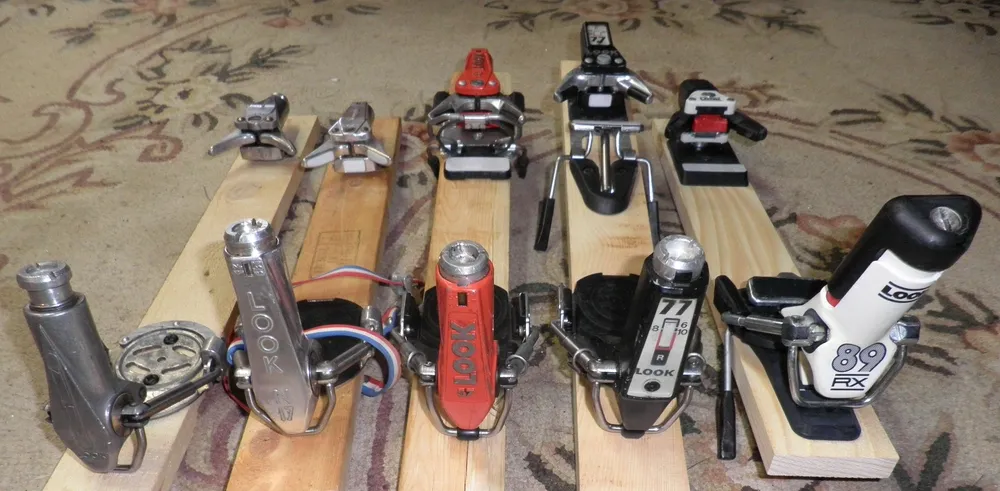
Binding Age - Right off the bat, bindings do get old and springs (the thing that controls DIN release) get tired. Many folks say 10 years is the service life of bindings, others say 4... there's no real magic number, just know the more recent and less thrashed the binding, the more the odds are likely in your favor. There's also a belief that bindings where you are in the middle of the din range, or 20% ish below the maxrange means the springs are the least stressed.
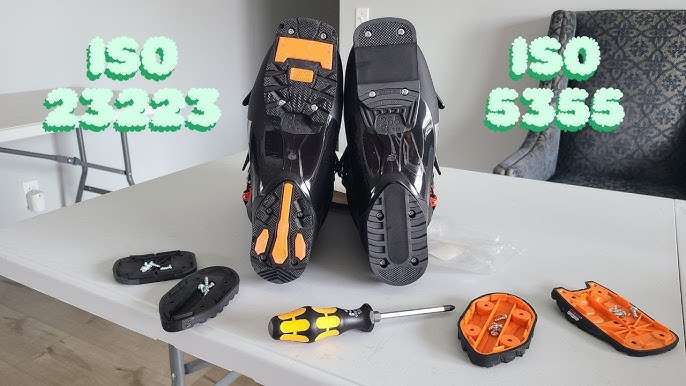
Grip Walk Compatability - This is a BIG one that folks don't even know they've run afoul of. About 2016 ish or so GripWalk came onto the scene, and like all things with skiing, they stole it from snowboarding. Just kidding, what they actually were was slow to adopt. So this occurring in 2016 or so means that ski bindings bindings didn't start to be available for gripwalk until 2019 or so, and even then it was not a guarantee the brand had adapted yet... such as with Look bindings being some of the last hold outs.
Now why this matters, is non grip-walk compatbile bindings won't work with gripwalk boots. Lots of folks upgrade their boots as they pack out... and without knowing something changed are on the new GripWalk boots. Then they shove their boots into their alpine only bindings and go "Well they still fit and click in, I'm good!" ... which is 100% not the case. Gripwalk has a different toe height and can cause uneven release, if not outright prevent release.
So, if you've update your boots anytime recently, be sure whatever you get is gripwalk compatible. Since most folks selling used bindings don't know much to anything about the binding, you'll need to do some research. If you have alpine boots though (old school smooth bottom) you can make anything work generally, but do be aware of the bindings age.
Honestly though if you haven't upgraded to a gripwalk compatible boot... your boot is probably tired anyways and it'll improve your quality of life, so treat yourself!
Brake Width
Ski brakes: the things that bring your ski to a stop if they ever come off of you.... unless you're that lady I went heli-skiing with in Alaska and her ski was so light it just floated ontop of the snow with the brakes effortlessly passing through the fluffy powder on top, b-lining it down the 5 mile glacier to the bay below...
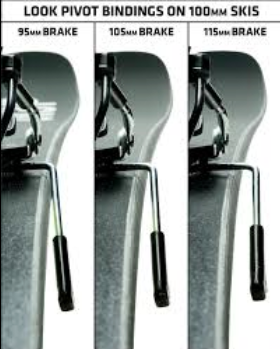
It's important to get the width just right here. Generally the belief is that you want to be no more than 10mm wider than the waist width of the ski you are on. So a 100mm underfoot ski will work with up to a 110mm brake. Go with a 90mm brake, the brake will hit the ski and not engage with the snow. Go with a 115mm brake and it can start to drag under heavy carving and possibly cause your edge to lift.
You can bend the ski brakes a bit o get some extra width. Be aware they don't like to be bent multiple times, so bend once and that's what she wrote for the ski brakes. You can also often purchase specific width brakes online for bindings or from shops.
Second, What's Needed to do DIY Ski Binding Mounts
While most folks online will tell you that you should be some certified technician with knowledge in the dark arts of ski binding mounting... this task is honestly elementary... as in elementary shop class elementary. Whoever is stating that is just over inflating their mediocre skill sets... sorry folks, it takes skill, but it's no transmission rebuild...
I highly recommend some tools to make the job easy:
- 4.1mm drill bit
- 3.5mm binding mounting drill bit
- Binding Plugs (included with above kits but if you strike out on drilling on your own)
Mounting Locating Methods:
- Paper Templates
- Google Drive Link - Thanks to Knut of PowderGuide.com
- My Backup Zipe File of Knut's templates
- SlideWright Templates
- Binding Freedom Paper Templates
- I DO NOT RECOMMEND THESE! You will find them searching on your own, so I linked them to make sure I could tell you to AVOID THESE. They never line up, the scale will measure right and be just close enough... and then not work. These appear to all be older pre-GW bindings and seem to not apply anymore.
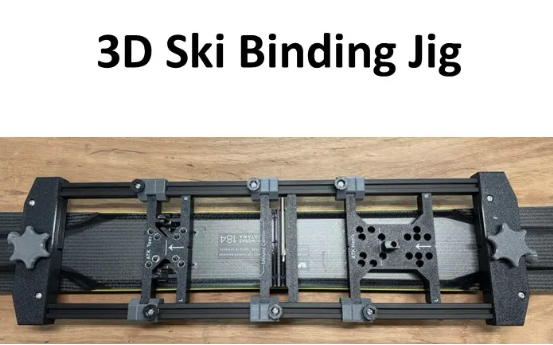
- 3D Printed Ski Binding Jig
- Available here on printables.com
- Supposedly you can message him to purchase a ready to go version for $80.
How to Use Paper Templates to Mount Ski Bindings
This is the method I am currently using. While I have a 3d printer and some time I've yet to finish assembling the 3D printed ski binding mounting jig.
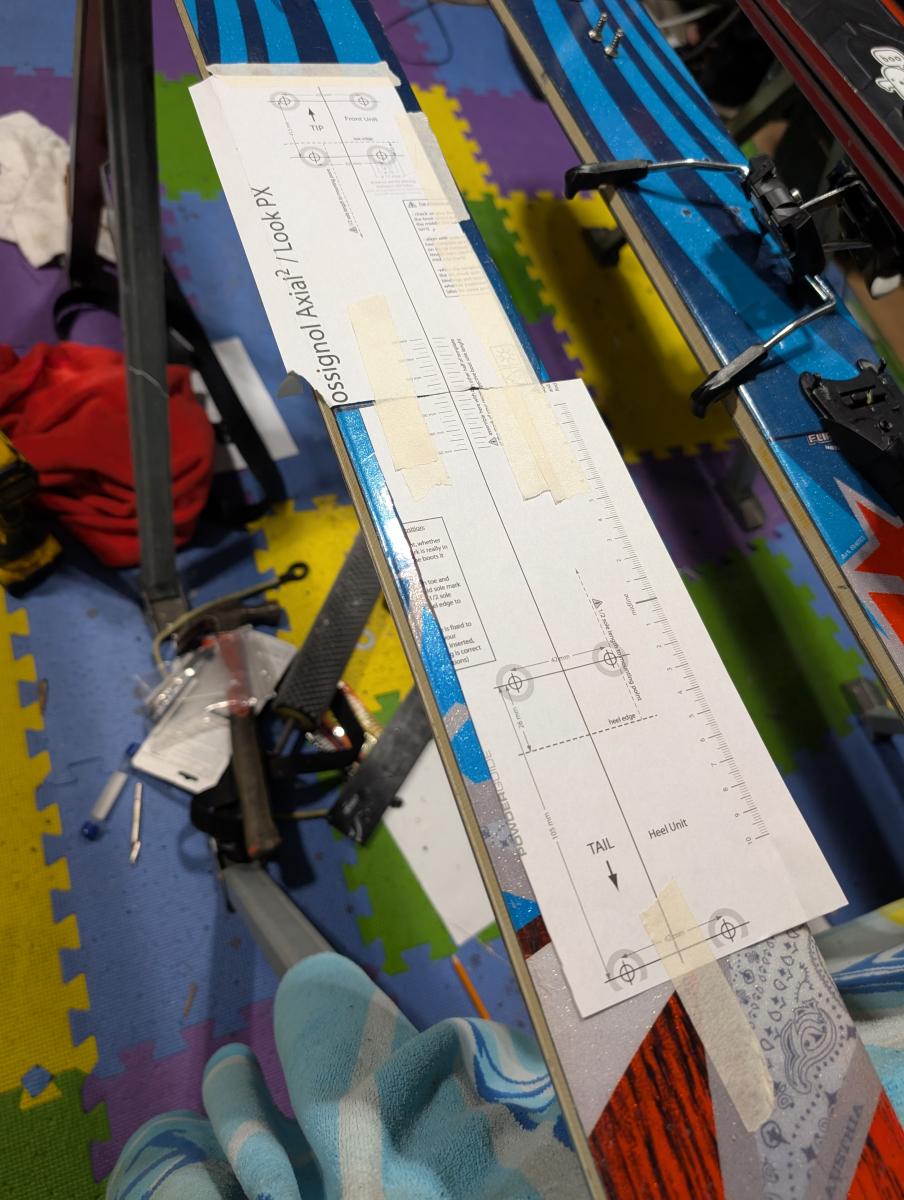
The technique is pretty simple. Print out the paper templates and confirm their scale with a ruler., I highly recommend these and operating in Metric for ease of mathing. I also like to take the binding, remove all of the screws (remembering what went where) and place it down over the template so I can confirm the holes all line up correctly. The few times I used the binding freedom templates the measurements for confirming scale worked but then the bindings were nowhere friggen close at all!
Next up, you'll want to find your skis mounting center line. Some skis make it really obvious with a line in the graphic. Others place some bumps... and then others like this Blizard Cochise I recently mounted faintly print in yellow on a tinted sidewal an arow and some drilling details. Since these are DIY skis and the value is already debatble... I just take a straight edge like the ones I linked above or a square, and draw the center line on with a sharpy. No misunderstanding that, and who the heck cars this is probably the last hoorah of a cheap (but still capable) ski.
(picture of drilling to come)
With that center line, you'll take the paper templates, cut per side, and then fold them at the approximate length of your ski boot. For the lenghh of your ski boot don't stress perfection here. If you're a 318mm boot sole length (BSL) don't try and go 2mm below 320mm. Just go to the nearest easily identifiable mark. All ski bindings have some adjustability fore and aft in them to get forward pressure correct and to account for how high the shop technician installing the bindings might be.
(Picture of centering the paper templates to come)
Now I like to first mark the center of my ski center line and mount my first template there. I then measure somewhere down the ski and across the line to get it centered and tape that down. Voila, centered enough ski binding! You may very well be off as much as 1.5mm... and you'll probably never know so who cares.
(Picture of boot on paper template)
Rinse and repeat the same process for the front part of the binding, and then place your boot on the paper template to confirm it lines up with about where the toe and heel of the boot are called out to be at on the paper template Also look for your boot center mark and that it falls generally right over the ski binding center mark.
Now you need to stop and perform a bit of validation at this point for a critical consideration: DO YOUR NEW HOLE LOCATIONS INTERSECT WITH OLD HOLE LOCATIONS!
If they do,it doesn't nescessarily fully matter if it's a small overlap, at least in my liimited experience and for my modest demands on the ski. World Cup Racers and dudes sending cliffs out of a redbull helicopter aren't reading my articles though... or if you are welcome, please consider giving me your old shit!
Now if you've got an overlap of greater than say... 8%... you got a choice. You can move the binding mount forwards or backwards a few MM to get a clean mounting location. I'm not good enough at skiing to tell you the difference, and most folks aren't good enough at skiing to tell either, and few people legitimately experiment with this since it's not like a snowboard where you can change things to your hearts content. I recommend for your average person to just set the bindings back a short distance and you'll be in business.
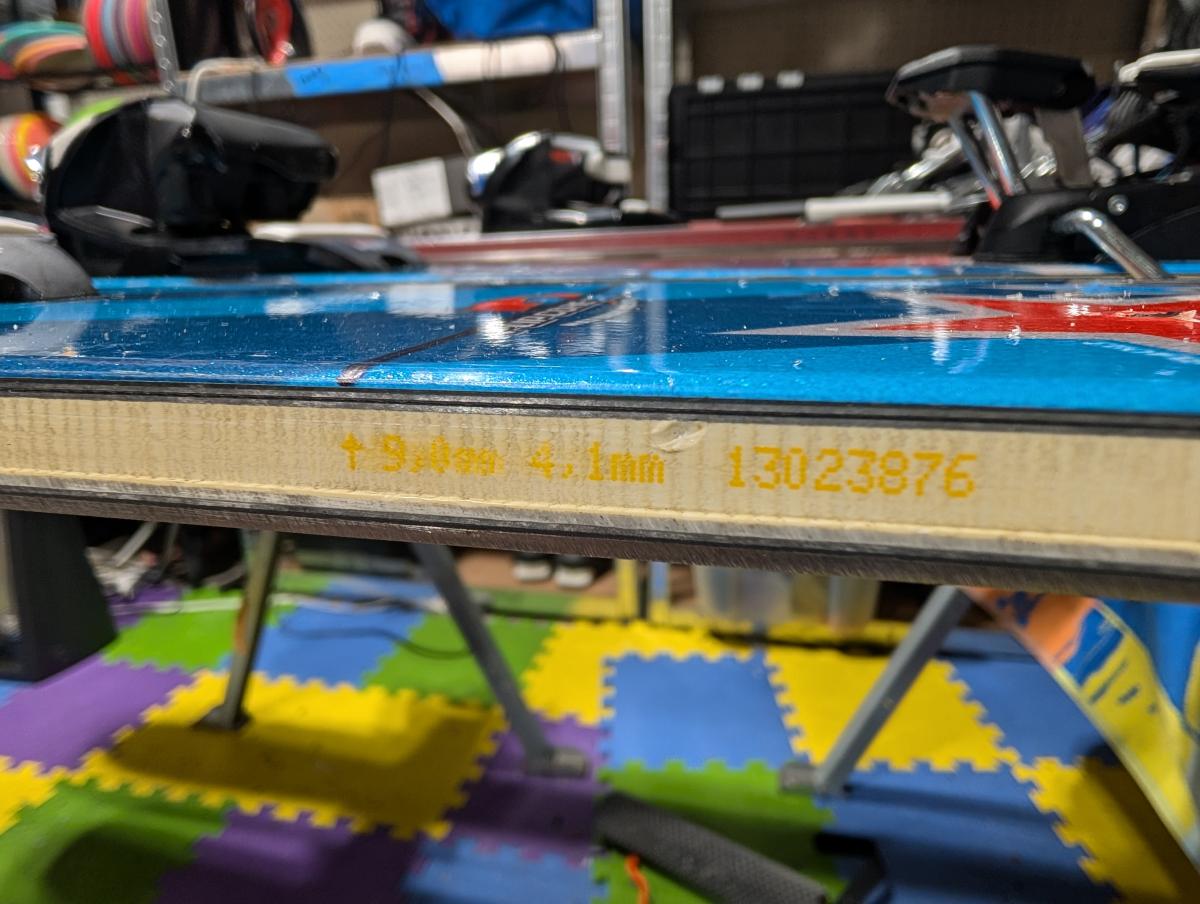
Now comes the fun part... DRILLING! First be certain you use whatever drill bit the ski generally has recommended on it. If there isn't anything written on it, determine if you're drilling through a metal layer or not. Skis tend to be proud of metal and write if they are right on them so hopefully it's easy for you, but AI is a solid fallback along with ye-olde Google. For metal, drill with a 4.1mm diameter drill bit, and for wood you will drill with a 3.5mm drill bit.
Now before you drill all the way through, start your drill bit on the paper template and only drill enough on each drill location to leave an indentation you can easily finish drilling later. Now, remove the paper template, assess the situation is going as expected, and confirm the binding holes will all line up. This is a "check thrice, drill once" sort of situation, because more of the wrong holes in a ski aren't going to do you any favors and you can drill enough that it can't be mounted anymore reasonably...
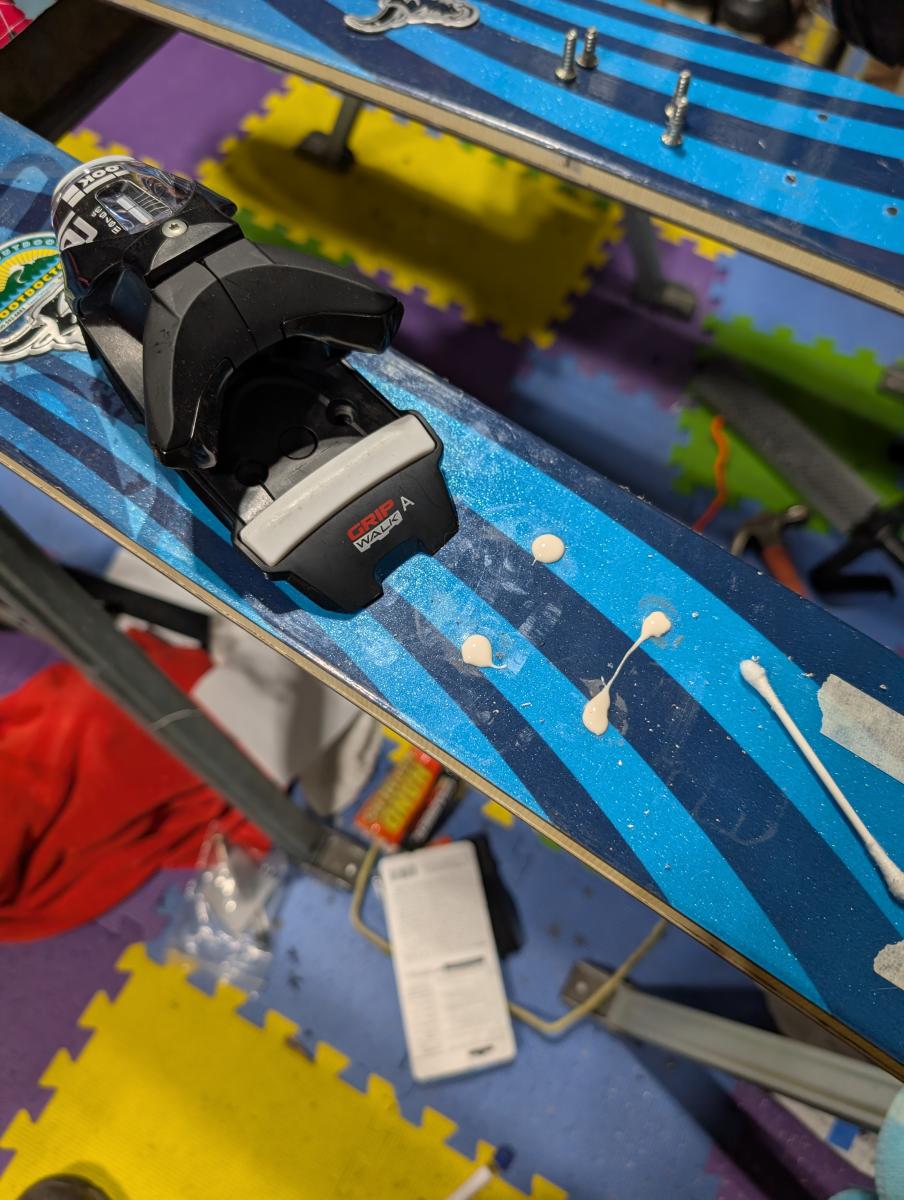
So with everything lined up and confirmed... NOW is the time to plug those old holes. The kits I linked above includes some plastic inserts you just hammer into the holes. I use an old bolt I had around to really hammer them into the holes until they are as close to flush as I can get... and then I take a razoblade and trim the inserts as flush as I can get.
With everything all confirmed and the old mounting holes filled... drill baby drill! If you've got the ski binding specific collared bits I recommendd above it's an easy process, just send it until you can't send it anymore. If you're a maniac and doing your own drill depth, good luck, that's all you!
Last is mounting the actual binding.
First, pre-fill the holes with a good waterproof wood glue, for which I recommend the Gorilla Glue variety I just linked up. It's $5 ish a bottle and will do a liftime of ski bindings. Plus you can strategically leave it in locations around your house that make your friends think you are handy, easy win!
Second: I like to start all of the screws about 1/4 of their depth into the holes so I can be certain they are all going to line up. Confirm it looks good, and then tighten everything down. Now at this point I'm going to say something that is hopefully obvious, but you're going to want the exact right bit for your screws. Stripping them is a headache, but hard to do as long as you don't blindly gorilla the screws on and then keep sending it after the first sign of distress.
What to do If Things Go Wrong
I'll update this section soon. It's possible things don't go perfect... but there are ways to remedy things so don't stress if your first DIY effort ruined a ski you REALLY wanted. There are options, and I'll share the details in here as I get pictures and details prepped to share!