Hexagon basket
Recently, I've been playing a lot of disc golf. I play a decent amount, but it's been forefront on my mind the past few weeks, and I've been digging it. I went out to the field nearby my house to practice throwing discs, while simultaneously letting my dog roam free. Unfortunately, I quickly discovered that without a target, gauging any gains from changing up my form was pretty tough. I could see consistency, and judge on how it felt physically... but that was about it. This got me thinking about a DIY disc golf basket again.
I've been away from my home for a while helping with family, so my previous effort at a disc golf basket was limited in a wide varity of ways, the most notably being good tools. Now that I'm back at home, I've got a lot more potential ahead of me and my own tools. So, I took about looking for options online for bending steel into cricles. Unfortunately, this seems to be not a DIY process... which is a bummer. I'll probably look into getting some pre-shaped for me, but in the meantime, I saw the DIY basket pictured below that some one else did, and got the idea to do a pentagon shape.

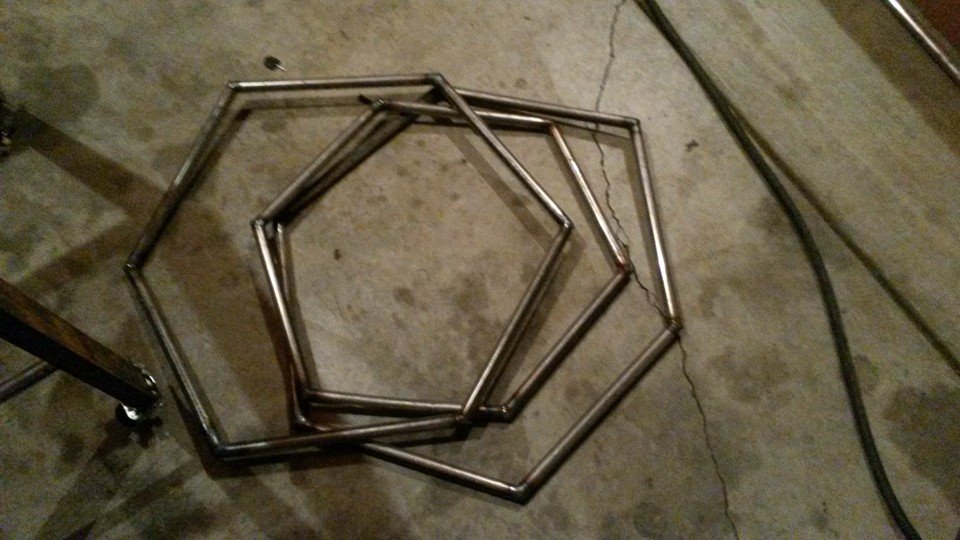
First thing first, weld up some Pentagons! 60 degree cuts, with 11" side pieces for the top, and 13" side pieces for the top. This would give the pentagons a longest distance accross of 22" and 26" respectively. Seems to fit with the image below concerning standard disc golf basket sizing:
With this all in mind, I took to cutting and then welding everything up. Truth be told... I probably needed some better ventilation in the garage. Will keep that in mind for next time. I got a bit light headed as the project progressed, and as I went from the smallest to the two largest hexagons, it quickly became apparant I was getting sloppier. A few of them are downright sloppy as all heck, but they'll do the trick! Note to self: performing two angled cuts on tubing is downright difficult as it's really easy to get the cuts to be off axis from each other, creating ugly ugly work like you see below.
I stopped at this point, half for oxygen, half because it was getting late. Next up, weld the bottom two brackets together to form the basket, and then figure out what to do for the length of pipe... I may just mount this in my backyard so I've got something to play with... but I may want this to be portable... deciscions, deciscions!
Day Two
Chains for the basket were now an essential but somewhat easy choice: Mach III baskets have 20 links of 2/0 chain. 3 inch ring for the outside (not sure how to make this yet) and an 8" ring for the outside chains. Turns out though... more chain length in a thicker chain seemed fitting. So I went with 26 links of a slightly thicker chain on the outside, and I believe 20 links on the inside.
I welded the basket up somewhat haphazardly. I was in a bit of a rush to get it done, and so I didn't give some steps (namely: measuring) the full time that they were surely do. I mostly just wanted to get the basket done so I could move on to other things.

The chain itself was a monumental cost in wrapping. The chain ran me $75, and then the hooks I used to attach the chain on the top also ran another $12. So, $87 in chain and fixtures, and probably $40 in remnant steel. For a total of $127, I'd have to recommend a purchased product over this still! On the flipside, I am not being as effecienct as I could about the process and I intentionally have no eye or desire for measuring everything twice, cutting once. I'm an eyeball a measurement, weld up the difference sort of guy.
A notable amount remains to be done. There needs to be more steel added to the base so as discs will not fall through. After that, the top needs a bit more reinforcement, and the base could use some adjusting to make it more stable.
Once that is done, I'll need to touch up all of the welded seams, grind any surface imperfections off of the beat, and paint it so it will last a while. Once that is done, I can just plop it in the front yard for my HOA to get mad about!